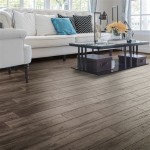
Installing Laminate Flooring With Pad Attached: A Beginner's Guide
Laminate flooring with an attached pad is a popular choice for homeowners looking for a durable, affordable, and easy-to-install flooring option. The attached pad provides a layer of cushioning that helps to reduce noise and make the floor more comfortable to walk on. In this guide, we will provide you with everything you need to know to install laminate flooring with pad attached.
1. Preparation
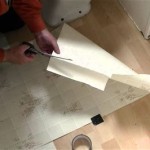
Before you begin installing your laminate flooring, you will need to prepare the subfloor. The subfloor should be clean, level, and dry. You may need to level the subfloor using a self-leveling compound or by installing a layer of plywood. Once the subfloor is prepared, you can begin installing the laminate flooring.
2. Installing the First Row
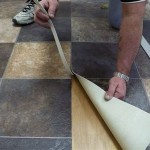
The first step is to install the first row of laminate flooring. Start by placing a spacer against the wall along the longest wall in the room. This spacer will create a gap between the flooring and the wall, which is necessary for expansion. Next, place the first plank of laminate flooring in the corner of the room, against the spacer. Tap the plank into place using a tapping block and a hammer.
3. Continuing the Installation
Once you have installed the first row, you can continue installing the rest of the flooring. To do this, simply tap the next plank into place against the previous plank. Continue tapping until you have reached the end of the row. Once you have installed the first row, you can continue installing the rest of the flooring in the same manner.
4. Cutting the Planks
When you reach the end of a row, you will need to cut the last plank to fit. To do this, measure the distance from the last plank to the wall. Then, use a miter saw to cut the plank to the correct length. Once the plank is cut, tap it into place against the previous plank.
5. Finishing Up
Once you have installed all of the laminate flooring, you can remove the spacers and install the baseboards. To install the baseboards, simply nail them into place using a brad nailer. Once the baseboards are installed, your laminate flooring installation is complete.
Tips for Installing Laminate Flooring With Pad Attached
- Make sure that the subfloor is clean, level, and dry before you begin installing the flooring.
- Use a tapping block and a hammer to tap the planks into place.
- Measure the distance from the last plank to the wall before you cut the plank to fit.
- Remove the spacers and install the baseboards once the flooring is installed.

Laminate Flooring With Attached Underlayment Pros And Cons Mp Global S Llc

Laminate Flooring With Attached Underlayment

Laminate Flooring With Attached Pad Shortens The Laying Process

How To Install Laminate Flooring The Home Depot

Installation Of Duoloc Laminate With Attached Pad English

What Is A Floating Floor

All About Floor Pad

When Underlayment Is Not Necessary For Laminate Flooring Mp Global S Llc

Do I Need Pad Under My Vinyl Plank And 4 Other Common S Answered

Vinyl Flooring Does It Need Underlayment Word Of Mouth Floors
Related Posts