Vinyl Plank Flooring Installation: A Comprehensive Guide
Vinyl plank flooring has emerged as a popular choice for residential and commercial spaces, prized for its durability, aesthetic versatility, and relative ease of installation. This article provides a comprehensive guide to understanding the process of installing vinyl plank flooring, covering essential preparation steps, installation methods, and considerations for ensuring a successful and long-lasting result.
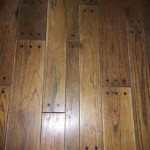
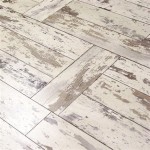
The appeal of vinyl plank flooring lies in its ability to mimic the appearance of natural materials like wood and stone, while offering superior resistance to moisture, scratches, and wear. This makes it particularly suitable for areas prone to spills and high foot traffic, such as kitchens, bathrooms, and entryways. Furthermore, the click-lock installation systems commonly employed with vinyl plank flooring make it a viable DIY project for homeowners with basic carpentry skills.
Before embarking on a vinyl plank flooring installation, thorough preparation is paramount. This involves assessing the existing subfloor, gathering necessary tools and materials, and acclimatizing the vinyl planks to the environment where they will be installed.
Subfloor Preparation: The Foundation for Success
The subfloor is the underlying surface upon which the vinyl plank flooring will be laid. Its condition significantly impacts the final appearance and longevity of the floor. A subfloor that is uneven, damaged, or contaminated can lead to unsightly blemishes, premature wear, and even structural issues in the vinyl plank floor.
The first step is to inspect the subfloor for any signs of damage, such as cracks, holes, or loose sections. These imperfections must be addressed before proceeding. Small cracks can be filled with a patching compound specifically designed for flooring applications. Larger cracks or holes may require more extensive repairs, potentially involving the replacement of damaged sections of the subfloor.
Next, the subfloor's levelness should be assessed using a long level or a straightedge. Any significant dips or humps must be leveled out. Self-leveling compounds are often used to correct minor variations in levelness. For more substantial unevenness, grinding down high spots or adding shims to low spots may be necessary.
Finally, the subfloor must be thoroughly cleaned to remove any dirt, dust, debris, or adhesive residue. Vacuuming followed by a damp mopping with a mild detergent is typically sufficient. Ensure the subfloor is completely dry before proceeding with the installation.
Different types of subfloors may require specific preparation techniques. Concrete subfloors, for example, may require moisture testing to ensure they meet the manufacturer's recommended moisture levels. Wood subfloors should be inspected for signs of rot or insect infestation and repaired accordingly.
Failing to properly prepare the subfloor is a common mistake that can lead to significant problems down the line. Investing the time and effort to ensure a smooth, level, and clean subfloor is crucial for a successful vinyl plank flooring installation.
Tools and Materials: Equipping for Efficiency
Having the right tools and materials on hand will streamline the installation process and ensure a professional-looking result. The specific tools required may vary depending on the type of vinyl plank flooring being used and the complexity of the installation, but some essentials include:
- Measuring Tape: Accurate measurements are essential for planning the layout and cutting the planks.
- Utility Knife: Used for scoring and cutting vinyl planks. A sharp blade is crucial for clean cuts.
- Straight Edge or T-Square: Provides a guide for making straight cuts.
- Rubber Mallet: Used for gently tapping the planks together to ensure a tight fit.
- Spacers: Help maintain a consistent expansion gap around the perimeter of the room.
- Pull Bar: Used to lock the planks together in tight spaces, such as along walls.
- Tapping Block: Protects the edges of the planks when using a mallet.
- Pencil: For marking cut lines.
- Safety Glasses: Protects the eyes from debris during cutting.
- Knee Pads: Provides comfort during installation.
In addition to these tools, the following materials are also essential:
- Vinyl Plank Flooring: Purchase enough planks to cover the entire area, plus an extra 10% for waste and future repairs.
- Underlayment (Optional): Some vinyl plank flooring comes with pre-attached underlayment. If not, a separate underlayment may be required to improve sound insulation and cushioning.
- Moisture Barrier (If Required): Depending on the subfloor and the type of vinyl plank flooring, a moisture barrier may be necessary to prevent moisture from damaging the floor.
- Transition Strips: Used to transition between the vinyl plank flooring and other types of flooring, such as carpet or tile.
- Baseboards or Quarter Round: Used to cover the expansion gap around the perimeter of the room.
It is advisable to consult the manufacturer's instructions for specific tool and material recommendations for the particular type of vinyl plank flooring being installed.
Installation Techniques: Achieving a Seamless Finish
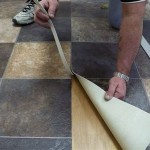
The actual installation of vinyl plank flooring typically involves a click-lock mechanism. The method involves connecting the planks edge to edge and end to end. The overall process is relatively straightforward but attention to detail ensures a professional looking finished floor.
Planning the Layout: Before starting the installation, plan the layout of the planks to minimize waste and achieve a visually appealing pattern. Consider the direction of the planks, the placement of seams, and the need for transition strips.
Starting the First Row: Begin by installing the first row of planks along a straight wall, leaving an expansion gap of approximately ¼ inch. Use spacers to maintain this gap. Ensure the planks are aligned properly and that the click-lock mechanisms are engaged.
Installing Subsequent Rows: Connect the planks in the second row to the first row, ensuring the click-lock mechanisms are fully engaged. Use a rubber mallet and tapping block to gently tap the planks together. Stagger the seams between rows to create a more natural look.
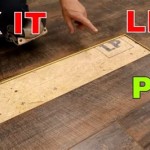
Cutting Planks: When necessary, cut planks to fit around obstacles or along walls. Use a utility knife and straight edge to score the plank, then snap it along the score line. For more complex cuts, a jigsaw may be required.
Working Around Obstacles: When installing around pipes or other obstacles, use a template to trace the shape onto the plank, then cut the plank accordingly.
Finishing Touches: Once the entire floor is installed, remove the spacers and install baseboards or quarter round to cover the expansion gap. Install transition strips where the vinyl plank flooring meets other types of flooring.
Throughout the installation process, it is important to regularly check the alignment and levelness of the planks. Any imperfections should be corrected immediately to prevent problems from escalating. Consistent application of the correct techniques ensures a more professional and durable finished project.
Acclimatizing the vinyl planks is vital for a successful installation. Vinyl planks expand and contract with temperature variations so allowing the planks to adjust to the room's environment for at least 48 hours before installation can prevent issues like buckling or gapping after installation. The planks should be laid flat in the room where they will be installed, away from direct sunlight or heat sources. The temperature of the room should be within the normal range that it will experience during its use.

A Beginner S Guide To Installing Vinyl Plank Flooring Dumpsters Com

How To Install Floating Vinyl Plank Flooring In 5 Easy Steps Riverbend Interiors

How To Install Vinyl Flooring Planks

Installing Vinyl Plank Flooring How To Fixthisbuildthat

Laying Vinyl Planks The Right Way Expert Guide By Fantastic Handyman

How To Install Luxury Vinyl Plank Flooring Wood

How To Install Luxury Vinyl Plank Flooring Quick And Simple Casa Watkins Living

Vinyl Flooring Installation From Lowe S

How To Install Vinyl Plank Flooring In A Bathroom Fixthisbuildthat

Installing Vinyl Floors A Do It Yourself Guide The Honeycomb Home
Related Posts