Replacing RV Flooring: A Comprehensive Guide
Replacing the flooring in your RV can significantly enhance its appearance, comfort, and functionality. Whether you're looking to repair damaged flooring or update the design, following the proper steps can ensure a successful outcome. Here's a comprehensive guide to replacing RV flooring:
1. Remove Existing Flooring
Remove all furniture and appliances from the RV. Use a pry bar or flooring remover to carefully lift up the existing flooring, working gradually from one corner of the room to the other. Remove any nails or screws that may be holding the flooring in place.
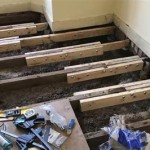
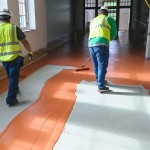
2. Prepare the Subfloor
Inspect the subfloor for any damage or rot. Replace damaged sections with new plywood or OSB. Smooth out any uneven areas using a belt sander or orbital sander. Ensure the subfloor is clean and dry before installing new flooring.
3. Choose and Measure the New Flooring
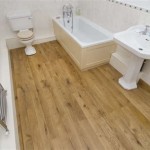
Select flooring that is durable and suitable for RV use, such as vinyl, laminate, or carpet. Measure the length and width of each room in the RV and determine the required amount of flooring material. Add 10% extra for cuts and waste.
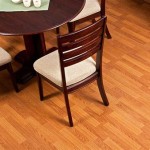
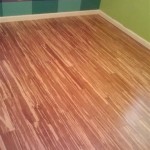
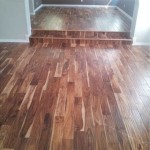
4. Install the New Flooring
Lay out the new flooring in the room, starting from the center and working your way outward. For vinyl flooring, use a sharp utility knife to cut the material to size. For laminate flooring, click the planks together according to the manufacturer's instructions. For carpet, use carpet tape to secure the edges.
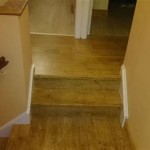
5. Trim and Seal the Flooring
Trim any excess flooring around the edges of the room using a jigsaw or utility knife. Seal the flooring around the perimeter and any seams or transitions using a suitable sealant. This will prevent moisture from penetrating the subfloor.
6. Reinstall Furniture and Appliances
Once the flooring is installed, reinstall all furniture and appliances. Secure them properly to prevent them from shifting or damaging the new flooring.
Tips for Success
* Use a level to ensure the subfloor is level before installing the new flooring. * Start with a small section of the room to practice your cutting and installation techniques. * Pay attention to the direction of the flooring planks to create a consistent look. * Allow the sealant to cure completely before using the RV. * Protect the new flooring from heavy traffic or spills during the first few weeks after installation.
Replacing Rv Floor Covering

Replacing That Old Carpet Kreating Homes

The Best Rv Flooring Ideas In 2024

Diy Rv Renovation Installing Vinyl Plank Flooring Our Camper 2 The Mommy

Summer Renovation Part 5 Replacing The Rv Slide Flooring

What To Know About Rv Floor Replacement Travel

Summer Renovation Part 5 Replacing The Rv Slide Flooring

Tips For Replacing Rv Slide Out Flooring Fireplaces Van Life

How To Replace Your Rv Carpet With Vinyl Flooring

Replacing That Old Carpet Kreating Homes
Related Posts