Laying Tongue and Groove Plywood Flooring: A Comprehensive Guide
Tongue and groove plywood flooring is a popular choice for its durability, affordability, and ease of installation. By following a few simple steps and essential aspects, you can achieve a professional-looking floor that will last for years to come.
1. Planning and Preparation
Begin by determining the square footage of the area to be floored and purchasing the necessary plywood panels. Ensure that the subfloor is level and free of moisture. If necessary, use a level to check for any unevenness and make adjustments accordingly.
2. Laying the First Row
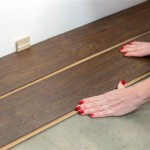
Start by installing the first row of plywood along the longest wall of the room. Apply a bead of construction adhesive to the subfloor along the edge where the plywood will be placed. Align the tongue of the first panel with the groove of the second panel and slide them together tightly.
3. Aligning the Panels
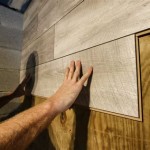
Continue laying the panels in a staggered pattern, ensuring that the joints between the panels are tightly sealed. Use a tapping block and a hammer to gently tap the panels into place, ensuring that they are securely connected. Check the alignment of the panels regularly using a level.
4. Installing the Last Row
The last row of plywood may need to be cut to fit the remaining space. Measure the gap between the last full panel and the wall, and cut the final panel accordingly. Apply adhesive to the subfloor and slide the panel into place, securing it with a tapping block.
5. Finishing Touches
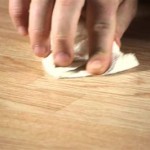
Once all the plywood panels are installed, apply wood filler to any gaps or joints to create a seamless finish. Allow the wood filler to dry completely before sanding it down to match the level of the floor. Finish by staining or painting the floor as desired.
Additional Tips
Use a moisture barrier between the subfloor and the plywood to prevent moisture absorption.
Leave a small expansion gap around the perimeter of the room to allow for natural movement of the wood.
If you encounter any unevenness during installation, use a floor sander to level the surface.
Follow the manufacturer's instructions for proper spacing, adhesive selection, and finishing techniques.

23 32 In X 4 Ft 8 Southern Pine Tongue And Groove Plywood Sheathing 605189 The Home Depot

Laying Down Tongue And Groove Plywood

How To Install A Subfloor On Joists Ana White

Sub Floor Installation Tips From Georgia Pacific

23 32 In X 4 Ft 8 Southern Pine Tongue And Groove Plywood Sheathing 605189 The Home Depot

Sub Floor Installation Tips From Georgia Pacific

How To Install A Plywood Subfloor

All You Need To Know About Tongue And Groove Flooring Installation Reallyfloors America S Est Hardwood

Laying Down Tongue And Groove Plywood

9 Common Sub Floor Installation Mistakes And How To Avoid Them Builder
Related Posts