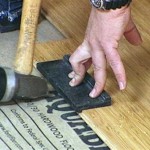
Laying Laminate Flooring In A Narrow Hallway - Essential Aspects
Installing laminate flooring in a narrow hallway requires careful planning and execution. By following these essential aspects, you can achieve a professional-looking and durable floor that will enhance the aesthetic appeal of your home.
1. Measure and Plan Thoroughly
Precise measurements are crucial in a narrow hallway. Measure the width and length of the hallway, taking into account any doorways or obstacles. Draw a floor plan to determine the number of planks needed and the optimal orientation of the flooring.
2. Prepare the Subfloor
The subfloor must be level and smooth to ensure a stable base for the laminate flooring. Remove any existing flooring, level any uneven areas, and repair any damage. Install an underlayment under the laminate to provide cushioning and insulation.
3. Choose Appropriate Laminate
Select laminate flooring that is suitable for high-traffic areas, such as hallways. Look for planks with a higher AC rating, indicating their resistance to wear and tear. Consider the width of the planks, as narrower planks are easier to work with in narrow spaces.
4. Start from the Center
To ensure a symmetrical appearance, start laying the laminate flooring from the center of the hallway. Dry fit the first few rows to verify the alignment and spacing before gluing them down.
5. Use Expansion Gaps
Laminate flooring expands and contracts with changes in temperature and humidity. Leave a small expansion gap around the perimeter of the hallway and around any fixed objects to prevent buckling.
6. Cut Planks Precisely
Use a sharp utility knife or a laminate cutter to cut the planks to fit narrow spaces and around obstacles. Measure carefully and make clean, straight cuts to ensure a seamless finish.
7. Stagger Plank Joints
Avoid aligning the joints of adjacent planks in a row. Stagger the joints by at least 10-12 inches to create a more natural look and enhance the structural stability of the flooring.
8. Secure the Planks
Follow the manufacturer's instructions for securing the laminate planks. Most laminate flooring systems utilize a tongue-and-groove locking mechanism that snaps the planks together. Apply glue to the joints for added strength.
9. Trim and Finish
Once the laminate flooring is installed, trim the edges around the baseboards, doorways, and other obstacles. Install transition pieces, such as T-moldings or reducers, where the laminate flooring meets other flooring types.
10. Protect and Maintain
Protect the newly installed laminate flooring from heavy furniture and sharp objects. Sweep or vacuum regularly to remove dirt and debris. Use a pH-neutral cleaner designed specifically for laminate flooring to maintain its appearance and durability.

Installing Laminate Flooring In Hallways Do It Yourself

The Best Way To Make Your Narrow Hallway Feel Wider
Hallway Flooring Ideas Pretty And Practical Solutions

One Room Challenge Week Three Installing Laminate Floor Hilltown House

7 Laminate Flooring Ideas For Small Spaces

75 Beautiful Hallway With Laminate Floors Ideas Designs April 2024 Houzz Au

12 Decor Ideas To Make Narrow Hallways Look Bigger Hunker Hallway Decorating White

Laminate Flooring Lockdown Diy A Simple Life Of Luxury
:max_bytes(150000):strip_icc()/cd581a_8594adafc6ee4a7f945b685d1f2e0cc4mv2-86f63bb2d09746b99647fb190ad7988e.jpeg?strip=all)
30 Narrow Hallway Ideas For Maximum Style And Function

A Long Narrow Hallway Help For Dark Scary Mess Laurel Home
Related Posts


