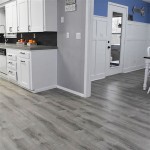
How To Precisely Measure a Room for Wooden Flooring
Accurate measurements are crucial for any successful flooring installation, particularly when dealing with the precision and investment associated with wooden flooring. Imprecise measurements can lead to material shortages, excessive waste, increased costs, and a less-than-perfect final result. Therefore, understanding how to properly measure a room before ordering wooden flooring is a fundamental skill, whether undertaking a DIY project or working with a professional installer. This article provides a comprehensive guide to achieving accurate measurements and accounting for necessary considerations to ensure a smooth and cost-effective flooring project.
Essential Tools and Materials
Before commencing the measuring process, gathering the necessary tools and materials is essential. The absence of any of these items can impede the accuracy and efficiency of the task. A reliable measuring tape, preferably one at least 25 feet in length, is the foundation of the measurement process. Shorter tapes may necessitate multiple measurements and increase the risk of accumulated errors. A notepad and pen are indispensable for recording measurements systematically. A calculator can be useful for quick calculations, especially when dealing with irregular shapes. Finally, a laser distance measurer can expedite the process, particularly in larger rooms, but is not strictly necessary for adequate measurement accuracy.
Beyond measurement tools, certain additional items contribute to a more accurate and comprehensive assessment. A straight edge, such as a level or a yardstick, is beneficial for determining whether walls are perfectly straight. This will be important later when calculating waste. Graph paper can be used to create a scaled drawing of the room, which is invaluable for visualizing the flooring layout and determining the optimal plank orientation. Finally, masking tape can be used to mark specific points or areas of concern within the room.
Step-by-Step Guide to Measuring the Room
The process of measuring a room for wooden flooring involves a systematic approach to ensure accuracy and completeness. Begin by sketching a rough outline of the room on the notepad. Indicate the location of doors, windows, and any permanent fixtures such as fireplaces or built-in cabinets. This initial sketch serves as a visual reference for recording measurements and identifying any irregularities in the room's shape.
Focus on measuring the length and width of the room. Extend the measuring tape along the longest wall from one corner to the opposite corner, ensuring the tape is taut and straight. Record the measurement on the sketch, noting the units used (inches, feet, or meters). Repeat this process for the width of the room, measuring along the shortest wall. If the room is a perfect rectangle or square, these two measurements will suffice. However, most rooms are rarely perfectly rectangular.
For rooms that are not perfect rectangles or squares, further measurements are necessary. Divide the room into smaller, more manageable rectangular or square sections. Measure each section individually, recording the length and width of each. For example, if the room has an alcove, measure the length and width of the main room and then separately measure the length and width of the alcove. Add these individual measurements together to calculate the total area. In cases of more complex shapes, breaking the area up into multiple rectilinear areas might be necessary to accurately measure.
Carefully measure any irregular features within the room. These might include angled walls, curved walls, or protruding columns. For angled walls, measure the length of the wall and the angle of the deviation from a straight line. This information can be used to calculate the additional flooring needed to cover the angled area. For curved walls, approximate the curve as a series of short, straight lines. Measure each of these short lines and the distance between them to create an estimate of the curved area. If columns or other obstructions exist, measure their dimensions and calculate the area they occupy. This area will need to be subtracted from the total room area to determine the accurate amount of flooring required.
Accounting for Wastage and Ordering Additional Materials
After accurately measuring the room, the next step is to account for wastage. Wastage refers to the excess material that is inevitably generated during the flooring installation process due to cuts, miscalculations, or damaged planks. It is crucial to factor in wastage when ordering wooden flooring to ensure that sufficient material is available to complete the project.
The amount of wastage to account for depends on several factors, including the complexity of the room's shape, the skill level of the installer, and the type of wooden flooring being used. For simple rectangular rooms with minimal obstructions and a skilled installer, a wastage factor of 5% may be sufficient. However, for rooms with irregular shapes, angled walls, or intricate patterns, a wastage factor of 10% to 15% is recommended. For inexperienced installers, a higher wastage factor is advisable to compensate for potential errors.
To calculate the amount of flooring needed, first, calculate the total area of the room in square feet (or square meters). Multiply the length of the room by the width. If the room is divided into sections, add the areas of each section together. Once the total area is known, multiply this area by the desired wastage factor (expressed as a decimal). For example, if the total area is 200 square feet and the wastage factor is 10%, multiply 200 by 0.10, which equals 20 square feet. Add this amount to the total area to determine the total amount of flooring to order. In this example, you would order 220 square feet of flooring.
Consider the plank orientation when calculating wastage. Diagonal installations, while aesthetically appealing, typically generate more waste than parallel installations. Additionally, factor in the pattern of the wood flooring. Matching grain patterns may require more careful cuts and therefore increase wastage. Evaluate the potential for using offcuts in closets or other small areas to minimize waste. It might also be beneficial to order a few extra planks beyond the calculated amount to keep as spares for future repairs or replacements.
Tips for Ensuring Accuracy and Avoiding Common Mistakes
Maintaining accuracy throughout the measurement process is paramount to avoid costly errors and delays. Double-check all measurements to ensure they are accurate and consistent. If possible, have a second person verify the measurements. Pay close attention to the units of measurement. Ensure that all measurements are recorded in the same units. Avoid mixing inches and feet, or feet and meters. Converting all measurements to a single unit before calculating the area can minimize errors.
Be meticulous when dealing with irregular shapes and angles. Utilize tools such as protractors or angle finders to accurately measure angles. Break down complex shapes into simpler geometric forms to facilitate easier calculations. Consider using a laser distance measurer for large or difficult-to-reach areas. These devices provide accurate measurements with minimal effort. However, always verify the laser measurements with a manual tape measure to ensure consistency.
Account for any potential obstructions or irregularities in the room. Check for pipes, electrical outlets, or other fixtures that may interfere with the flooring installation. Measure the distances from these obstructions to the walls to determine the amount of flooring that needs to be cut around them. Be aware of thresholds between rooms. If the flooring is being installed in multiple rooms, ensure that the flooring transitions smoothly between the rooms and that the thresholds are properly measured and accounted for.
Consider ordering slightly more flooring than the calculated amount to allow for unexpected issues. Ordering an extra box or two of flooring can prevent project delays if additional material is needed due to damage, miscuts, or unforeseen circumstances. Store the extra flooring in a safe and dry place for future use. If working with a professional installer, thoroughly discuss the measurements and wastage calculations with them before placing the flooring order. Their expertise can help identify potential issues and ensure that the correct amount of flooring is ordered.

How To Measure A Room For Flooring

How To Measure A Room Imperial Wood Floors

Measuring Guide For Wood Flooring Natural Floor Co

How To Determine Square Footage For Flooring Vermont Hardwoods

How To Measure A Room For Wood Flooring Laminate And Luxury Vinyl Tiles

How To Measure Your Room Hardwood Floor Depot

How To Measure Your Floor Space 4 Easy Methods

How To Measure A Floor Factory Direct Flooring

How To Measure A Room For Flooring Panel Town Floors

How To Measure Rooms For New Hardwood Flooring Carlisle Wide Plank Floors
Related Posts


