How to Lay Tongue and Groove Engineered Wood Flooring
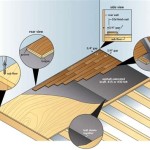
Engineered wood flooring is a popular choice for homeowners who want the look of hardwood flooring without the high cost. It is also a good option for areas that are prone to moisture, such as kitchens and bathrooms. Engineered wood flooring is made from a thin layer of hardwood veneer that is bonded to a core of plywood or other wood product. This makes it more durable and water-resistant than solid hardwood flooring. Tongue and groove engineered wood flooring is easy to install, and it can be floated over a subfloor or glued down.
Tools and Materials You'll Need:
* Engineered wood flooring * Underlayment * Tape measure * Pencil * Utility knife * Pry bar * Hammer * Nail set * Wood glueSteps:
1. Prepare the subfloor: The subfloor must be level, flat, and dry. If the subfloor is not level, you will need to level it using a self-leveling compound. If the subfloor is not flat, you will need to sand it down. If the subfloor is not dry, you will need to wait until it is dry before you can install the flooring. 2. Install the underlayment: The underlayment will help to prevent moisture from damaging the flooring and it will also provide a cushion for the flooring. The underlayment should be installed according to the manufacturer's instructions. 3. Layout the flooring: Start by laying out the flooring in the room where you will be installing it. This will help you to determine how many pieces of flooring you will need and where the seams will be located. 4. Cut the flooring: You will need to cut the flooring to fit around obstacles such as walls, doorways, and cabinets. To do this, use a utility knife to score the flooring along the cut line. Then, snap the flooring along the score line. 5. Install the flooring: Start by installing the flooring along the longest wall in the room. To do this, place a bead of wood glue along the tongue of the flooring. Then, insert the tongue of the flooring into the groove of the previous piece of flooring. Tap the flooring into place using a hammer and a nail set. 6. Continue installing the flooring: Continue installing the flooring by working your way across the room. Be sure to stagger the seams between the pieces of flooring. Also, be sure to leave a small gap between the flooring and the walls to allow for expansion. 7. Trim the flooring: Once you have installed the flooring, you will need to trim it around the edges of the room. To do this, use a utility knife to score the flooring along the cut line. Then, snap the flooring along the score line. 8. Install the baseboards: The baseboards will help to hide the gap between the flooring and the walls. To install the baseboards, use a brad nailer to nail the baseboards into place.Tips:
* Be sure to wear safety glasses and gloves when installing engineered wood flooring. * Use a level to ensure that the flooring is installed level. * Stagger the seams between the pieces of flooring to create a stronger floor. * Leave a small gap between the flooring and the walls to allow for expansion. * Install the baseboards to hide the gap between the flooring and the walls.
All You Need To Know About Tongue And Groove Flooring Installation Reallyfloors America S Est Hardwood

5 Essential Tips For Tongue And Groove Flooring District Floor Depot

How To Install Engineered Tongue Groove Flooring

Tongue And Groove Vs Wood Flooring Direct

How To Install Tongue And Groove Flooring Blog

Engineered Wood Floor Laying Flooring Installation Method

How To Install Lock Engineered Hardwood Flooring

Engineered Hardwood Floors Installation Floor Refinishing New Jersey Repair Sanding

Installing Laminate Engineered Wood Floating Floors Home Improvement Stack Exchange Blog

Tongue And Groove Vs Wood Flooring Direct
Related Posts


