How To Lay Laminate Flooring Tile Effect
Transforming your floors with laminate flooring tile effect is a great way to achieve a stylish and durable finish. This guide will provide you with the essential steps to ensure a successful installation:
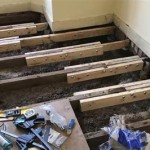
1. Preparation:
Before you begin, it's crucial to prepare your subfloor. Ensure it's level, clean, and free from debris. Use a self-levelling compound to smooth out any unevenness. Allow it to dry completely before proceeding.
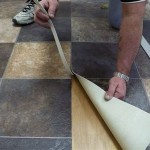
2. Underlayment Installation:
An underlayment goes between the subfloor and laminate flooring to provide cushioning, reduce noise, and improve insulation. Roll out the underlayment and cut it to the size of the room, overlapping the edges slightly. Secure it with tape or adhesive following the manufacturer's instructions.
3. Plank Preparation:
Arrange the planks in a staggered pattern to enhance the tile effect. Use spacers to maintain even gaps between them. Cut the first row of planks to fit around the perimeter of the room. Measure and cut additional planks as needed.
4. Plank Installation:
Start by laying the first row of planks along one wall. Angle the first plank slightly into the adjacent plank and gently tap it into place using a tapping block or mallet. Continue adding planks, interlocking them end-to-end.
5. Expansion Gaps:
Remember to leave expansion gaps around the perimeter of the room to allow for natural movement. Use spacers or leave a 10-15mm gap between the planks and walls, moldings, and other fixed objects.
6. Doorways and Transitions:
For doorways and transitions, you may need to cut planks to fit. Cut the planks to size and carefully remove the tongue from the end. Then, insert the plank into the doorway and secure it with a metal strip or transition molding.
7. Trimming and Finishing:
Once the planks are installed, remove the spacers and trim any excess underlayment or planks. Install baseboards, moldings, or other trim pieces to finish the installation. Use a caulk gun to seal any gaps or joints.
Tips:
* Use a tapping block when installing planks to avoid damaging them. * Maintain a consistent gap between planks throughout the installation. * Double-check the planks are securely locked together before moving on to the next one. * Clean up excess adhesive or debris as you go. * Allow time for the flooring to settle before placing furniture or heavy objects on it.
Goodhome Slate Black Stone Design Tile Effect Laminate Flooring 2 53m² Diy At B Q

Why Choose Tile Effect Laminate Flooring Nwfloors Co Northwest Floors

Tile Effect Laminate Flooring Leader Trade

Goodhome Elstree Natural Stone Effect Laminate Flooring 2 53m² Diy At B Q

Tile And Stone Effect Laminate Flooring

Egger Anthracite Slate Black Tile Effect Laminate Flooring Floor

Colours Leggiero Stone Effect Laminate Flooring 1 86m² Diy At B Q

Egger S Latest Tile Design Onyx Natural Is A Beautiful Beige Brown Laminate Floor That Looks And Feels Like R Flooring Designs

Tile Effect Laminate Flooring Leader Trade

Binyl Pro 8mm Moonslate Tile Effect 4v Waterproof Laminate Flooring Direct
Related Posts