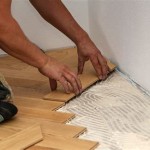
How To Install Wood Flooring On Stairs
Installing wood flooring on stairs is a project that can dramatically enhance the look and feel of your home. It's a challenging but rewarding task that requires patience, precision, and a set of specialized tools. This comprehensive guide will provide you with the necessary information to successfully install wood flooring on your stairs, step by step.
Planning and Preparation
The first step in installing wood flooring on stairs is careful planning and preparation. This includes assessing the condition of the existing staircase, selecting the right materials, and gathering the necessary tools.
Begin by examining the existing stairs for any structural issues or damage. If needed, repairs should be made before proceeding. Next, choose the type of wood flooring that best suits your style and budget. Solid hardwood flooring is durable and classic, while engineered hardwood offers greater stability and can be more cost-effective.
Consider the thickness of the flooring and whether it can be installed over existing subfloor or requires a new one. Once you've selected the flooring, measure the staircase carefully to determine the exact amount needed. It's advisable to purchase a small extra amount to account for potential waste during installation.
Essential Tools and Materials
Before starting your project, gather all the necessary tools and materials. This includes:
- Circular saw
- Table saw (optional)
- Miter saw
- Power drill
- Tape measure
- Level
- Hammer
- Nail gun (optional)
- Staple gun (optional)
- Safety glasses
- Ear protection
- Dust mask
- Wood flooring
- Underlayment (if necessary)
- Wood glue
- Finish nails or staples
- Stair nosing (optional)
- Filler (for gaps)
- Wood stain or paint (optional)
Having all the necessary tools and materials ready will make the installation process smoother and more efficient.
Installation Process
The installation process involves several key steps:
- Prepare the subfloor: Ensure the subfloor is level and free of any debris or obstacles. If necessary, use shims to level the subfloor. Install underlayment if required for moisture control or soundproofing.
- Install the first riser: Start by installing the first riser at the bottom of the staircase. Make sure it is plumb and square.
- Install the first tread: Attach the first tread to the riser using wood glue and finish nails or staples.
- Install remaining risers and treads: Continue installing the remaining risers and treads, ensuring that each piece is level and flush with the previous one.
- Install stair nosing (optional): If desired, install stair nosing to provide a finished edge and prevent wear.
- Fill gaps and finish: Fill any gaps between the boards with wood filler and allow it to dry completely. Sand the flooring and apply stain or paint if desired.
- Apply sealant: Seal the wood flooring with a polyurethane sealant to protect it from scratches, stains, and moisture.
It is important to follow the manufacturer's instructions for installing the specific type of wood flooring you have chosen. Pay close attention to details like the direction of the grain and the placement of the boards.
It's essential to work carefully and precisely when installing wood flooring on stairs. Taking your time and following these steps carefully will help to ensure a beautiful and durable result.

How To Install Laminate Flooring On Stairs Direct Wood

How To Convert Carpeted Stairs Hardwood Lowe S

How To Install Laminate On Stairs Follow Our Essential Guide Laying And Costing For

How To Install Wood Flooring On Stairs Esb

How To Install Laminate Flooring On Staircase Step By Guide

How To Install Laminate Flooring On Stairs Direct Wood

How To Install Laminate Flooring On Stairs 13 Steps

How To Install Hardwood On Stairs

Value Carpets Flooring Installing Laminate On Stairs

How To Install Laminate Flooring On Stairs Direct Wood
Related Posts


