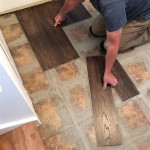
How to Install Wood Flooring in Multiple Rooms Like a Pro
Transforming your home with the warmth and elegance of wood flooring is a rewarding experience that can significantly enhance your living spaces. Installing it in multiple rooms can be a challenging task, but with proper planning and execution, it's achievable. Here's a comprehensive guide to help you master the art of wood flooring installation in multiple rooms.
1. Planning the Layout
Before purchasing materials, carefully plan the layout for each room. Consider the flow of the flooring throughout the home and any obstacles like doorways or fireplaces. Draw a detailed plan to determine the direction of the planks and any necessary cuts.
2. Acclimating the Flooring
Allow the wood flooring to acclimate to the temperature and humidity of your home for at least 48 hours before installation. Open the boxes and stack the planks in a pyramid shape to promote airflow. This prevents buckling or expansion later on.
3. Preparing the Subfloor
The subfloor must be level, dry, and free of imperfections. Inspect it thoroughly and repair any damage. If necessary, install an underlayment to provide additional support and moisture resistance.
4. Installing the First Row
Start by installing the first row of flooring along one wall. Use a spacer to ensure a consistent gap between the wall and the planks. Stagger the end joints for added strength and stability.
5. Continue Laying the Floor
Continue laying subsequent rows of flooring, using spacers to maintain a consistent gap. Tap the planks together using a tapping block and hammer, being careful not to damage the edges. As you reach doorways or obstacles, make necessary cuts using a circular saw.
6. Installing Trim and Moldings
Once the flooring is laid, install baseboards, door thresholds, and any other necessary moldings. These not only enhance the aesthetics but also conceal any gaps or transitions.
7. Finishing the Floor
After the installation is complete, you can choose to finish the floor with stains or sealants to enhance its appearance and protect it from wear and tear. Follow the manufacturer's instructions carefully for optimal results.
Tips for Success
- Use high-quality materials and tools.
- Hire a professional installer if you are not confident in DIY projects.
- Take your time and pay attention to detail.
- Maintain the floor regularly by sweeping, mopping, and applying protective sealants as needed.
- Enjoy the beautiful and durable wood flooring in your multiple rooms!

How To Install Vinyl Plank Flooring In Multiple Rooms Or Whole Floor

Determining The Direction To Lay Install Hardwood Laminate Or Luxury Vinyl Plank Flooring

Installing Planks Into Multiple Rooms Laminate And Vinyl Plank Installation Part 2

How To Install Laminate Flooring Without Room Transitions

How To Install Lock Engineered Hardwood Flooring

How To Install Lock Engineered Hardwood Flooring

How To Install Hardwood Flooring The Home Depot

How To Install Hardwood Flooring The Home Depot

How To Install Lock Engineered Hardwood Flooring

Which Direction To Lay Your Hardwood Flooring Riterug
Related Posts


