How To Install Vinyl Plank Flooring Over Wood Subfloor
Vinyl plank flooring has emerged as a popular choice for homeowners due to its durability, water resistance, ease of installation, and aesthetic appeal. Installing vinyl plank over a wood subfloor presents a practical and cost-effective flooring solution. However, proper preparation and installation techniques are crucial to ensure a long-lasting and visually appealing result. This article provides a comprehensive guide on how to successfully install vinyl plank flooring over a wood subfloor.
Preparing the Wood Subfloor
The foundation for a successful vinyl plank installation lies in the thorough preparation of the wood subfloor. A clean, level, and stable subfloor is essential to prevent future issues such as unevenness, squeaking, and premature wear of the vinyl planks. The following steps outline the preparation process:
Inspection: The initial step involves a detailed inspection of the existing wood subfloor. This includes looking for any signs of damage, such as water stains, rot, insect infestation, or loose boards. Any identified issues must be addressed before proceeding with the installation. Water damage and rot compromise the structural integrity of the subfloor and need to be repaired or replaced. Loose boards can cause movement and instability, leading to issues with the vinyl plank flooring.
Repairing Damage: Any damaged sections of the subfloor need to be repaired or replaced. Minor cracks can be filled with wood filler. More significant damage, such as rot or water damage, requires the replacement of the affected section of the subfloor. Ensure that the replacement wood is of the same thickness and material as the existing subfloor. Secure the new wood to the joists using screws designed for wood applications.
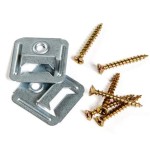
Securing Loose Boards: Loose boards should be secured to the joists using screws. Use wood screws that are long enough to penetrate the joists and provide a strong hold. Countersink the screws to ensure they are flush with the surface of the subfloor. This prevents the screw heads from interfering with the vinyl plank installation.
Leveling the Subfloor: Vinyl plank flooring requires a level surface for proper installation. Any unevenness in the subfloor can cause the planks to flex or buckle, leading to premature wear and an unprofessional appearance. Use a long level (at least 6 feet) to identify any high or low spots in the subfloor. High spots can be sanded down using a belt sander or a floor sander. Low spots can be filled with a self-leveling compound designed for wood subfloors. Follow the manufacturer's instructions for mixing and applying the self-leveling compound. Allow the compound to dry completely before proceeding with the installation.
Cleaning the Subfloor: Thoroughly clean the subfloor to remove any dirt, dust, debris, or old adhesive residue. Use a broom and a vacuum cleaner to remove loose debris. For stubborn residue, use a scraper or a solvent designed for removing adhesive. Ensure the subfloor is completely dry before moving on to the next step.
Acclimation and Planning
Proper acclimation of the vinyl plank flooring and careful planning of the layout are crucial for a successful installation. These steps help to minimize expansion and contraction issues and ensure a visually appealing final product.
Acclimation: Vinyl plank flooring needs to acclimate to the room's temperature and humidity before installation. This allows the planks to adjust to the environment and minimizes expansion or contraction after installation. Store the vinyl plank flooring in the room where it will be installed for at least 48 to 72 hours prior to installation. Ensure the room temperature is within the manufacturer's recommended range during acclimation. This process is crucial for minimizing gaps and warping post-installation.
Planning the Layout: Before starting the installation, plan the layout of the vinyl planks. Measure the room and determine the best direction to lay the planks. Generally, it is recommended to lay the planks parallel to the longest wall of the room, as this can make the room appear larger. However, consider the direction of the light and any existing features in the room when planning the layout. Determine the number of planks needed for each row and calculate the amount of waste. Add an extra 5-10% to the total amount of flooring to account for waste and cuts.
Underlayment (Optional): While some vinyl planks come with an attached underlayment, others may require a separate underlayment. Underlayment can provide additional cushioning, sound insulation, and moisture resistance. If using an underlayment, choose one that is specifically designed for vinyl plank flooring and wood subfloors. Follow the manufacturer's instructions for installing the underlayment. Ensure the underlayment is properly secured to the subfloor before installing the vinyl planks.
Installing the Vinyl Plank Flooring
The installation process involves carefully interlocking the vinyl planks according to the manufacturer's instructions. Precision and attention to detail are essential to ensure a seamless and secure installation.
Starting the Installation: Begin the installation along the longest straight wall of the room. Leave a small expansion gap (typically ¼ inch) between the edge of the planks and the wall. This gap allows for expansion and contraction of the planks without putting pressure on the walls. Use spacers to maintain the expansion gap. Place the first row of planks with the tongue side facing the wall. Interlock the end joints of the planks, ensuring they are securely connected.
Cutting Planks: When you reach the end of a row, you will likely need to cut a plank to fit. Measure the distance between the last full plank and the wall, remembering to account for the expansion gap. Use a utility knife or a vinyl plank cutter to score the plank along the measured line. Snap the plank along the score line. For more intricate cuts, use a jigsaw. Always wear safety glasses and gloves when cutting the planks.
Installing Subsequent Rows: Start each subsequent row with the remaining piece from the previous row, provided it is at least six inches long. This helps to minimize waste and create a staggered pattern. Staggering the joints of the planks adds visual appeal and structural stability to the floor. Interlock the side joints of the planks at a slight angle, then press them down to lock them into place. Use a tapping block and a rubber mallet to gently tap the planks together, ensuring a tight and secure fit. Avoid hitting the planks directly with the mallet, as this can damage the edges.
Working Around Obstacles: When installing around obstacles such as pipes or door frames, use a measuring tape and a combination square to accurately mark the required cuts on the plank. Use a jigsaw to carefully cut out the necessary shape. Consider using a template to ensure a precise fit. Cover any gaps around pipes with pipe collars for a clean and professional finish. Be mindful of expansion gaps around obstacles.
Final Row: When installing the final row of planks, you may need to rip the planks to fit the width of the remaining space. Measure the distance between the last full row and the wall, remembering to account for the expansion gap. Use a utility knife or a circular saw to rip the planks to the required width. Install the final row of planks, ensuring they are securely interlocked with the previous row. Use a pull bar to help tighten the planks against the wall.
Removing Spacers and Installing Transition Strips: Once the installation is complete, remove the spacers along the walls. Install transition strips at doorways and where the vinyl plank flooring meets other flooring types, such as carpet or tile. Transition strips provide a smooth and safe transition between different flooring surfaces. Secure the transition strips to the subfloor using screws or adhesive. Avoid nailing or screwing directly into the vinyl plank flooring.
Cleaning Up: Clean up any debris and dust from the newly installed floor. Use a broom and a vacuum cleaner to remove loose debris. Wipe the floor with a damp cloth to remove any remaining dirt or smudges. Avoid using harsh chemicals or abrasive cleaners, as these can damage the vinyl plank flooring. Follow the manufacturer's recommendations for cleaning and maintaining your vinyl plank floor.

How To Install Vinyl Plank Flooring As A Beginner Home Renovation

How To Install Vinyl Plank Flooring On Plywood Floor

How To Prep Wood Subfloor For Luxury Vinyl Plank Flooring Beginners Fix High And Low Spots

A Beginner S Guide To Installing Vinyl Plank Flooring Dumpsters Com

How To Prep Your Sub Floor For Luxury Vinyl Flooring

Installing Vinyl Floors A Do It Yourself Guide The Honeycomb Home

Installing Luxury Vinyl Floors Over Engineered Hardwood Honey Built Home

Installing Luxury Vinyl Floors Over Engineered Hardwood Honey Built Home

How To Install Glue Down Luxury Vinyl Plank Flooring On Osb Sub Floor

Installing Vinyl Plank Flooring For Beginners Anika S Diy Life
Related Posts