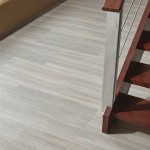
How To Install Vinyl Plank Flooring On A Concrete Floor
Installing vinyl plank flooring over a concrete subfloor is a popular choice for many homeowners due to the material’s durability, water resistance, and ease of installation. This article provides a comprehensive guide to the process, ensuring a successful and aesthetically pleasing outcome. Careful preparation and attention to detail are crucial for a long-lasting and professional-looking result.
Vinyl plank flooring is available in various styles and locking mechanisms, including glue-down, click-lock, and loose-lay options. This guide focuses primarily on the click-lock installation method, which is generally considered the most DIY-friendly. However, the principles of subfloor preparation and acclimation apply to all types of vinyl plank flooring.
Essential Tools and Materials
Before commencing the installation, gather all the necessary tools and materials. This pre-planning stage streamlines the process and minimizes interruptions.
Essential tools include:
- Measuring tape
- Utility knife (with plenty of extra blades)
- Straight edge or T-square
- Pencil
- Rubber mallet
- Spacers (1/4 inch)
- Moisture meter
- Broom or vacuum cleaner
- Level
- Safety glasses
- Knee pads
- Optional: Tapping block, pull bar
Required materials include:
- Vinyl plank flooring
- Underlayment (if required by the manufacturer or desired for added sound insulation)
- Moisture barrier (if required by the manufacturer or if the concrete subfloor exhibits high moisture levels)
- Self-leveling compound (if needed to correct imperfections in the concrete subfloor)
- Concrete patch (for minor repairs)
- Transition strips (for doorways or where the flooring meets other surfaces)
- Baseboards or quarter round molding
- Construction adhesive (for securing transition strips and moldings)
Subfloor Preparation: The Foundation for Success
The most critical aspect of installing vinyl plank flooring is proper subfloor preparation. A properly prepared subfloor ensures a level, stable, and moisture-free surface, which is crucial for the longevity and performance of the flooring.
1. Cleanliness: Begin by thoroughly cleaning the concrete subfloor. Sweep or vacuum the entire area to remove all dust, debris, and loose particles. Any remaining debris can interfere with the adhesion of the flooring or cause unevenness.
2. Leveling: Check the concrete subfloor for levelness using a long level. Significant variations in height can cause the vinyl planks to flex and potentially break or separate at the seams. Use a self-leveling compound to fill in low spots and create a perfectly level surface. Follow the manufacturer's instructions carefully when applying self-leveling compound.
3. Repairs: Inspect the concrete subfloor for cracks, holes, or other imperfections. Use a concrete patch to fill in any cracks or holes, ensuring that the patch is flush with the surrounding concrete. Allow the patch to dry completely before proceeding.
4. Moisture Testing: Concrete is porous and can absorb moisture from the ground. Excess moisture can damage the vinyl plank flooring and lead to mold growth. Conduct a moisture test to determine the moisture content of the concrete slab. There are several methods for testing moisture levels:
- Calcium Chloride Test: This is a reliable method that involves placing a container of calcium chloride on the concrete surface for a specified period and then measuring the amount of moisture absorbed by the calcium chloride.
- Relative Humidity (RH) Test: This test involves drilling small holes into the concrete and inserting probes to measure the relative humidity levels within the slab.
- Plastic Sheet Test: This is a simpler, though less accurate, method that involves taping a plastic sheet to the concrete surface for 24-72 hours. If condensation forms under the plastic sheet, it indicates a high moisture content.
If the moisture test reveals excessive moisture levels, a moisture barrier must be installed before proceeding with the flooring installation. Follow the manufacturer's instructions for installing the moisture barrier.
5. Underlayment (Optional): Some vinyl plank flooring products come with a pre-attached underlayment, while others require a separate underlayment. An underlayment can provide added sound insulation, cushioning, and moisture resistance. Check the manufacturer's recommendations for whether an underlayment is required or recommended for your specific product. If using a separate underlayment, install it following the manufacturer's instructions.
Acclimation: Allowing the Flooring to Adjust
Acclimation is a crucial step that is often overlooked but is vital for preventing warping, buckling, or gapping after installation. Vinyl plank flooring needs time to adjust to the temperature and humidity levels of the room in which it will be installed. Store the boxes of vinyl plank flooring in the room where they will be installed for at least 48-72 hours before installation. This allows the material to expand or contract to match the room's conditions.
During the acclimation period, maintain a consistent temperature and humidity level in the room. Avoid extreme temperature fluctuations or excessive humidity. Refer to the manufacturer's instructions for the recommended temperature and humidity ranges for acclimation.
Installing the Vinyl Plank Flooring
With the subfloor properly prepared and the flooring acclimated, the installation process can begin.
1. Planning the Layout: Before starting, take measurements and plan the layout of the flooring. Consider the direction in which the planks will run and how they will meet doorways, walls, and other obstacles. It is generally recommended to run the planks parallel to the longest wall in the room. This minimizes the number of cuts and creates a more visually appealing result. Also, consider staggering the seams between rows for a more natural look and to increase the strength of the flooring.
2. Starting the First Row: Begin installing the first row of planks along a straight wall. Use spacers to maintain a consistent expansion gap between the planks and the wall. The expansion gap allows the flooring to expand and contract without putting pressure on the walls, preventing buckling.
3. Connecting the Planks: Most vinyl plank flooring uses a click-lock system. Align the tongue of one plank with the groove of the adjacent plan and gently push them together until they click into place. Use a rubber mallet and a tapping block (if needed) to ensure a tight and secure connection. Avoid hitting the planks directly with the rubber mallet, as this can damage the edges.
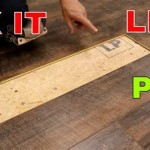
4. Cutting Planks: When you reach the end of a row or need to work around obstacles, you will need to cut the planks to size. Use a utility knife and a straight edge to score the plank along the cut line. Then, snap the plank along the scored line. For more complex cuts, use a jigsaw or a coping saw. Always wear safety glasses when cutting vinyl planks.
5. Working Around Obstacles: When installing around obstacles such as pipes or door frames, carefully measure and cut the planks to fit. Use a jigsaw or coping saw to make the necessary cuts. It may be helpful to create a template to ensure accurate cuts.
6. Installing Subsequent Rows: Continue installing the remaining rows of planks, staggering the seams between rows. Maintain a consistent expansion gap along the walls. Check your work frequently to ensure that the planks are properly aligned and securely connected.
7. The Final Row: The final row of planks may need to be cut to fit the remaining space. Measure the width of the remaining space and cut the planks accordingly. Use a pull bar to help lock the final row of planks into place.
Finishing Touches: Completing the Installation
Once the flooring is installed, complete the installation with finishing touches to enhance the appearance and protect the edges of the flooring.
1. Removing Spacers: Remove the spacers along the walls.
2. Installing Transition Strips: Install transition strips at doorways and where the flooring meets other surfaces, such as tile or carpet. Transition strips provide a smooth transition between different flooring types and protect the edges of the flooring from damage. Secure the transition strips with construction adhesive or screws, following the manufacturer's instructions.
3. Installing Baseboards or Quarter Round Molding: Install baseboards or quarter round molding along the walls to cover the expansion gap. This provides a finished look and protects the walls from damage. Secure the baseboards or quarter round molding with nails or construction adhesive.
4. Cleaning Up: Clean up any debris and dust from the installation. Use a damp cloth to wipe down the flooring.
Key Points for Successful Vinyl Plank Installation
Proper Subfloor Preparation is Paramount: A level, clean, and dry subfloor is essential for the longevity and performance of the vinyl plank flooring. Neglecting subfloor preparation can lead to problems such as buckling, gapping, and premature wear.
Acclimation Prevents Issues: Allowing the flooring to acclimate to the room's temperature and humidity levels is crucial for preventing warping and other issues. Follow the manufacturer's recommendations for acclimation time and conditions.
Attention to Detail Matters: Paying attention to detail throughout the installation process, from measuring accurately to ensuring tight connections between planks, will result in a professional-looking and long-lasting floor.

How To Prepare A Concrete Floor For Vinyl Flooring Parrys

Easy Ways To Install Vinyl Plank Flooring On Concrete

10 Beginner Mistakes Installing Vinyl Plank Flooring

Easy Ways To Install Vinyl Plank Flooring On Concrete

Tips For Installing Vinyl Plank Over Concrete Floors Lemon Thistle

How To Install Vinyl Plank Flooring On Concrete Step By Guide

How To Install Vinyl Plank Flooring As A Beginner Home Renovation

Laminate Flooring On Concrete Basement Floors Expert Installation Guide Csg Renovation

How To Install Vinyl Plank Flooring The Home Depot

Tips And Tricks For Installing Vinyl Plank Over Concrete Floors Riverbend Interiors
Related Posts