How To Install Floating Laminate Flooring On Concrete
Installing floating laminate flooring on concrete is a popular and cost-effective way to enhance the aesthetics and comfort of a space. This type of installation offers several advantages, including relative ease of installation for DIY enthusiasts and the ability to cover existing imperfections in the concrete subfloor. However, meticulous preparation and adherence to established best practices are crucial for achieving a successful and long-lasting result.
This article provides a comprehensive guide to installing floating laminate flooring on concrete, covering essential preparatory steps, tool and material requirements, and detailed installation procedures.
Understanding Floating Laminate Flooring
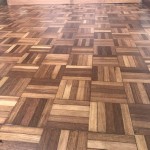
Floating laminate flooring distinguishes itself from traditional flooring options by not being directly adhered to the subfloor. Instead, individual planks or tiles interlock via a tongue-and-groove system, creating a continuous surface that "floats" above the concrete. This method allows for expansion and contraction of the flooring material due to fluctuations in temperature and humidity, preventing buckling or cracking. The success of this method depends heavily on a properly prepared subfloor and the use of an appropriate underlayment.
Essential Preparations for Concrete Subfloors
Proper preparation of the concrete subfloor is the most critical aspect of a successful floating laminate flooring installation. Failing to address potential issues can lead to problems such as uneven flooring, moisture damage, and premature wear.
1. Moisture Testing: Concrete is porous and can absorb moisture from the ground. Excessive moisture can damage laminate flooring, causing it to warp, swell, or develop mold. Therefore, it is essential to conduct a moisture test before installation. Several methods can be used:
- Calcium Chloride Test: This is a widely accepted and accurate method that involves placing a pre-weighed dish of calcium chloride on the concrete surface, sealing it with a plastic dome, and allowing it to sit for a specified period (typically 72 hours). The dish is then re-weighed to determine the amount of moisture absorbed. The results are used to calculate the moisture vapor emission rate (MVER). Most laminate flooring manufacturers specify a maximum MVER that the concrete subfloor must meet.
- Plastic Sheet Test: Although less precise than the calcium chloride test, this is a simpler method. A square of clear plastic sheeting (approximately 18" x 18") is taped securely to the concrete surface. After 24-72 hours, the plastic is inspected for condensation. If condensation is present beneath the plastic, it indicates excessive moisture levels. This is not a quantitative measure, but it can alert one to potential problems.
- Electronic Moisture Meter: These devices can provide a quick assessment of the moisture content in the concrete. However, it is important to use a meter specifically designed for concrete testing and to follow the manufacturer's instructions for accurate readings.
If the moisture test reveals excessive levels, remediation is necessary before proceeding with the installation. This may involve applying a moisture barrier coating to the concrete surface or addressing the source of the moisture intrusion.
2. Cleaning and Leveling: The concrete subfloor must be thoroughly cleaned to remove any dirt, debris, adhesive residue, or paint. A stiff broom, vacuum cleaner, and appropriate cleaning solutions may be required. Inspect the concrete surface for cracks, holes, or unevenness. Small cracks can be filled with a concrete patching compound. Larger cracks or significant unevenness may require the application of a self-leveling compound. These compounds are designed to flow evenly across the surface, creating a smooth and level base for the flooring.
To ensure the subfloor is level, use a long straightedge or a laser level to identify any high or low spots. The goal is to achieve a surface that is within the manufacturer’s specified tolerance for flatness, usually expressed as a maximum deviation over a certain distance (e.g., 3/16 inch over 10 feet). After applying patching compound or self-leveling compound, allow it to dry completely according to the manufacturer's instructions.
3. Acclimation: Laminate flooring needs to acclimate to the environment in which it will be installed. This involves storing the unopened boxes of flooring in the room where they will be installed for at least 48-72 hours prior to installation. This allows the material to adjust to the temperature and humidity of the room, minimizing expansion or contraction after installation. The room temperature should be within the normal range expected for the occupied space.
Tools and Materials Required
Having the right tools and materials on hand will streamline the installation process and ensure a professional-looking result. The following is a comprehensive list:
- Laminate Flooring: Calculate the square footage of the room and add at least 10% for waste.
- Underlayment: This provides cushioning, sound insulation, and additional moisture protection. Choose an underlayment specifically designed for use with laminate flooring on concrete. Some laminates come with pre-attached underlayment.
- Moisture Barrier (if needed): If moisture testing indicates a potential problem, a separate moisture barrier may be required in addition to the underlayment.
- Measuring Tape: For accurate measurements.
- Pencil: For marking cutting lines.
- Square: For ensuring accurate cuts.
- Laminate Flooring Cutter or Saw: A laminate flooring cutter is ideal for making clean, straight cuts. A circular saw or jigsaw can also be used, but ensure the blade is designed for cutting laminate to prevent chipping.
- Tapping Block: Used to gently tap the planks together without damaging the edges.
- Pull Bar: Used to tighten the last row of planks against the wall.
- Spacers: Placed along the walls to maintain an expansion gap.
- Hammer: For use with the tapping block and pull bar.
- Safety Glasses: To protect your eyes from debris.
- Knee Pads: For comfort during installation.
- Vacuum Cleaner: To keep the work area clean.
- Transition Strips: To cover the gaps where the laminate flooring meets other flooring types or doorways.
- Baseboards or Quarter Round: To cover the expansion gap along the walls.
- Construction Adhesive: For securing transition strips and baseboards (optional).
Step-by-Step Installation Procedure
The following steps outline the process of installing floating laminate flooring on a properly prepared concrete subfloor:
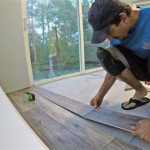
1. Install the Underlayment: Roll out the underlayment across the concrete subfloor, following the manufacturer's instructions. Overlap the edges of adjacent rolls by a few inches and tape them together with seam tape. The underlayment should cover the entire area where the laminate flooring will be installed.
2. Plan the Layout: Before starting the installation, plan the layout to ensure that the flooring looks balanced and aesthetically pleasing. Ideally, the planks should run parallel to the longest wall of the room. Measure the width of the room and divide it by the width of a plank to determine how many full planks will fit. If the result is a fraction, consider adjusting the starting row so that the last row will not be too narrow (less than half a plank width can be difficult to install and may look awkward).
3. Install the First Row: Begin installing the first row of planks along a straight wall, using spacers to maintain an expansion gap of at least ¼ inch between the planks and the wall. Ensure the tongue side of the plank is facing towards the wall. Interlock the planks end-to-end, using the tapping block and hammer if necessary to ensure a tight fit. The first row is critical because it sets the foundation for subsequent rows.
4. Install Subsequent Rows: Stagger the end joints of the planks in each row to create a more visually appealing and structurally sound floor. Typically, a minimum stagger of 6-12 inches is recommended. To start a new row, cut a plank to the desired length (the leftover piece can often be used to start a later row, minimizing waste). Angle the plank into the groove of the previous row at a slight angle and then press it down to lock it into place. Use the tapping block and hammer to ensure a tight fit. Pay close attention to the locking mechanism and ensure that the planks are properly engaged.
5. Cutting Around Obstacles: When encountering obstacles such as pipes or door frames, use a jigsaw to cut the planks to fit around them. Measure carefully and create a template if necessary. Leave a small expansion gap around the obstacle. Undercut door frames to allow the flooring to slide underneath, creating a clean and professional finish.
6. Installing the Last Row: The last row of planks will likely need to be cut to fit the remaining space. Measure the width of the space, taking into account the expansion gap. Use a pull bar to tighten the last row against the wall. This tool allows one to apply leverage and engage the locking mechanism, even in tight spaces.
7. Finishing Touches: Remove the spacers. Install transition strips where the laminate flooring meets other flooring types or doorways. Attach baseboards or quarter round to cover the expansion gap along the walls. Use a nail gun or construction adhesive to secure them in place. Be careful not to nail or adhere the baseboards directly to the flooring, as this would prevent the flooring from expanding and contracting freely.

Installing Laminate Flooring Over Concrete The Ultimate Guide Aa Floors

Installing Wood Flooring Over Concrete Diy

How To Install Laminate Over Concrete Day 1

How To Install Laminate Floor On Concrete In A Basement Ideas Budget Episode 5

Laminate Flooring On Concrete Basement Floors Expert Installation Guide Csg Renovation

How To Install Laminate Floor On Concrete In A Basement Ideas Budget Episode 5

Flooring Suggestions To Hold Floating Laminate Floor From Sliding On Vapor Barrier Installed Over Concrete Slab Home Improvement Stack Exchange

How To Install Vinyl Or Laminate Floors In A Basement Over Concrete Slab

Easy Ways To Install Vinyl Plank Flooring On Concrete

How To Install Laminate Flooring Over Concrete Your Home Renewed
Related Posts