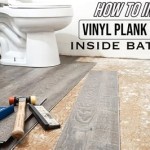
How To Install Luxury Vinyl Plank Flooring Around a Toilet
Installing luxury vinyl plank (LVP) flooring is a popular DIY project, offering a stylish and durable alternative to traditional flooring options. However, installing around a toilet presents a unique challenge due to its fixed position and the need for precise cutting. This article outlines the steps involved in successfully installing LVP flooring around a toilet, ensuring a seamless and professional-looking finish.
1. Preparing the Subfloor and Toilet
The first step in the installation process involves preparing both the subfloor and the toilet. This ensures a smooth and stable surface for the LVP planks to be laid upon, minimizing the risk of movement or unevenness. To prepare the subfloor, inspect it for any imperfections, such as cracks, gaps, or unevenness. If necessary, repair these issues with wood filler or leveling compound. It's important to ensure the subfloor is level and free of moisture to prevent problems with the LVP flooring.
Next, prepare the toilet for the installation. This involves turning off the water supply to the toilet and flushing to empty the bowl. Once empty, detach the toilet from the floor by removing the bolts connecting it to the flange. Carefully lift the toilet and set it aside. If the toilet flange is damaged or loose, consider replacing it before proceeding with the installation.
2. Measuring and Cutting the LVP Planks
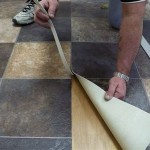
Before cutting any LVP planks, it's crucial to accurately measure the area around the toilet. This involves determining the width and length of the space where the planks will be installed. Precise measurements will ensure that the planks fit snugly around the toilet, avoiding any gaps or overlaps. Use a measuring tape and pencil to mark the desired cuts on the planks. It's important to consider the direction of the planks and ensure that the cuts align with the intended pattern.
Once the measurements are taken, utilize a utility knife or a circular saw with a fine-tooth blade to cut the LVP planks. For intricate cuts around the toilet base, a jigsaw with a fine-tooth blade can be used to achieve precise curves. When cutting, make sure to use a cutting mat or a piece of scrap wood to protect the surface from scratches. Cutting the planks to the correct size ensures a neat and professional finish.
3. Installing the LVP Planks
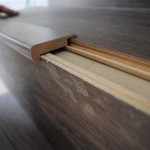
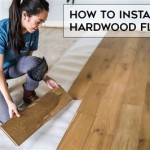
After preparing the subfloor, toilet base, and cutting the LVP planks, you can start installing the planks. Depending on the type of LVP, the installation process might involve adhesive, clicking, or floating methods. Adhering to the manufacturer's instructions is crucial for proper installation and ensuring a long-lasting finish.
When laying the planks around the toilet, start with the furthest plank from the toilet base. This ensures that any remaining space will be filled with a full plank, avoiding the need for excessive cutting. As you approach the toilet area, carefully align the planks and use a spacer to maintain a consistent gap between the planks and the toilet base. The spacers will allow for expansion and contraction of the LVP flooring due to temperature changes.
4. Sealing the Gaps and Finishing Touches
After installing the LVP planks, it's important to seal any gaps between the planks and the toilet base. This prevents moisture from seeping beneath the flooring and potentially causing damage. Use a high-quality caulk to fill any gaps and ensure a smooth transition between the floor and the toilet. Allow the caulk to dry completely before proceeding to the final steps.
Once the caulk has dried, carefully reposition the toilet back onto the flange, ensuring it's level and properly sealed. If necessary, tighten the bolts securing the toilet to the floor. Replace the toilet seat and tank. Finally, inspect the entire flooring installation for any imperfections or inconsistencies. Make any necessary adjustments to ensure a flawless finish.

How To Install Vinyl Plank Flooring In A Bathroom Fixthisbuildthat

How To Easily Install Vinyl Flooring Around A Toilet

How To Install Vinyl Plank Flooring In A Bathroom

How To Cut Flooring Around A Toilet Luxury Vinyl Plank Bathroom Installation Calibamboo

How To Install Vinyl Plank Flooring In A Bathroom Fixthisbuildthat

How To Install Vinyl Plank Flooring In A Bathroom Fixthisbuildthat

How To Install Vinyl Plank Flooring In A Bathroom As Beginner Home Renovation

How To Install Vinyl Plank Flooring In A Bathroom

How To Install Vinyl Plank Flooring In A Bathroom Fixthisbuildthat

How To Install Vinyl Plank Flooring In A Bathroom Fixthisbuildthat
Related Posts