How to Install Engineered Hardwood Flooring: A Comprehensive Guide
Installing engineered hardwood flooring using the nail-down method is a popular flooring option thanks to its durability, aesthetic appeal, and ease of maintenance. Here's a step-by-step guide to help you successfully install engineered hardwood flooring:
Step 1: Gather Materials and Tools
Ensure you have the following before starting:
- Engineered hardwood flooring
- Flooring nails and flooring nailer
- Tape measure, pencil, and chalk line
- Tapping block
- Safety goggles
- Dust mask
- Knee pads
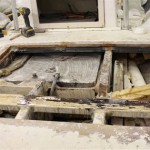
Step 2: Prepare the Subfloor
The subfloor should be clean, level, and structurally sound. Remove any old flooring, dirt, or debris. Level the subfloor using plywood or other leveling materials.
Step 3: Install an Underlayment
An underlayment provides sound insulation, moisture protection, and a smooth surface for the flooring. Roll out the underlayment over the subfloor and secure it with tape or staples.
Step 4: Determine the Starting Point
Choose a starting point along a straight wall. Use a chalk line to mark a straight line perpendicular to this wall as your first row guide.
Step 5: Install the First Row
Place the first plank along the chalk line. Nail the plank into the subfloor through the tongue side using the flooring nailer. Leave an expansion gap of 1/4 inch along all walls.
Step 6: Install Subsequent Rows
Angle the next plank into the groove of the previous one. Tap the plank into place using a tapping block. Nail the plank through the tongue and groove into the subfloor.
Step 7: Stagger Joints
For added strength and stability, stagger the end joints of the planks. Alternate the starting point of each row to create a staggered pattern.
Step 8: Nail the Flooring
Continue laying and nailing the flooring planks until the entire area is covered. Use a flooring nailer to drive nails at a 45-degree angle through the tongue and into the subfloor.
Step 9: Install Trim and Transition Strips
Install baseboards and quarter round molding to cover the expansion gap along walls. Use transition strips to connect different flooring types or to create a seamless transition between rooms.
Step 10: Sand and Finish the Floor
(Optional) For a smoother and more polished finish, sand the floor lightly and apply a protective finish such as polyurethane or lacquer.
Conclusion
Installing engineered hardwood flooring using the nail-down method is a rewarding project that can enhance the beauty and durability of your home. By carefully following these steps, you can enjoy a stunning wood floor that will last for years to come.

Floating Floor Vs Nail Down Slaughterbeck Floors Inc

Which Method Should I Use To Install My Engineered Wood Floor Tesoro Woods

Engineered Hardwood Floors Installation Floor Refinishing New Jersey Repair Sanding

Installing Engineered Hardwood Flooring In The Not So Tiny House

Engineered Hardwood Floors Installation Floor Refinishing New Jersey Repair Sanding

Is Nail Down Installation The Best Unique Wood Floor

Advantages Of Nail Down Floor Installation Wood Fitting

How To Install An Engineered Hardwood Floor

How To Install Lock Engineered Hardwood Flooring

Which Method Should I Use To Install My Engineered Wood Floor Tesoro Woods