How To Install Ceramic Tile Flooring
Installing ceramic tile flooring can significantly enhance the aesthetic appeal and durability of any room. While it may seem like a daunting task, with careful planning, the right tools, and a systematic approach, a homeowner can successfully install ceramic tile flooring, achieving a professional-looking result. This article provides a comprehensive guide on the process, covering everything from preparation to grouting.
The initial phase of any successful tiling project involves meticulous preparation. Neglecting this stage can lead to uneven surfaces, tile adhesion issues, and ultimately, a less-than-desirable outcome. This preparatory phase encompasses several critical steps that ensures the subfloor is ready to receive the tile.
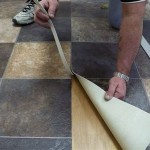
First and foremost, the existing flooring must be removed. This could include carpet, vinyl, or even old tile. The process varies depending on the existing material. Carpet typically requires cutting and pulling, while vinyl may need adhesive removal tools. Old tile removal can be more challenging, often necessitating a hammer and chisel or a specialized tile scraper. Safety glasses and gloves are essential during this stage to protect against flying debris and sharp edges.
Once the existing flooring has been removed, the subfloor must be thoroughly cleaned. Vacuuming is essential to remove loose debris, dust, and any remaining adhesive. Following the vacuuming, a damp mop with a mild cleaning solution can further prepare the surface by removing any residual grime or dirt. Allow the subfloor to dry completely before proceeding.
One of the most crucial aspects of preparation is ensuring the subfloor is level. Uneven surfaces can lead to cracked tiles and an unprofessional appearance. A long level, ideally 6 feet or longer, should be used to check for any dips or high spots across the entire floor. Minor imperfections can be corrected with self-leveling compound, which is poured onto the floor and allowed to flow evenly, creating a smooth, consistent surface. For larger discrepancies, plywood shims may be required to raise low areas. These shims should be securely fastened to the existing subfloor with screws.
Finally, priming the subfloor is highly recommended. Primer enhances the adhesion of the thin-set mortar to the subfloor, preventing moisture from being absorbed into the subfloor and potentially weakening the bond. Choose a primer specifically designed for tile installations and apply it according to the manufacturer's instructions. Allow the primer to dry completely before moving on to the next stage.
Planning the Layout
Before applying any thin-set or laying any tile, careful planning of the layout is essential. A well-planned layout minimizes cuts, avoids awkward tile placements, and ensures a visually appealing finished product. This involves finding the center point of the room and establishing reference lines.
Begin by identifying the center of the room. The most effective method is to measure the length and width of the room and then mark the midpoint of each. Snap a chalk line between the midpoints of opposite walls to create two intersecting lines. The intersection of these lines represents the center of the room.
Dry-laying the tile allows a homeowner to visualize the final layout and identify any potential issues. Start at the center point and lay out a row of tiles along each chalk line, using tile spacers to maintain consistent spacing between the tiles. This process reveals how many full tiles will fit and the size of the cuts required along the edges of the room.
Adjust the layout as needed to minimize small tile cuts along the perimeter. Ideally, perimeter tiles should be at least half the size of a full tile. This might involve shifting the center point slightly or adjusting the starting point of the layout. The goal is to achieve a balanced and aesthetically pleasing appearance with minimal waste.
Once the layout is finalized, mark the positions of the tiles on the subfloor with a pencil. This provides a visual guide during the installation process and helps ensure that the tiles are placed accurately. Pay particular attention to areas around doorways, fixtures, and other obstacles.
Applying Thin-Set Mortar and Laying Tile
With the subfloor prepared and the layout planned, the next step involves applying thin-set mortar and laying the tile. This requires careful technique and attention to detail to ensure proper adhesion and a level surface. Using the correct tools is helpful for efficient installation.
Mix the thin-set mortar according to the manufacturer's instructions. The consistency should be similar to peanut butter – smooth and spreadable. Avoid adding too much water, as this can weaken the mortar and compromise its bonding ability. Using a drill with a mortar mixing attachment is highly recommended for achieving a consistent mixture. Allow the mortar to slake for the recommended time, usually around 10 minutes, and then remix it before applying.
Using a notched trowel, apply a thin layer of thin-set mortar to the subfloor. The notch size will depend on the size of the tile. As a general rule, larger tiles require larger notches to ensure proper coverage. Hold the trowel at a 45-degree angle and apply even pressure to create uniform ridges in the mortar. Only apply mortar to a manageable area – typically 2-3 square feet at a time – to prevent it from drying out before the tiles are laid.
Position the tile carefully onto the mortar bed, pressing down firmly and twisting slightly to ensure good contact. Use tile spacers to maintain consistent spacing between the tiles. The size of the spacers will depend on the desired grout line width. Ensure that the tiles are level and aligned with the layout marks. Use a rubber mallet to gently tap the tiles into place, if necessary. Periodically check the levelness of the tiles with a level, making adjustments as needed before the mortar sets.
For tiles that require cutting, use a wet saw for straight cuts and a tile nipper for curved or intricate cuts. Always wear safety glasses and gloves when using cutting tools. Measure and mark the tile accurately before cutting. After cutting, smooth the edges of the tile with a rubbing stone or a tile file to remove any sharp edges.
Continue applying mortar and laying tiles, working systematically across the room. Periodically check the alignment and levelness of the tiles. Remove any excess mortar from the tile surfaces with a damp sponge as you go. Allow the thin-set mortar to cure for the recommended time, typically 24-48 hours, before proceeding to the next stage.
Grouting and Cleaning
Once the thin-set mortar has fully cured, the final step is grouting. Grouting fills the spaces between the tiles, providing a finished look and preventing water from seeping beneath the tiles. After the grout has cured, proper cleaning is important to maintain the tile's aesthetic.
Remove the tile spacers before applying the grout. Use a grout saw or a utility knife to carefully remove any excess thin-set mortar that may have squeezed up between the tiles. Ensure that the grout lines are clean and free of debris.
Mix the grout according to the manufacturer's instructions. Choose a grout color that complements the tile and the overall aesthetic of the room. Apply the grout to the tile surface using a grout float, working diagonally across the tiles to force the grout into the grout lines. Ensure that all the grout lines are completely filled.
Remove excess grout from the tile surface with the grout float, holding it at a 45-degree angle. Next, use a damp sponge to clean the remaining grout residue from the tile surface. Rinse the sponge frequently in clean water. Be careful not to remove too much grout from the grout lines. Allow the grout to dry slightly, and then use a clean, dry cloth to buff the tile surface and remove any remaining haze.
After the grout has cured for the recommended time, typically 24-72 hours, apply a grout sealer to protect the grout from stains and moisture. Follow the manufacturer's instructions for applying the sealer. Allow the sealer to dry completely before using the floor.
After sealing the grout, a final cleaning of the tile surface is recommended. Use a mild detergent and a soft mop to clean the tiles. Avoid using abrasive cleaners or scouring pads, as these can scratch the tile surface. Regular cleaning and maintenance will help keep the ceramic tile flooring looking its best for years to come.

Complete Guide On How To Install Ceramic Floor Tiles Rubi Blog Usa

Complete Guide On How To Install Ceramic Floor Tiles Rubi Blog Usa

How To Install A Tile Floor The Home Depot

How To Install Ceramic Floor Tiles Westside Tile And Stone

Installing Tile Floor For The First Time How To Lay Crafted Work

How To Install A Ceramic Tile Floor Dummies

2024 Ceramic Tile Installation Cost A Complete Guide Angi

How To Install A Tile Floor The Home Depot

Materials Needed To Lay Tile Floor The Best Tools Rubi Blog Usa

How To Lay A Ceramic Or Porcelain Tile Floor Step By
Related Posts


