How to Calculate Floor Area for Laminate Flooring
Accurately calculating the floor area is a crucial initial step in any laminate flooring project. An imprecise measurement can lead to purchasing insufficient material, resulting in project delays and added expenses, or acquiring excessive material, increasing the overall cost. This article outlines a step-by-step methodology for calculating floor area, incorporating factors for waste and pattern matching, ensuring a successful and cost-effective laminate flooring installation.
Laminate flooring offers a durable and aesthetically pleasing alternative to hardwood, tile, or carpet. Its relatively simple installation process makes it a popular choice for both DIY enthusiasts and professional contractors. However, before even considering the installation process, properly determining the amount of material needed becomes paramount. This precedes any decisions about laminate type, color, or pattern, as the quantity of materials required directly impacts the budget and planning.
1. Measuring the Room’s Dimensions
The initial step involves accurately measuring the dimensions of the room or rooms where the laminate flooring will be installed. A reliable measuring tape is essential for this task. Ensure the tape is extended fully and held taut along the walls to obtain accurate readings. Measure each wall’s length individually, paying close attention to ensure the measurements are taken at the baseboard level where the flooring will be installed. Avoid measuring along the top of the wall, as these measurements may vary due to inconsistencies in wall construction. Record each measurement clearly, using either metric (meters and centimeters) or imperial (feet and inches) units, maintaining consistency throughout the entire calculation process.
For rooms with irregular shapes, such as those containing alcoves or bay windows, divide the room into smaller, more manageable rectangular or square sections. Measure each section independently and record the dimensions. These individual areas will be calculated separately and then summed to determine the total floor area. This approach simplifies the calculations and minimizes potential errors associated with complex shapes.
When measuring around permanent fixtures like pipes or columns, measure to the furthest point of the obstruction. These areas are considered part of the total floor area and must be accounted for when calculating the final material requirement. Note the location and dimensions of these obstructions for potential cutting and fitting adjustments during the installation process.
Accurately recording the measurements immediately after they are taken prevents confusion and reduces the risk of repeating measurements multiple times. A clear diagram of the room with labeled dimensions for each wall and section proves highly beneficial in organizing the data and facilitating the subsequent calculations.
2. Calculating the Floor Area
Once all dimensional measurements have been accurately recorded, the next step involves calculating the floor area. For rectangular or square rooms, the calculation is straightforward: multiply the length of the room by its width. For example, if a room measures 12 feet in length and 10 feet in width, the floor area is 12 feet * 10 feet = 120 square feet. Ensure the units are consistent; if measurements are in feet and inches, convert all measurements to feet before performing the calculation, or convert the final result to square feet and inches.
For rooms divided into multiple sections, calculate the area of each individual section using the same length-multiplied-by-width formula. Once each section's area has been determined, sum these individual areas to obtain the total floor area of the room. This approach ensures accuracy when dealing with more complex room layouts.
If the measurements were taken in metric units (meters and centimeters), convert all measurements to meters before calculating the area. The area will then be expressed in square meters. For example, if a room measures 4 meters in length and 3 meters in width, the floor area is 4 meters * 3 meters = 12 square meters. Converting to square feet can be done by multiplying the square meter result by approximately 10.764.
Double-checking the calculations is crucial to minimize errors. Recalculating each area independently and comparing the results ensures accuracy. Any discrepancies should be investigated and resolved before proceeding to the next step.
3. Accounting for Waste and Pattern Matching
The calculated floor area represents the bare minimum amount of laminate flooring required. However, it needs to be adjusted to account for waste due to cutting, fitting around obstacles, and potential damage during installation. Additionally, if the laminate flooring has a specific pattern that requires matching, further adjustments are needed. A general guideline is to add a waste factor of 5-10% for standard installations. However, for complex room layouts or patterned laminate, a higher waste factor of 10-15% or even 20% may be necessary.
To calculate the waste allowance, multiply the total floor area by the chosen waste percentage. For example, if the total floor area is 120 square feet and a 10% waste factor is applied, the waste allowance is 120 square feet * 0.10 = 12 square feet. Add this waste allowance to the total floor area to determine the final material requirement: 120 square feet + 12 square feet = 132 square feet. This is the minimum amount of laminate flooring that should be purchased to cover the room adequately.
When dealing with patterned laminate flooring, the waste factor often needs to be increased significantly. Pattern matching requires cutting and aligning the laminate planks to maintain a continuous visual flow. This can result in a substantial amount of waste, particularly for intricate patterns. Carefully assess the complexity of the pattern and consider adding an additional 5-10% to the waste factor, potentially resulting in a total waste factor of 15-25%. Consulting with a flooring professional or the laminate manufacturer can provide valuable insights into the specific waste requirements for a particular patterned product.
Consider purchasing an extra box of laminate flooring as a contingency. This provides additional material for unexpected waste, damage during installation, or future repairs. Storing this extra material in a dry, climate-controlled environment ensures it remains in good condition for potential use later. This small investment can save considerable time and expense if a replacement piece is needed in the future.
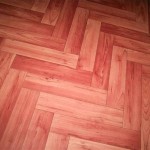
The direction in which the laminate is laid can also impact the amount of waste. Laying laminate diagonally across a room often results in more waste than laying it parallel to the longest wall. Consider the chosen installation direction when determining the appropriate waste factor.
Finally, note that the packaging of the laminate flooring might dictate how much to purchase. Laminate is usually sold by the box, with each box covering a specific square footage. Divide the total square footage needed (including waste) by the square footage per box to determine the number of boxes to purchase. Always round up to the nearest whole box, as partial boxes are typically not sold.
By meticulously measuring the room dimensions, accurately calculating the floor area, and prudently accounting for waste and pattern matching, individuals can confidently determine the necessary amount of laminate flooring required for their project. This detailed approach minimizes the risk of material shortages and unnecessary expenses, contributing to a successful and satisfying laminate flooring installation.

How To Measure Floor For Laminate 9 Steps With S

How To Measure A Room For Laminate Flooring

Calculate Area For The Correct Amount Of Laminate Flooring Needed

How To Measure Floor For Laminate 9 Steps With S

How Do You Measure A Room Flooring Advice Supplies

How To Determine Square Footage For Flooring Vermont Hardwoods

How To Measure Rooms For Flooring Help Advice Leader Floors

How To Measure Floor For Laminate 9 Steps With S

Flooring Calculator How Much Do I Need

Quantity Calculator How Much Laminate Flooring Do You Need Swiss Krono
Related Posts