Essential Aspects of Glue Down Vinyl Flooring Installation
Glue down vinyl flooring, also known as resilient flooring, is a durable and versatile option that offers a wide range of design possibilities. It's perfect for busy areas like kitchens, bathrooms, and high-traffic hallways. Installing glue down vinyl flooring requires precision and attention to detail, but with the right preparation and materials, you can achieve a professional-looking finish.
1. Preparing the SubfloorThe subfloor should be smooth, level, and free of any imperfections or debris. Vacuum and sweep the subfloor thoroughly, and use a leveling compound to fill any gaps or depressions. Remove any existing baseboards or moldings, and ensure that the subfloor is dry and moisture-free.
2. Installing the UnderlaymentAn underlayment is an essential layer that provides cushioning and sound insulation. Roll out the underlayment over the subfloor, overlapping the seams by a few inches. Secure the underlayment with tape or glue.
3. Dry-Fitting the Vinyl TilesBefore applying any adhesive, dry-fit the vinyl tiles to determine their placement and ensure proper coverage. This will help you identify any potential cutting or trimming that may be required.
4. Applying the AdhesiveUse a notched trowel to spread the adhesive evenly over the subfloor. Apply the adhesive in small sections to prevent it from drying before the tiles are installed. The amount of adhesive required will vary depending on the flooring manufacturer's recommendations.
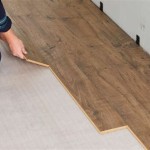
5. Installing the Vinyl TilesCarefully place the vinyl tiles into the adhesive, starting from the center of the room and working your way outwards. Press down firmly to ensure good adhesion. Use spacers to maintain uniform spacing between the tiles.
6. Rolling and Weighting the FloorOnce all the tiles are installed, use a heavy roller to press down on the floor to enhance adhesion. You can also place weights or heavy objects on the floor overnight to further secure it.
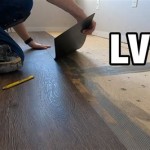
7. Trimming and FinishingTrim any excess vinyl around the edges of the room using a sharp utility knife. Reinstall the baseboards or moldings and seal any gaps or seams with caulk.
Tips:- Use a sharp knife for precise cutting and trimming.
- Allow the adhesive to cure completely before allowing foot traffic.
- Clean the floor regularly with a damp mop and neutral cleaner.
- Avoid using abrasive cleaners or harsh chemicals on the floor.
By following these steps carefully, you can ensure a successful glue down vinyl flooring installation. Its durability and ease of maintenance will provide you with a beautiful and long-lasting flooring solution for years to come.

Post Nbl Express Eco Flooring

Deal Floors Step By Glue Down Vinyl Plank Installation Guide Flooring Blog Ideal In Dallas Fort Worth

Ivc Lvt Igrip Glue Down Installation With Trowel Full

How To Install Glue Down Vinyl Plank

How To Install Glue Down Vinyl Floor

Floating Vinyl Plank Flooring Vs Glue Down 99cent Floor

Flooring Installation Comparison Guide System Vs Glue Down Method Floorrich

Diy How To Install Glue Down Vinyl Plank Flooring

Glue Down Vinyl Plank Flooring Tagged 7 X 73 Inch

How To Install Plank Vinyl Glue Down
Related Posts


