Can You Paint Old Vinyl Flooring? A Comprehensive Guide
Vinyl flooring, once a ubiquitous choice for kitchens and bathrooms, often remains in place long after its aesthetic appeal has faded. Replacing it can be a significant undertaking, involving cost, labor, and potential disruption to daily life. Painting old vinyl flooring presents itself as a more accessible alternative, promising a quick and relatively inexpensive update. However, the success of this venture hinges on several factors, requiring careful consideration and proper execution.
The feasibility of painting vinyl flooring depends on its condition, type, and the preparation undertaken. While painting offers a potential solution for covering up worn or outdated designs, it's not a universal remedy for all vinyl flooring issues. Understanding the nuances of vinyl flooring and the painting process is crucial for achieving a durable and aesthetically pleasing outcome.
Assessing the Condition and Type of Vinyl Flooring
Prior to embarking on a painting project, a thorough assessment of the vinyl flooring is essential. Not all vinyl flooring is created equal, and its condition significantly impacts the likelihood of achieving a successful and long-lasting paint job. Several factors warrant careful scrutiny.
First, the presence of significant damage should be evaluated. Deep scratches, gouges, tears, or widespread staining can compromise the paint's adhesion and overall aesthetic. While minor imperfections can often be addressed with fillers or patching compounds, extensive damage may indicate that replacement is a more prudent option.
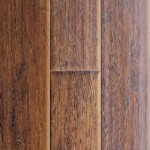
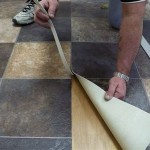
Second, the type of vinyl flooring plays a crucial role. Sheet vinyl, typically installed in large, continuous pieces, generally presents a more suitable surface for painting compared to vinyl tiles. Vinyl tiles often have beveled edges or textured surfaces that can make achieving a smooth, uniform finish challenging. Moreover, older vinyl tiles may contain asbestos, necessitating professional assessment and abatement before any alteration, including painting, is considered.
Third, the presence of a wax or polish coating must be carefully addressed. These coatings prevent paint from properly adhering to the vinyl surface. Thorough removal of any existing wax or polish is paramount to ensure a successful paint job. Specialized wax strippers and rigorous scrubbing may be required.
Fourth, the flooring's stability is critical. If the vinyl is loose, lifting, or showing signs of adhesive failure, painting will only exacerbate the problem. Addressing the underlying issues with the subfloor and adhesive is necessary before any painting can commence. Failure to do so will result in the paint cracking and peeling as the vinyl continues to shift.
Preparing the Vinyl Flooring for Painting
Proper preparation is the cornerstone of a successful vinyl flooring painting project. Skimping on this crucial step will almost certainly result in a subpar finish that is prone to peeling, chipping, and premature wear. The preparation process involves thorough cleaning, surface abrasion, and the application of a suitable primer.
The initial step involves a deep cleaning of the vinyl floor. This removes dirt, grease, grime, and any other contaminants that could impede paint adhesion. A strong detergent solution, such as trisodium phosphate (TSP), is effective for cutting through grease and removing stubborn residues. It's crucial to wear appropriate safety gear, including gloves and eye protection, when working with TSP.
After cleaning, the floor must be thoroughly rinsed with clean water to remove any remaining detergent residue. Allowing the floor to dry completely is essential before proceeding to the next step. Any moisture trapped beneath the paint can cause blistering and peeling.
Once dry, the vinyl surface needs to be abraded to create a slightly rough texture that will allow the primer to grip effectively. This can be achieved using fine-grit sandpaper (180-220 grit). Lightly sanding the entire surface is sufficient; excessive sanding can damage the vinyl. The goal is to create "tooth" for the primer to adhere to, not to remove the existing pattern or color completely.
After sanding, meticulously remove all sanding dust with a vacuum cleaner followed by a tack cloth. Any remaining dust will compromise the primer's adhesion and result in a rough, uneven finish.
The final preparation step involves applying a high-quality primer specifically designed for use on vinyl or PVC surfaces. These primers are formulated to chemically bond with the vinyl, creating a stable base for the paint. Follow the manufacturer's instructions carefully regarding application techniques and drying times. Applying multiple thin coats of primer is generally preferable to a single thick coat, as it promotes better adhesion and reduces the risk of drips and runs.
Selecting the Right Paint and Application Techniques
The choice of paint and the application methods employed significantly impact the durability and aesthetic appeal of the finished floor. Not all paints are suitable for vinyl flooring, and improper application techniques can lead to a disappointing outcome. Selecting the right materials and employing proper techniques are essential for achieving a professional-looking and long-lasting paint job.
For vinyl flooring, a high-quality acrylic latex or epoxy paint is generally recommended. Acrylic latex paints offer good durability, ease of application, and water-based cleanup. Epoxy paints provide superior durability and resistance to chemicals and abrasion, making them a suitable choice for high-traffic areas. However, epoxy paints typically require more meticulous preparation and application.
Avoid using oil-based paints on vinyl flooring. Oil-based paints tend to be too rigid and can crack and peel over time as the vinyl expands and contracts with temperature changes.
Regardless of the chosen paint type, it's crucial to select a product specifically designed for floor applications. These paints are formulated to withstand foot traffic and resist scuffing and staining. Consult with a paint specialist at a reputable paint store to ensure you select the appropriate product for your specific needs.
When applying the paint, use high-quality rollers and brushes. A short-nap roller is ideal for achieving a smooth, even finish. For edging and corners, use a high-quality angled brush. Apply thin, even coats of paint, allowing each coat to dry completely before applying the next. Multiple thin coats are always preferable to a single thick coat, as they promote better adhesion and reduce the risk of drips and runs.
Follow the manufacturer's instructions regarding drying times and curing times. Curing refers to the time it takes for the paint to fully harden and achieve its maximum durability. Avoid heavy foot traffic on the painted floor during the curing process. Consider using painter's tape to protect baseboards and other adjacent surfaces from accidental paint splatters.
After the paint has fully cured, consider applying a clear polyurethane topcoat for added protection. A polyurethane topcoat will enhance the durability of the painted floor and make it more resistant to scratches, scuffs, and stains. Choose a water-based polyurethane specifically designed for floor applications. Apply multiple thin coats, allowing each coat to dry completely before applying the next.
Finally, regular maintenance is crucial for preserving the appearance and longevity of the painted vinyl floor. Sweep or vacuum regularly to remove dirt and debris. Clean spills promptly with a damp cloth. Avoid using abrasive cleaners or harsh chemicals, as they can damage the paint finish. Consider using floor mats in high-traffic areas to protect the painted surface from excessive wear.

How To Paint Vinyl Flooring Family Handyman

Ricochet And Away I Painted My Vinyl Floor

How I Painted My Vinyl Floor Repurposed Life

Painted Vinyl Floor 1 Year Later Semigloss Design

How To Paint Vinyl Floors For Long Lasting Results Painted Flooring

How To Paint A Vinyl Floor Diy Painted Floors Dans Le Lakehouse

How To Paint Linoleum Flooring The Honeycomb Home

How To Paint Linoleum Flooring The Honeycomb Home

How To Paint Over Vinyl Floors Modernize

Painted Vinyl Linoleum Floor Makeover Ideas Fox Hollow Cottage
Related Posts