Unlocking the Secrets: Essential Aspects of Armstrong Engineered Flooring Installation
Armstrong Engineered Flooring has earned a reputation for its exceptional quality, durability, and aesthetic appeal. Here's a comprehensive guide to ensure a successful installation process:
1. Proper Subfloor Preparation
A solid and level subfloor is paramount for a stable flooring installation. Inspect the subfloor for any irregularities, such as slopes, gaps, or moisture issues. Resolve any discrepancies by leveling, patching, or installing an underlayment as needed.
2. Moisture Control
Moisture is the nemesis of wood flooring. Ensure the subfloor is dry and has proper moisture protection. Install a vapor barrier over the subfloor to prevent moisture vapor from rising and damaging the flooring. Maintain proper humidity levels in your home to minimize moisture-related issues.
3. Expansion Gap Allowance
Engineered flooring expands and contracts with changes in temperature and humidity. Allow proper expansion gaps around the perimeter of the room and between fixed objects, such as walls and cabinetry. Use appropriately sized spacers to ensure a snug fit while allowing for expansion and contraction.
4. Flooring Acclimation
Before installation, allow the engineered flooring to acclimate to the temperature and humidity of the room where it will be installed. This typically involves leaving the flooring in its packaging unopened for several days in the installation environment. Acclimation reduces the risk of warping or buckling.
5. Adhesive Selection
The choice of adhesive is crucial for the performance of your flooring. Armstrong Engineered Flooring recommends using flooring adhesives specifically designed for engineered flooring. Refer to the manufacturer's instructions to select the appropriate adhesive for your specific flooring type and installation method.
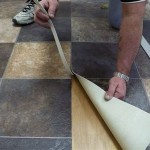
6. Installation Techniques
Armstrong Engineered Flooring offers both glue-down and floating installation methods. Glue-down involves adhering the flooring directly to the subfloor, while floating involves attaching the planks together and allowing them to float over an underlayment. Follow the recommended installation technique based on the flooring type and subfloor conditions.
7. Trim and Moldings
The finishing touch to your flooring is achieved through trims and moldings. These accessories conceal expansion gaps, protect the edges of the flooring, and enhance the aesthetic appeal. Use moldings specifically designed for engineered flooring to ensure compatibility and durability.
By adhering to these essential aspects, you can ensure a flawless and long-lasting Armstrong Engineered Flooring installation that will enhance the beauty and value of your home for years to come.

Engineered Hardwood Flooring

Armstrong Floor Installation Service Inc

Armstrong Engineered Wood Flooring Gallery

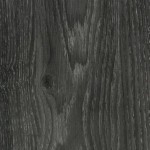
Engineered Wood Flooring Hartco Formerly Armstrong Historic Reveal Warm Brown Ehrl63l25w Hurst Hardwoods

Enginereed Wood Flooring Hartco Formerly Armstrong Timberbrushed Gold Unearthed Eklp85l03w Hurst Hardwoods

Armstrong Engineered Wood Flooring Gallery

Armstrong Floors Hardwood Flooring Prime Harvest Engineered 6 5 X Random Tan Ekph64l02see The Noble Whole Tampa Bay

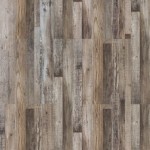
Armstrong Flooring Sample Pro Mark Barnwood Blend Waterproof Wood Look Glue Down Luxury Vinyl Plank In The Samples Department At Com

Engineered Wood Flooring Hartco Formerly Armstrong Heritage Remix Antique Inspired Emhrm3l40h Hurst Hardwoods

Armstrong Performance Plus Low Gloss Engineered Hardwood Woodland View Walnut 3 8 X 5 Panel Town Floors
Related Posts