Essential Aspects of Tranquility Vinyl Wood Plank Flooring Installation
Tranquility Vinyl Wood Plank Flooring offers an exquisite combination of style, durability, and comfort. Its easy-to-install planks make it a popular choice for homeowners and DIY enthusiasts looking to enhance their living spaces. Here are some crucial aspects to consider for a seamless and successful Tranquility Vinyl Wood Plank flooring installation:1. Subfloor Preparation
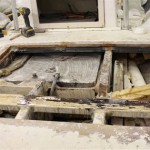
The foundation of a stable and long-lasting floor lies in a well-prepared subfloor. Ensure the subfloor is level, moisture-free, and free of any imperfections. Level the uneven areas using self-leveling compounds, repair any cracks or holes, and remove any existing flooring or debris.2. Moisture Protection
Tranquility Vinyl Wood Plank Flooring is water-resistant, but it's crucial to install a moisture barrier to prevent moisture from seeping into the subfloor, especially in areas prone to spills or humidity. Use a polyethylene moisture barrier with a minimum thickness of 6 mils.3. Flooring Acclimation
Before installing the planks, allow them to acclimate to the room temperature for at least 48 hours. This helps reduce expansion and contraction after installation, minimizing the risk of buckling or gaps. Store the planks in the room where they will be installed, keeping them flat and off the floor.4. Adhesive Selection
Tranquility Vinyl Wood Plank Flooring can be installed using either peel-and-stick adhesive or a moisture-resistant flooring adhesive. For areas with heavy traffic or potential moisture exposure, choose a high-quality flooring adhesive. Always follow the manufacturer's instructions for adhesive selection and application.5. Plank Placement
Start the installation in a corner of the room and work your way out. Position the planks according to the manufacturer's guidelines for staggering and spacing. Use spacers to ensure even gaps between planks. For a more natural look, alternate the starting end of each row.6. Cutting and Trimming
Precise cutting and trimming are essential for a professional-looking finish. Use a utility knife or a flooring cutter for straight cuts and a jigsaw for intricate cuts. Leave a small gap around the perimeter of the room for expansion and contraction.7. Trims and Accessories
Trims and accessories, such as baseboards, moldings, and transition strips, provide a polished and complete look. Install the trims after the flooring is installed, using appropriate fasteners and sealants. Transition strips are used to connect flooring materials of different heights or materials.8. Cleaning and Maintenance
After installation, sweep or vacuum the floor to remove any dust or debris. Use a damp mop with a neutral cleaner designed for vinyl flooring. Avoid abrasive cleaners or harsh chemicals that can damage the finish. By adhering to these essential aspects, you can enjoy a beautiful and long-lasting Tranquility Vinyl Wood Plank Flooring installation that will add value and style to your home.
How To Install A Tranquility Resilient Flooring With Tips From Property Improvement Guru Llc

I Installed Tranquility Vinyl Plank Flooring Organically Ann

Tranquility Vinyl Floor Installation

Tranquility Ultra 5mm River Walk Oak Waterproof Luxury Vinyl Plank Flooring 6 In Wide X 48 Long Ll

My Luxury Vinyl Plank Flooring Review Pros And Cons Average But Inspired

I Installed Tranquility Vinyl Plank Flooring Organically Ann

Tranquility Xd 4mm Rail Tie Oak Waterproof Luxury Vinyl Plank Flooring 7 08 In Wide X 48 Long Ll

My Luxury Vinyl Plank Flooring Review Pros And Cons Average But Inspired

Mohawk Solidtech Luxury Vinyl Flooring Tranquility Seeker Summer Peach

White Oak Tranquility Engineered Brushed Character 5 8 X 7 1 2
Related Posts

