Laying Wood Plank Flooring: A Guide to Essential Aspects
Installing wood plank flooring can transform a room, adding warmth, character, and value to your home. However, achieving a professional-looking finish requires careful preparation and proper installation techniques. Here's a comprehensive guide to help you lay wood plank flooring successfully:
1. Planning and Preparation
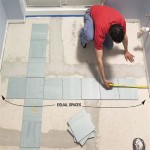
Start by measuring the room accurately to determine the amount of flooring needed. Allow for at least 5% extra for waste. Choose planks with the desired width, thickness, and finish to complement your décor. Ensure you have the necessary tools, including a saw, hammer, and pry bar.
Prepare the subfloor by making it level and smooth. Uneven subfloors can cause squeaks or buckling. If necessary, use a self-leveling compound or plywood underlayment to create a level surface.
2. Acclimate the Flooring
Before installation, allow the wood planks to acclimate to the room's temperature and humidity for at least 48 hours. This prevents warping or buckling later on.
3. Laying the First Row
Start by installing a spacer along the longest wall of the room. This ensures a straight starting point. Place the first plank against the spacer, leaving a small expansion gap at the end. Hammer it gently into place using a tapping block.
Continue laying the first row, staggering the joints for strength. Check the level frequently to ensure the planks are level.
4. Installing Subsequent Rows
Use a tapping block and hammer to connect the planks in subsequent rows. Angle the tongue of the new plank into the groove of the previous plank and gently tap it into place. Continue this process until you reach the opposite wall.
5. Cutting and Fitting
For planks that need to be cut, measure and mark the desired length. Use a saw to cut the plank cleanly. When fitting the cut plank, ensure the tongue and groove are facing the correct direction.
6. Expansion Gaps
Leave a small expansion gap between the wall and the last row of planks. This allows the flooring to expand and contract with changes in temperature and humidity.
7. Installation Equipment
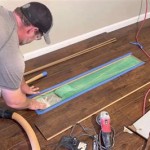
Use a pry bar or flooring pull bar to tighten the joints and close any gaps. A tapping block helps protect the planks from damage during hammering.
8. Finishing
Once installed, sand the floor lightly to remove any splinters or imperfections. Apply a sealant or finish of your choice to protect the flooring and enhance its appearance.
Conclusion
Laying wood plank flooring requires precision, patience, and attention to detail. By following these essential aspects, you can achieve a beautiful and durable floor that will enhance your home for years to come.

How To Install Hardwood Flooring Step By Forbes Home

How To Install Hardwood Flooring For Beginners
:strip_icc()/101206837-1dd14e2eaebe404e9c0e3fd1494b7c77.jpg?strip=all)
How To Install Hardwood Floors

How To Install Hardwood Flooring The Home Depot

How To Install Hardwood Flooring The Home Depot
:strip_icc()/101206833-2e499ef612434b6b8ab6e5b62422a78f.jpg?strip=all)
How To Install Hardwood Floors

Make Your Own Plank Flooring Using 1 X 12 Lumber Hallstrom Home

How To Install Laminate Flooring For Beginners

Which Direction Should You Lay Hardwood Floors 50floor

How To Install Hardwood Flooring The Home Depot
Related Posts


