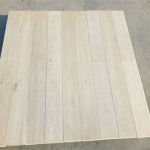
Tongue And Groove Pine Flooring Installation: Essential Aspects to Consider
Tongue and groove pine flooring, with its rustic beauty and timeless charm, has gained immense popularity as a decorative and durable flooring option. Installing it seamlessly requires careful planning and attention to crucial aspects. This article provides a comprehensive guide to the essential considerations for a successful tongue and groove pine flooring installation.
Pre-Installation Considerations
Before embarking on the installation process, thorough preparation is paramount. Ensure the subfloor is level, moisture-free, and free of any imperfections. Use a moisture meter to assess the moisture content of the subfloor. Ideally, it should be below 12% for optimal installation outcomes.
Acclimation and Spacing
Allow the pine planks to acclimate to the installation environment for a few days before installation. This process stabilizes the wood and minimizes the risk of expansion or contraction after installation. Maintain a 1/4-inch gap around the perimeter of the room to allow for natural expansion and contraction of the wood.
Tools and Materials
Gather the necessary tools and materials, including a table saw, nail gun, pry bar, spacers, and pine flooring planks. Choose flooring nails appropriate for the thickness of the pine planks. Ensure you have enough nails and flooring planks to complete the installation.
Installation Process
Begin the installation process by laying the first row of planks along one wall, with the tongue facing the wall. Nail each plank securely into place using a nail gun. For subsequent rows, insert the tongue of each plank into the groove of the previous row and tap it into place using a pry bar or tapping block. Stagger the joints between rows to enhance the structural integrity of the flooring.
Finishing Touches
Once the flooring is installed, secure it to the subfloor using screws or nails every 6-8 inches apart. Fill any gaps or nail holes with wood filler and sand the surface smooth. Apply a protective finish such as polyurethane or oil to protect the flooring from wear and tear.
Maintenance and Care
Regular maintenance is vital to preserve the beauty and longevity of tongue and groove pine flooring. Sweep or vacuum regularly to remove dust and debris. Use a damp mop for occasional cleaning and avoid using harsh chemicals or cleaning agents. Periodically reapply the protective finish to maintain the flooring's protection against wear and tear.
Conclusion
Installing tongue and groove pine flooring requires careful planning and adherence to specific best practices. By following the essential considerations outlined in this article, you can achieve a flawless and durable installation that will enhance the aesthetics and value of your home for many years to come.

How To Install Pine Floors Diy Family Handyman
Diy Wide Plank Pine Floors Part 1 Installation The Roots Of Home
.jpg?strip=all)
Laying A Rustic Pine Floor Ibuildit Ca

Wide Plank Floor Diy Rough Cut To Tongue And Groove 10 Steps With S Instructables

Diy Wide Plank Pine Floors Part 1 Installation The Roots Of Home

Installing Pine Tongue And Groove Floor In The Loft Playhouse Build Part 7

How To Install Beautiful Wood Floors Using Basic Unfinished Lumber The Creek Line House

Floor Spruce Up Ana White

Diy Wide Plank Pine Floors Part 1 Installation The Roots Of Home

12x12 Tiny Cabin Build Installing Pine 1x6 Flooring Cedar Roof Custom Stairs
Related Posts

