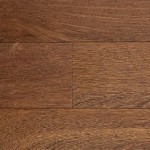
Professional Bruce Hardwood Flooring Installation Instructions
Installing Bruce hardwood flooring is a rewarding home improvement project that can enhance the beauty and value of your home. By following these detailed instructions, you can achieve a professional-looking installation that will last for years to come.
Planning and Preparation
Before beginning the installation, carefully plan your project to ensure you have the necessary tools, materials, and a clear understanding of the steps involved. Here are some key considerations:
*Calculate the amount of flooring needed:
Measure the area to be covered and add 10-15% for waste. *Choose the right underlayment:
Select an underlayment that provides moisture and soundproofing and is compatible with your flooring type. *Acclimate the flooring:
Allow the flooring to acclimate to the room's temperature and humidity for 2-3 days before installation.Subfloor Preparation
A properly prepared subfloor is essential for a successful installation. The subfloor should be flat, level, and moisture-free.
*Inspect the subfloor:
Check for any unevenness, cracks, or moisture issues. Repair as necessary. *Level the subfloor:
Use a self-leveling compound or plywood to level out any high or low spots. *Install the underlayment:
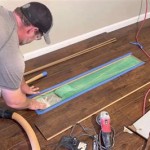
Roll out the underlayment and secure it with tape or staples.Installation
Once the subfloor is prepared, you can begin installing the hardwood flooring. Start by laying out a few rows in the center of the room to establish a straight starting line.
*Use a nail gun:
A nail gun with 15-gauge cleats is recommended for securing the flooring to the subfloor. *Nail at an angle:
Drive nails through the tongue of each plank at an angle of 45 degrees. *Stagger the joints:
Offset the end joints of adjacent rows by at least 6 inches to create a stronger installation. *Leave expansion gaps:
Allow for expansion and contraction by leaving a small gap around the perimeter of the room.Finishing
Once the flooring is installed, you can enhance its beauty and protection by applying a finish.
*Sand and refinish:
If necessary, sand the flooring to remove any imperfections and apply a finish of your choice. *Protect with sealant:
Apply a sealant or polyurethane to protect the flooring from moisture and wear. *Maintain regularly:
Sweep or vacuum the flooring regularly and clean it with a hardwood floor cleaner as recommended.Troubleshooting
During installation, you may encounter some common issues. Here are some troubleshooting tips:
*Squeaky floors:
Ensure the subfloor is properly nailed or screwed down and the flooring is firmly secured. *Gaps between planks:
Re-nail any loose planks or apply wood filler to fill in gaps. *Buckling:
This can be caused by excessive moisture. Allow the flooring to acclimate and check for any moisture sources.
Installing Bruce Hardwood Flooring Stop Motion Animation

How To Install Bruce Lock Engineered Hardwood
Bruce Hardwood Installation Instructions Diy Wood Flooring

How To Install Bruce Solid Hardwood Floors Using Nails

How To Install Bruce Floating Tongue Groove Engineered Hardwood

Installing Bruce Hardwood Flooring Stop Motion Animation
Bruce Hardwood Installation Instructions Diy Wood Flooring

Bruce Floating Hardwood Review

Bruce Natural Reflections Oak Walnut 5 16 In Thick X 2 1 4 Wide Random Length Solid Hardwood Flooring 40 Sqft Case C5031 The Home Depot

How To Install Bruce Floating Tongue Groove Engineered Hardwood