How To Install Lifeproof Vinyl Plank Flooring In A Bathroom
Lifeproof vinyl plank flooring is a popular choice for bathrooms because it is waterproof, durable and easy to clean, If you are considering installing Lifeproof vinyl plank flooring in your bathroom follow these steps.
1. Prepare the subfloor: The subfloor must be level, smooth and dry before you begin installing the vinyl plank flooring, Remove any existing flooring, baseboards and quarter-round molding, Level the subfloor using a self-leveling compound if necessary, and make sure the subfloor is completely dry before proceeding.
2. Install the underlayment: The underlayment will help to cushion the vinyl plank flooring and reduce noise, Roll out the underlayment over the subfloor, and tape the seams together with duct tape, Trim the underlayment around the perimeter of the room.
3. Install the vinyl plank flooring: Start by installing the first row of vinyl plank flooring along one wall of the room, Stagger the joints of the planks by at least 6 inches, Tap the planks together using a rubber mallet, and make sure the planks are securely locked together.
4. Continue installing the vinyl plank flooring: Continue installing the vinyl plank flooring by working your way across the room, Stagger the joints of the planks and tap them together securely, Use a spacers to ensure that the planks are evenly spaced.
5. Trim the vinyl plank flooring: Once you have installed the vinyl plank flooring, you will need to trim the planks around the perimeter of the room, Use a utility knife to score the planks and then snap them off, Be careful not to cut the underlayment.
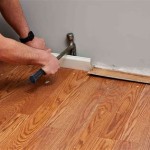
6. Install the baseboards and quarter-round molding: Once the vinyl plank flooring is installed, you can install the baseboards and quarter-round molding, The baseboards will cover the gap between the flooring and the wall, and the quarter-round molding will cover the gap between the flooring and the baseboards.
7. Caulk the seams: Once the baseboards and quarter-round molding are installed, you can caulk the seams between the flooring and the walls, This will help to seal the flooring and prevent water from getting underneath it.

Installing Vinyl Plank Flooring Lifeproof Waterproof Rigid Core Sustain My Craft Habit

How To Install Vinyl Plank Flooring In A Bathroom Fixthisbuildthat

How To Install Vinyl Plank Flooring In A Bathroom

How To Install Vinyl Plank Flooring In A Bathroom As Beginner Home Renovation

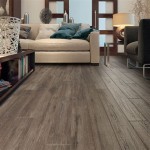
Lifeproof Vinyl Floor Installation Perfect For Kitchens Bathrooms

Installing Vinyl Plank Flooring Lifeproof Waterproof Rigid Core Sustain My Craft Habit

Lifeproof Vinyl Floor Installation Perfect For Kitchens Bathrooms

Installing Vinyl Plank Flooring Lifeproof Waterproof Rigid Core Sustain My Craft Habit

How To Install Vinyl Plank Flooring In A Bathroom

How To Install Vinyl Plank Flooring In A Bathroom Fixthisbuildthat
Related Posts