How To Install Vinyl Sheet Flooring Without Glue
Vinyl sheet flooring, prized for its durability, water resistance, and ease of maintenance, presents a cost-effective and aesthetically pleasing option for various spaces within a home. Traditionally, installation methods involved the application of adhesives to secure the vinyl sheet to the subfloor. However, modern innovations have introduced “floating” vinyl sheet installations that eliminate the need for glue, offering advantages in terms of installation speed, ease of replacement, and potential preservation of the subfloor. This article provides a comprehensive guide on how to install vinyl sheet flooring without the use of adhesives.
Understanding Glue-Free Vinyl Sheet Flooring Installation
The key distinction lies in the installation method. Glue-down vinyl requires a layer of adhesive spread across the subfloor before the vinyl sheet is laid. This creates a permanent bond. Glue-free, or floating, vinyl sheet flooring relies on its weight, the precision of the cut, and strategically placed double-sided tape for perimeter security. Some products also utilize interlocking systems, similar to laminate or luxury vinyl plank (LVP) flooring, for added stability. These interlocking systems often involve a tongue-and-groove design along the seams, creating a tighter and more secure connection between adjacent sheets.
The benefits of a glue-free installation are numerous. It simplifies the installation process, making it accessible to a wider range of DIY enthusiasts. Removal is significantly easier, as the vinyl sheet can be lifted without damaging the subfloor or leaving behind adhesive residue. This is particularly useful for renters or homeowners who anticipate future flooring replacements. Furthermore, glue-free installation allows for minor adjustments after the initial placement, providing more flexibility during the installation process. It also avoids the potential health hazards associated with some adhesives, especially those containing volatile organic compounds (VOCs).
While glue-free installations offer numerous advantages, certain considerations apply. The subfloor must be exceptionally smooth and level, as any imperfections will be visible through the vinyl sheet. Accurate measurements and precise cuts are crucial to ensure a snug fit and prevent gaps along the edges. Properly securing the perimeter with double-sided tape is also essential to prevent movement and maintain the integrity of the installation.
Preparing the Subfloor for Glue-Free Installation
The subfloor is the foundation of any flooring installation, and its preparation is paramount for a successful glue-free vinyl sheet installation. The subfloor must be clean, dry, level, and structurally sound. Any existing flooring, such as carpet, tile, or old vinyl, must be removed. Examine the subfloor for signs of damage, such as cracks, holes, or unevenness. Addressing these issues before proceeding is crucial for a lasting and aesthetically pleasing result.
For concrete subfloors, sweep thoroughly to remove dust and debris. Use a concrete patch compound to fill any cracks or holes. If the concrete surface is uneven, a self-leveling compound may be necessary to create a smooth, consistent surface. Allow the patch or self-leveling compound to dry completely according to the manufacturer's instructions.
For wood subfloors, inspect for loose nails or screws and secure them. Replace any damaged or rotting wood. Sand down any high spots or uneven areas. Fill any gaps or cracks with wood filler. If the wood subfloor is significantly uneven, consider installing a layer of underlayment, such as plywood or hardboard. This will provide a smoother, more uniform surface for the vinyl sheet flooring.
Regardless of the subfloor type, ensure it is thoroughly cleaned before proceeding with the installation. Vacuum the surface to remove any remaining dust or debris. Wipe down the subfloor with a damp cloth to remove any lingering residue. Allow the subfloor to dry completely before laying the vinyl sheet flooring.
Acclimation is also a critical step. Unroll the vinyl sheet flooring in the room where it will be installed at least 24 to 48 hours prior to installation. This allows the material to adjust to the room's temperature and humidity, preventing expansion or contraction after installation.
Step-by-Step Guide to Installing Glue-Free Vinyl Sheet Flooring
Once the subfloor is properly prepared and the vinyl sheet has acclimated, the actual installation process can begin. This process emphasizes precision and careful execution to achieve a professional-looking result. The following steps outline the process:
- Measure the Room: Accurately measure the length and width of the room. Add a few inches to each dimension to account for trimming and ensure the vinyl sheet covers the entire area.
- Cut the Vinyl Sheet: Transfer the measurements to the vinyl sheet, using a sharp utility knife or flooring cutter to make the cuts. It is recommended to cut the vinyl sheet slightly larger than the room dimensions and trim the excess later. When dealing with complex shapes or corners, create a template using paper or cardboard to ensure accurate cuts. Exercise caution when using sharp tools.
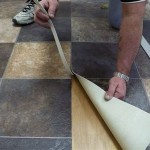
- Position the Vinyl Sheet: Carefully position the vinyl sheet in the room, aligning it with the walls and corners. Ensure the sheet lies flat and smooth, with no wrinkles or bubbles. If using a pattern, ensure it is properly aligned.
- Trim the Excess: Use a sharp utility knife and a straight edge to trim the excess vinyl along the walls. Leave a small gap (approximately 1/4 inch) between the vinyl sheet and the wall to allow for expansion and contraction. This gap will be covered by baseboards or quarter-round molding.
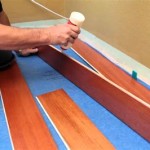
- Secure the Perimeter: Apply double-sided flooring tape around the perimeter of the room, adhering it to both the subfloor and the underside of the vinyl sheet. This will prevent the vinyl sheet from shifting or lifting at the edges. Overlap the tape slightly at the corners for added security. Ensure the tape is specifically designed for flooring applications and compatible with both the subfloor and the vinyl sheet material.
- Seam Sealing (If Necessary): If the room requires multiple sheets of vinyl, use a seam sealer to create a waterproof and durable seam. Follow the manufacturer's instructions for applying the seam sealer. For interlocking systems, carefully align the edges and press them together to create a secure connection.
- Install Baseboards or Quarter-Round Molding: Install baseboards or quarter-round molding along the perimeter of the room to cover the expansion gap and provide a finished look. Secure the molding to the wall using nails or screws, ensuring it does not penetrate the vinyl sheet.
- Roll the Flooring (Optional): After installation, use a floor roller to ensure the vinyl sheet is fully adhered to the subfloor and the double-sided tape. This will help eliminate any air pockets and create a smoother, more uniform surface.
Addressing Potential Challenges and Troubleshooting
While glue-free vinyl sheet flooring installation is generally straightforward, certain challenges may arise. These issues can be addressed with careful planning and execution. Addressing these problems early on is crucial to prevent further complications and ensure a professional-looking installation.
One common issue is bubbles or wrinkles appearing in the vinyl sheet after installation. This is often caused by unevenness in the subfloor or improper acclimation. Ensure the subfloor is properly prepared and the vinyl sheet has acclimated for the recommended time period. Use a floor roller to smooth out any bubbles or wrinkles. If the bubbles persist, carefully cut a small slit in the vinyl sheet with a utility knife and release the trapped air. Then, apply a small amount of seam sealer to the slit to prevent it from reopening.
Another challenge is gaps appearing along the edges or seams. This is usually due to inaccurate measurements or improper cutting. If gaps appear, carefully trim the vinyl sheet to fill the gaps. Use seam sealer to seal any small gaps along the seams. For larger gaps, consider replacing the entire sheet of vinyl.
Tears or damage to the vinyl sheet can occur during installation. If a tear occurs, use a vinyl repair kit to patch the damaged area. Follow the manufacturer's instructions for applying the patch. For extensive damage, consider replacing the entire sheet of vinyl.
Adhesion problems with the double-sided tape can also occur. This is often due to a dirty or improperly prepared subfloor. Ensure the subfloor is thoroughly cleaned before applying the tape. Use a high-quality flooring tape that is specifically designed for vinyl sheet flooring. Apply sufficient pressure to the tape to ensure it adheres properly to both the subfloor and the vinyl sheet.
When working around obstacles such as pipes or door frames, make precise cuts to ensure a snug fit. Use a template to create the cuts, and take your time to ensure accuracy. Consider using specialized tools, such as a coping saw or a jigsaw, for intricate cuts.
If installing vinyl sheet flooring in a bathroom, pay close attention to sealing the edges around the toilet and shower. Use a waterproof sealant to prevent water from seeping under the vinyl sheet. This will help prevent mold and mildew growth.
By addressing these potential challenges and troubleshooting effectively, one can achieve a successful and long-lasting glue-free vinyl sheet flooring installation. Regular cleaning and maintenance will further extend the lifespan of the flooring and maintain its aesthetic appeal.

How To Lay Sheet Vinyl Flooring

How To Lay Sheet Vinyl Flooring

Vinyl Sheet Floor Installation

How To Lay Vinyl Flooring Sheets Tiles And Planks Tarkett

How To Install Vinyl Plank Flooring In A Bathroom Fixthisbuildthat

How To Lay Vinyl Flooring Sheets Tiles And Planks Tarkett

How To Install Vinyl Sheet Flooring A Erfly House

Professional Tips For Laying Resilient Sheet Vinyl Flooring

10 Beginner Mistakes Installing Vinyl Plank Flooring Fixthisbuildthat

How To Install Vinyl Sheet Flooring A Erfly House
Related Posts