Laying Vinyl Plank Flooring on Concrete: A Step-by-Step Guide
Transforming your concrete subfloor with luxurious vinyl plank flooring is a rewarding project that can elevate the aesthetics and functionality of your space. While the installation process requires careful preparation and precision, it is achievable with the right tools, materials, and this comprehensive guide.
Follow these steps to lay vinyl plank flooring on concrete effortlessly:
Materials Required:
* Vinyl plank flooring * Concrete cleaner * Concrete patch or leveler (if needed) * Moisture barrier * Adhesive * Notched trowel * Tapping block * Spacer wedges * Utility knife * Measuring tape * Chalk lineStep 1: Prepare the Concrete Subfloor
Ensure that your concrete subfloor is clean, dry, and level. Remove any debris, dirt, or grease using a concrete cleaner. If there are cracks or uneven areas, fill them in with concrete patch or leveler as necessary.
Step 2: Install a Moisture Barrier
To protect your flooring from moisture damage, install a polyethylene moisture barrier over the concrete subfloor. Overlap the edges by at least 6 inches and seal them with tape.
Step 3: Apply Adhesive
Using a notched trowel, spread a thin layer of adhesive evenly over the moisture barrier. Follow the manufacturer's instructions for proper coverage and cure time.
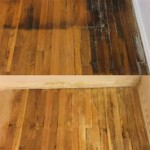
Step 4: Lay the First Plank
Place a spacer wedge along the wall to create an expansion gap. Start laying the first plank in a corner, aligning it with the chalk line. Press it down firmly into the adhesive.
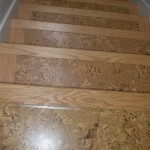
Step 5: Continue Laying Planks
Stagger the end joints of adjacent planks by at least 6 inches. Tap each plank into place using a tapping block and spacer wedges. Ensure that the planks are level and tightly fitted.
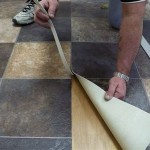
Step 6: Cut and Fit Planks
For irregular areas or obstacles, use a utility knife to cut planks to the necessary size. Measure and mark the cuts accurately to ensure a precise fit.
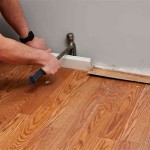
Step 7: Trim Edges
Once the flooring is complete, trim any excess vinyl plank flooring along the walls or other surfaces using a utility knife. Remove the spacer wedges and insert molding or baseboards to cover the expansion gap.
Maintenance Tips:
To preserve the beauty and longevity of your vinyl plank flooring, follow these maintenance tips:
* Sweep or vacuum regularly to remove dust and debris. * Mop occasionally with a mild cleaning solution specifically designed for vinyl flooring. * Avoid using abrasive cleaners or harsh chemicals. * Protect the flooring from heavy furniture or sharp objects with floor protectors or rugs.
How To Prepare A Concrete Floor For Vinyl Flooring Parrys

Easy Ways To Install Vinyl Plank Flooring On Concrete

How To Install Vinyl Plank Flooring On Concrete Step By Guide

How To Install Vinyl Plank Flooring On Concrete Step By Tutorial

Tips For Installing Vinyl Plank Over Concrete Floors Lemon Thistle

10 Beginner Mistakes Installing Vinyl Plank Flooring

Laying Vinyl Planks The Right Way Expert Guide By Fantastic Handyman

Tips And Tricks For Installing Vinyl Plank Over Concrete Floors Riverbend Interiors

How To Install Vinyl Plank Flooring On Concrete Base

Concrete Subfloor Preparation For The Vinyl Floor Installation How To Diy Mryoucandoityourself
Related Posts