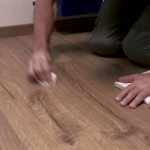
Whitewash Wood Floors: A Comprehensive DIY Guide
Whitewashing wood floors is a popular method for achieving a light, airy, and rustic aesthetic. It involves applying a diluted paint or specialized whitewash product to the wood surface, allowing some of the natural grain to remain visible. This technique enhances the wood's texture while simultaneously brightening the space and concealing imperfections. This guide provides a detailed, step-by-step approach to whitewashing wood floors as a DIY project, covering preparation, application, and finishing techniques.
Successful whitewashing hinges not only on the application of the chosen product but also on meticulous preparation. The condition of the existing floor, the type of wood, and the desired final appearance collectively influence the preparatory steps required. Ignoring these critical aspects can result in uneven coverage, poor adhesion, and ultimately, an unsatisfactory outcome.
Preparing the Wood Floor Surface
The initial step in any successful whitewashing project is thorough cleaning. Remove all furniture, rugs, and other obstructions from the room. Begin by sweeping or vacuuming the floor to eliminate loose dirt, dust, and debris. For floors exhibiting ingrained dirt or grime, a more aggressive cleaning method is necessary. A wood floor cleaner specifically formulated for the type of finish on the floor should be used. Follow the manufacturer's instructions carefully, paying close attention to dilution ratios and application techniques.
If the existing floor has a previous finish, such as varnish, polyurethane, or paint, sanding is generally required. The purpose of sanding is to create a slightly roughened surface to which the whitewash will adhere effectively. The grit of sandpaper required depends on the existing finish's condition and thickness. For relatively thin finishes, a medium-grit sandpaper (e.g., 80-grit) may suffice. For thicker or more durable finishes, a coarser grit (e.g., 60-grit) may be necessary for the initial pass. Progress through successively finer grits (e.g., 100-grit, then 120-grit) to smooth the surface and minimize sanding marks.
For large areas, a drum sander or orbital floor sander can significantly expedite the sanding process. Exercise caution when using these machines, as they can quickly remove a substantial amount of wood. Practice in an inconspicuous area first to develop a feel for the machine and prevent accidental damage to the floor. Hand sanding is often required along edges, in corners, and in other areas inaccessible to the larger sanders.
After sanding, remove all sanding dust thoroughly. Vacuum the floor repeatedly, using a brush attachment to reach crevices and corners. Subsequently, wipe the floor with a tack cloth to capture any remaining dust particles. Proper dust removal is crucial for achieving a smooth and even whitewash finish.
In some cases, a primer may be beneficial. Primers are designed to improve adhesion and create a more uniform surface. This is especially useful if the wood is porous or has variations in color. Choose a primer that is compatible with both the wood and the chosen whitewash product. Apply the primer according to the manufacturer's instructions, allowing it to dry completely before proceeding with the whitewashing.
Selecting the Right Whitewash Product and Application Technique
Several different products can be used for whitewashing wood floors, each offering distinct characteristics and aesthetic outcomes. The most common choices include diluted latex paint, specialized whitewash stains, and lime washes. Diluted latex paint is generally the most cost-effective option and allows for precise control over the opacity of the finish. Specialized whitewash stains are formulated specifically for wood and often contain additives that enhance adhesion and durability. Lime washes, traditionally used in Europe, create a unique, chalky finish that is particularly suitable for achieving a rustic or antique look. Evaluate the pros and cons of each option considering the desired aesthetic, budget, and the specific characteristics of the wood flooring.
If opting for diluted latex paint, choose a high-quality interior paint in a flat or matte finish. Glossy or semi-gloss paints will create an undesirable sheen. Dilute the paint with water, starting with a ratio of 1:1 (paint to water). Adjust the ratio to achieve the desired level of transparency. For a more subtle whitewash, use a higher proportion of water. For a more opaque finish, use less water. It is prudent practice to test the diluted paint on a small, inconspicuous area of the floor to assess the color and opacity before committing to the entire project.
Application techniques significantly influence the final appearance of the whitewashed floor. The most common methods include brushing, rolling, and wiping. Brushing is well-suited for achieving a textured, rustic look, as it emphasizes the grain of the wood. Use a high-quality paintbrush, applying the diluted paint in the direction of the grain. Avoid applying too much paint at once, as this can lead to drips and uneven coverage.
Rolling provides a smoother, more uniform finish. Use a short-nap roller designed for smooth surfaces. Apply the diluted paint in thin, even coats, overlapping each stroke slightly. Avoid pressing too hard on the roller, as this can create ridges and streaks.
Wiping involves applying the diluted paint with a brush or roller and then immediately wiping it off with a clean cloth. This technique creates a very subtle whitewash effect, allowing more of the natural wood grain to show through. The speed and pressure used when wiping will affect the amount of paint that remains on the floor. Experiment on a test area to determine the optimal wiping technique.
Regardless of the chosen application method, work in small sections, typically 3-4 feet wide. This allows for better control over the application process and prevents the diluted paint from drying prematurely. Apply one coat of the whitewash product, allowing it to dry completely according to the manufacturer's instructions. Evaluate the appearance of the floor after the first coat has dried. If a more opaque finish is desired, apply a second or even a third coat, allowing each coat to dry completely before applying the next.
Protecting the Whitewashed Floor
Once the whitewash has completely dried, it is essential to protect the surface with a clear topcoat. This will enhance the durability of the finish and protect it from scratches, stains, and wear. Several different types of topcoats are available, including water-based polyurethane, oil-based polyurethane, and wax. Water-based polyurethane is a popular choice due to its low odor and fast drying time. Oil-based polyurethane provides excellent durability but has a stronger odor and takes longer to dry. Wax creates a soft, matte finish but requires more frequent maintenance.
Choose a topcoat that is compatible with the chosen whitewash product and that meets the specific needs of the floor. For high-traffic areas, a more durable topcoat, such as oil-based polyurethane, is recommended. For areas with less traffic, a water-based polyurethane or wax may suffice.
Before applying the topcoat, lightly sand the whitewashed floor with a fine-grit sandpaper (e.g., 220-grit) to smooth any imperfections and create a better surface for adhesion. Remove all sanding dust thoroughly, vacuuming and wiping the floor with a tack cloth. Apply the topcoat according to the manufacturer's instructions, using a brush or roller designed for applying clear finishes. Apply thin, even coats, overlapping each stroke slightly. Allow each coat to dry completely before applying the next.
Most floors benefit from two or three coats of topcoat. Sand lightly between coats with a fine-grit sandpaper to ensure a smooth finish. After the final coat has dried completely, allow the floor to cure for the recommended time period before replacing furniture and rugs. This will allow the topcoat to fully harden and prevent damage to the finish.
Proper maintenance is crucial for preserving the appearance and longevity of the whitewashed wood floor. Sweep or vacuum the floor regularly to remove dirt and debris. Clean the floor with a pH-neutral wood floor cleaner. Avoid using harsh chemicals or abrasive cleaners, as they can damage the finish. Use felt pads under furniture legs to prevent scratches. Reapply the topcoat as needed to maintain protection and shine.

Diy Whitewashed Wood Floors Renovation Semi Pros

Diy Whitewashed Wood Floors Renovation Semi Pros

Wood Floor Refinishing And Whitewashing The Honeycomb Home
:strip_icc()/10194750920whitewash20floors20step202-99eae86a2dd746d9b89b35a639a0973a.jpg?strip=all)
How To Whitewash Hardwood Flooring For A Fresher Aesthetic

How To Whitewash Wood In 3 Simple Ways A Piece Of Rainbow

Nostalgiecat How To Whitewash Wooden Flooring

Sanding And Whitewashing Wood Floors

Diy Whitewashed Wood Floors Renovation Semi Pros

Wood Floor Refinishing And Whitewashing The Honeycomb Home

How To Whitewash Wood In 3 Simple Ways A Piece Of Rainbow
Related Posts


