What Tools Do You Need To Fit Laminate Flooring?
Installing laminate flooring can significantly enhance the aesthetic appeal and functionality of a space. While professional installation is an option, many homeowners choose to undertake this project themselves. Successful DIY laminate flooring installation hinges on having the right tools. Utilizing appropriate tools not only ensures a professional-looking finish but also contributes to efficiency and accuracy throughout the process. This article details the essential tools required for fitting laminate flooring, exploring their functions and importance in achieving optimal results.
Measuring and Marking Tools
Accurate measurement and precise marking are fundamental to a seamless laminate flooring installation. Errors in this stage can lead to gaps, uneven edges, and overall visual inconsistencies. The following tools are essential for this crucial preliminary step.
Measuring Tape: A durable and reliable measuring tape is indispensable. A tape measure with clear, easy-to-read markings and a locking mechanism to hold measurements is ideal. A length of at least 25 feet is recommended for most rooms.
Pencil: A standard pencil is used to mark cutting lines on the laminate planks. Sharpened pencils ensure crisp, accurate lines. Mechanical pencils can also be used, offering consistent line thickness.
Combination Square: This versatile tool is used for marking straight lines and ensuring right angles. It is particularly useful for marking cut lines along walls and around obstacles. The combination square allows for precise angle measurements, making it ideal for challenging cuts.
T-Square: A T-square is beneficial for marking long, straight lines, especially when cutting planks to length. The T-square aligns perfectly with the edge of the plank, ensuring a consistently straight cut.
Laser Level (Optional): While not strictly essential, a laser level can be invaluable for ensuring that the laminate flooring is laid evenly, especially in rooms with uneven subfloors. The laser level projects a perfectly horizontal line, aiding in aligning the first row of planks accurately.
Chalk Line (Optional): Similar to a laser level, a chalk line can be used to mark a straight line across the subfloor as a guide for laying the first row of planks. This is particularly helpful in larger rooms. The chalk line snaps against the floor, leaving a visible line for alignment.
Cutting Tools
Accurate and clean cuts are paramount for a professional-looking laminate floor. The appropriate cutting tool ensures the boards fit together seamlessly and prevents splintering or chipping of the laminate surface. Several options are available, each with its own advantages.
Laminate Flooring Cutter: This specialized tool is designed specifically for cutting laminate flooring. It provides clean, precise cuts with minimal effort and dust. Laminate cutters are particularly effective for straight cuts and are significantly quieter than power saws. They work by using a sharp blade to shear through the laminate plank, leaving a clean edge. However, laminate cutters may not be suitable for intricate or curved cuts.
Circular Saw: A circular saw is a versatile power tool that can be used for a variety of cutting tasks, including laminate flooring. When used with a fine-tooth blade designed for laminate, it can produce clean cuts. It is essential to use a guide or straight edge to ensure accurate cuts. The circular saw is advantageous for cutting multiple planks at once and for creating complex shapes. However, it produces a significant amount of dust, requiring proper ventilation and safety precautions.
Jigsaw: A jigsaw is ideal for cutting curves, irregular shapes, and detailed patterns in laminate flooring. Its maneuverability allows for intricate cuts around door frames, pipes, and other obstacles. A fine-tooth blade specifically designed for laminate is crucial to minimize chipping and splintering. While versatile, the jigsaw may not be the best choice for long, straight cuts due to the increased risk of deviation.
Table Saw: A table saw is a powerful tool suited for ripping laminate planks (cutting them lengthwise) and making precise, repetitive cuts. It offers increased stability and accuracy compared to a circular saw. A table saw equipped with a laminate blade is an investment that can significantly speed up the installation process, especially in large rooms. However, table saws require a dedicated workspace and a high level of safety awareness.
Utility Knife: A sharp utility knife is useful for scoring the laminate surface before snapping it along a marked line. This technique is particularly effective for thinner laminate planks or when making small, precise cuts. A retractable utility knife with replaceable blades ensures consistent sharpness.
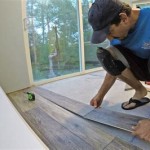
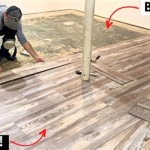
Installation Tools
The installation phase of laminate flooring requires specific tools to ensure planks are properly aligned, tightly fitted, and securely locked together. These tools facilitate a smooth and efficient installation process.
Tapping Block: A tapping block is used to gently tap the laminate planks into place without damaging the edges. It distributes the force evenly, preventing splintering or chipping. Tapping blocks are typically made of hard plastic or wood and are designed to fit snugly against the edge of the laminate plank.
Pull Bar: A pull bar is specifically designed to pull the final row of laminate planks into place, especially in tight spaces where a tapping block cannot be used effectively. The pull bar hooks onto the edge of the plank and allows the installer to apply leverage to pull the plank tightly against its neighbor. A pull bar ensures a seamless fit in challenging areas.
Spacers: Spacers are essential for maintaining a consistent expansion gap between the laminate flooring and the walls. Laminate flooring expands and contracts with changes in temperature and humidity, and the expansion gap allows for this movement without causing buckling or damage. Spacers are typically made of plastic or foam and are placed around the perimeter of the room during installation.
Hammer: A standard hammer is used in conjunction with the tapping block and pull bar to gently persuade the laminate planks into place. A rubber mallet can also be used to minimize the risk of damage to the laminate surface. The hammer should be used with controlled force to avoid overdriving the planks.
Knee Pads: Installing laminate flooring often involves extended periods of kneeling, which can be physically taxing. Knee pads provide cushioning and support, reducing strain on the knees and improving comfort during the installation process.
Vacuum Cleaner or Broom: Maintaining a clean subfloor is crucial for a successful laminate flooring installation. A vacuum cleaner or broom is used to remove dust, debris, and other particles that could interfere with the proper adhesion of the underlayment or the locking mechanism of the laminate planks. Regular cleaning throughout the installation process ensures a smooth and even surface.
Underlayment Tools
Underlayment provides a smooth, stable base for the laminate flooring and can offer additional benefits such as sound insulation and moisture resistance. Installing underlayment requires a few specific tools.
Utility Knife or Scissors: These tools are used to cut the underlayment to size. A sharp utility knife is generally preferred for thicker underlayment materials, while scissors are suitable for thinner, foam-based underlayment. Precise cuts ensure a seamless fit and prevent gaps or overlaps.
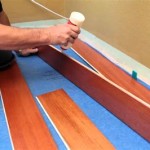
Seaming Tape: Seaming tape is used to join the edges of the underlayment, creating a continuous, moisture-resistant barrier. The tape should be specifically designed for underlayment and should provide a strong, durable bond. Overlapping the underlayment is not recommended, as it can create an uneven surface.
Safety Equipment
Safety should be a top priority when installing laminate flooring. The use of power tools and the potential for dust and debris necessitate the use of appropriate safety equipment to protect the installer from injury.
Safety Glasses: Safety glasses are essential for protecting the eyes from flying debris, dust, and other particles generated during cutting and installation. The glasses should provide a snug fit and offer adequate coverage.
Dust Mask or Respirator: Cutting laminate flooring can generate a significant amount of dust, which can be harmful to the respiratory system. A dust mask or respirator filters out these particles, preventing them from being inhaled. A respirator is recommended for prolonged exposure or when working in poorly ventilated areas.
Gloves: Gloves protect the hands from cuts, abrasions, and splinters. Work gloves with a good grip are recommended for handling laminate planks and tools.
Ear Protection: Power tools, such as circular saws and table saws, can generate a significant amount of noise, which can damage hearing over time. Earplugs or earmuffs should be worn when using these tools to protect the ears.
In conclusion, the successful installation of laminate flooring depends on possessing and correctly utilizing the appropriate tools. Having the right tools not only streamlines the process but also ensures a professional, long-lasting result. From measuring and cutting to installation and safety, each tool plays a vital role in achieving a flawless laminate floor.

How To Install Laminate Flooring On Your Own Diy Hq Longwood Fl

How To Install Laminate Flooring Do It Best

8 Essential Tools For Laminate Flooring Installations The Family Handyman

How To Install Laminate Flooring The Home Depot

Tools Needed To Install Laminate Flooring Find The Home Pros

See Which Laminate Flooring Tools And Cutters I Have In My Kit

Step By Guide On How To Install Hybrid Flooring Parrys

The Laminate Flooring Tools Needed For Installing This

Tools You Need To Install Laminate Flooring And Some Ll Want

Installing Laminate Flooring For The First Time Crafted Work
Related Posts