Using a conversational but informative tone, make sure the article is comprehensive.
What Tools Do I Need to Lay Laminate Flooring?
Laying laminate flooring is a popular DIY project that can significantly enhance the aesthetic appeal of a home while adding value. The process, while manageable for many homeowners, necessitates having the right tools at hand. Possessing the appropriate equipment not only ensures a professional-looking finish but also simplifies the installation process, reducing the likelihood of errors and speeding up the overall timeline.
This article will provide a comprehensive overview of the tools required for a successful laminate flooring installation, broken down into essential categories. Understanding the purpose and function of each tool will empower individuals to approach the project with confidence and achieve optimal results.
Preparation and Measurement Tools
Before any laminate planks can be laid, thorough preparation is crucial. This involves accurately measuring the room, assessing the subfloor, and ensuring a clean and level surface. Therefore, certain tools are paramount for this initial phase.
A measuring tape, preferably one that is at least 25 feet in length, is fundamental. It is used to accurately determine the room's dimensions, including length and width. Precise measurements are essential for calculating the amount of laminate flooring needed and minimizing waste. Always measure the longest points of the room, regardless of doorways or indentations.
A pencil and notepad are indispensable for recording measurements, calculating the square footage of the room, and sketching out the layout of the flooring. It's advisable to create a detailed diagram of the room, noting any obstructions or irregularities that may require special attention during installation.
A spirit level, preferably a long one (4 feet or more), is used to assess the levelness of the subfloor. Laminate flooring requires a relatively flat and even surface to prevent flexing, squeaking, and premature wear. Identify any high or low spots that need to be addressed before installation begins. A shorter level can be useful for checking smaller areas and individual planks.
A straight edge, often a long metal ruler or even a spare laminate plank, is used in conjunction with the spirit level to identify subtle undulations on the subfloor. Place the straight edge across the surface and use the level to check for gaps underneath. This method allows for precise identification of uneven areas that may need patching or sanding.
A moisture meter is a valuable tool for determining the moisture content of the subfloor, particularly if it is concrete or wood. Excessive moisture can lead to warping, buckling, and mold growth under the laminate flooring. Consult the laminate flooring manufacturer's recommendations for acceptable moisture levels before proceeding with the installation. If moisture levels are too high, remediation steps may be necessary.
A subfloor preparation kit may be needed depending on the condition of the existing subfloor. This kit might include tools such as a putty knife for scraping away old adhesive or debris, a self-leveling compound for filling in low spots, and a floor scraper for removing stubborn residue. Addressing any imperfections in the subfloor is crucial for a successful and long-lasting laminate flooring installation.
Cutting and Shaping Tools
Laminate flooring often requires cutting to fit around walls, doorways, and other obstructions. Precise and clean cuts are essential for achieving a professional-looking finish. The following tools are crucial for cutting and shaping laminate planks.
A laminate flooring cutter is a specialized tool designed specifically for cutting laminate planks quickly and cleanly. It operates like a large paper cutter, using a sharp blade to shear through the laminate. Laminate cutters are particularly useful for making straight cuts and are often preferred over saws for their speed, accuracy, and dust-free operation. They are available for purchase or rent at most home improvement stores.
A circular saw is a versatile power tool that can be used for making a variety of cuts in laminate flooring. When using a circular saw, it's imperative to use a blade specifically designed for cutting laminate. These blades typically have a high tooth count and are designed to minimize chipping and splintering. A circular saw is particularly useful for making long, straight cuts, as well as angled cuts.
A jigsaw is another power tool that is useful for making curved or intricate cuts in laminate flooring. It allows for greater flexibility compared to a circular saw or laminate cutter. When using a jigsaw, it's crucial to use a blade specifically designed for cutting laminate to minimize chipping and splintering. A jigsaw is especially helpful for cutting around pipes, door frames, and other irregular shapes.
A hand saw, such as a coping saw or a fine-toothed saw, can be used for making small, precise cuts in laminate flooring. This is particularly useful for trimming pieces to fit snugly around door frames or other tight spaces. While a hand saw requires more effort than power tools, it offers greater control and precision for intricate cuts.
A t-bevel is used to transfer angles from walls and other surfaces to the laminate planks. This tool consists of two arms that can be adjusted to match the angle of the surface. Once the angle is set, the t-bevel can be used to accurately transfer the angle to the laminate plank for cutting. This is essential for achieving a seamless fit around irregular shapes.
A square is used to ensure that cuts are made at a perfect 90-degree angle. This is crucial for achieving a clean and professional-looking finish, especially when cutting planks to fit along walls or corners. A speed square or a combination square can be used for this purpose.
Installation and Finishing Tools
Once the laminate planks have been cut to size, the installation process can begin. This involves properly aligning the planks, securing them together, and installing transition strips and baseboards. The following tools are essential for this final phase.
A tapping block and pull bar are essential for properly engaging the locking mechanism of the laminate planks. The tapping block is placed against the edge of the plank, and the pull bar is used to gently tap the plank into place. This ensures a tight and seamless connection between the planks. It is imperative to use a tapping block made of a soft material, such as wood or plastic, to avoid damaging the laminate surface.
Spacers are used to maintain a consistent expansion gap between the laminate flooring and the walls. Laminate flooring expands and contracts with changes in temperature and humidity. The expansion gap allows the flooring to move without buckling or warping. Spacers are typically made of plastic or wood and are available in various sizes.
A rubber mallet can be used to gently tap the planks into place, particularly in tight spaces. It provides a soft impact that won't damage the laminate surface. A rubber mallet is particularly useful for situations where a tapping block and pull bar are not sufficient to engage the locking mechanism.
A utility knife is a versatile tool that can be used for a variety of tasks during laminate flooring installation, such as cutting underlayment, trimming excess material, and scoring laminate planks for easier snapping. It is essential to use a sharp blade and to exercise caution when using a utility knife.
A caulk gun and appropriate caulk are used to seal the expansion gap around the perimeter of the room, as well as around pipes and other penetrations. This prevents moisture from entering the subfloor and helps to create a more airtight seal. Choose a caulk that is paintable and matches the color of the baseboards or walls.
A saw, either a hand saw or a power saw such as a miter saw, is used to cut baseboards and trim to the desired length and angle. Accurate cuts are essential for achieving a seamless and professional-looking finish. A miter saw is particularly useful for making angled cuts for corners.
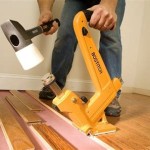
A nail gun or hammer and nails are used to secure the baseboards and trim to the walls. A nail gun offers greater speed and precision compared to a hammer and nails. Choose nails that are appropriate for the type of wall being used.
A transition strip may be necessary where the laminate flooring meets other types of flooring, such as tile or carpet. A transition strip provides a smooth and seamless transition between the two surfaces and prevents tripping hazards. Transition strips are available in various materials and styles to match the laminate flooring.
A dust mask, safety glasses, and gloves are essential for protecting the user from dust, debris, and sharp objects. Laminate flooring installation can generate a significant amount of dust, which can be harmful to the respiratory system. Safety glasses protect the eyes from flying debris, and gloves protect the hands from cuts and scrapes.
By gathering these tools, a homeowner can be well-prepared to undertake a laminate flooring installation project with confidence and achieve a durable and aesthetically pleasing result. Remember to consult the laminate flooring manufacturer's instructions for specific recommendations and guidelines relating to the installation process.

How To Install Laminate Flooring The Home Depot

Guide To Fitting Laminate Up 50 Off Free Samples

Tools Supplies And Materials For Installing Laminate Or Vinyl Plank So That S How You Do

See Which Laminate Flooring Tools And Cutters I Have In My Kit

Laminate Flooring Tools For Installing

The Laminate Flooring Tools Needed For Installing This

Must Have Hand Tools For Laminate Floor Installation All In One Essentials Bundle

Tools Needed To Install Laminate Flooring Find The Home Pros

Installing Laminate Flooring For The First Time Crafted Work

8 Essential Tools For Laminate Flooring Installations The Family Handyman
Related Posts


