Essential Nail Considerations for Affixing Hardwood Floors to Walls
Installing hardwood flooring on walls adds a touch of rustic elegance to any interior design. However, selecting the appropriate nails is crucial for ensuring a secure and aesthetically pleasing installation.
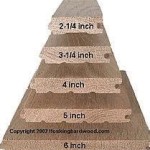
Length and Gauge
The length of the nails should be approximately 1 1/2 to 2 inches longer than the thickness of the hardwood flooring. This provides sufficient grip into the wall structure. As for the gauge, 16-gauge or 18-gauge nails are typically recommended for this application.
Type of Nails
Several types of nails are suitable for face-nailing hardwood floors to walls:
- Common nails: These have a slightly tapered shank and flat head, providing good holding power.
- Finishing nails: Smaller in diameter than common nails, they feature a smaller head that can be easily countersunk below the flooring surface.
- Brad nails: These are also thin and headless, but their length is shorter than finishing nails. They are suitable for nailing thin hardwood planks.
Nail Spacing
The recommended nail spacing for face-nailing hardwood floors to walls is 6 to 8 inches along the top and bottom edges of each plank. This ensures adequate support while allowing for some movement in the flooring due to temperature and humidity changes.
Angling and Countersinking
Nails should be driven in at a slight angle towards the wall. This helps reduce the risk of splitting the hardwood or leaving unsightly nail holes. If countersinking the nails, use a nail set or hammer with a dimpled head to drive the nail head below the flooring surface.
Pre-Drilling
For very hard or thick hardwood species, pre-drilling can be necessary to prevent splitting. Use a drill bit slightly smaller than the nail's diameter and drill a shallow pilot hole at each nail location.
Additional Tips
- Use a nail gun for faster and more consistent nailing.
- Wear safety glasses and gloves when nailing.
- Countersink the nails slightly to avoid snagging or tearing the flooring.
- Fill any visible nail holes with wood putty or a matching nail filler.
By carefully considering these essential aspects of nail selection and installation, you can achieve a beautiful and long-lasting hardwood wall installation.

How To Face Nail Wide Plank Wood Flooring Projects

Top Nail 5 16 Inch Strip How We Did And Still Do These Floors Wood Floor Business

Pine Hard How To Install Wide Flooring

Flooring 101 Securing Your Boards To The Substrate Carlisle Wide Plank Floors

Setting Nails On A Face Nailed Hardwood Floor

How To Nail Down Hardwood Flooring Builddirect

Top Nail 5 16 Inch Strip How We Did And Still Do These Floors Wood Floor Business

Installing Hardwood Floors On A Budget Dumpster

Flooring 101 Securing Your Boards To The Substrate Carlisle Wide Plank Floors

How To Install Wood Flooring Lowe S
Related Posts