Ways To Lay Vinyl Plank Flooring
Vinyl plank flooring has become a popular choice for homeowners and contractors alike due to its durability, water resistance, aesthetic appeal, and ease of installation. While professional installation is always an option, many find that laying vinyl plank flooring is a manageable DIY project. However, a successful installation hinges on proper preparation, the right tools, and understanding the various methods available. This article will explore different ways to lay vinyl plank flooring, emphasizing the key steps and considerations for each approach.
Before diving into the specifics, it's crucial to understand the different types of vinyl plank flooring. Two primary types exist: click-lock (also known as floating) and glue-down. Click-lock planks utilize a tongue-and-groove system that allows them to interlock, creating a floating floor that doesn't require adhesive. Glue-down planks, as the name suggests, require adhesive to be directly applied to the subfloor before the planks are laid. Each type necessitates a slightly different installation process and is suitable for different applications.
Preparing the Subfloor: A Universal Necessity
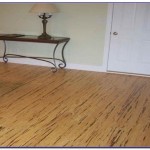
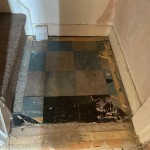
Regardless of whether you're opting for click-lock or glue-down vinyl plank flooring, proper subfloor preparation is paramount. The subfloor must be clean, level, and dry. Existing flooring, such as old carpet or tile, must be removed. Any debris, dirt, or adhesive residue needs thorough cleaning. A vacuum cleaner is essential for removing loose particles, and a scraper can be used for stubborn adhesive. Following cleaning, the subfloor should be inspected for any imperfections.
Leveling the subfloor is critical because uneven surfaces can lead to uneven wear and tear on the vinyl planks, as well as potential issues with the locking mechanisms (for click-lock varieties). Minor imperfections can often be addressed with self-leveling compound. This compound is mixed according to the manufacturer's instructions and poured onto the subfloor. It will spread and level itself, filling in low spots and creating a smooth surface. For more significant unevenness, grinding down high spots might be necessary. Always consult with a flooring professional if you are unsure about the severity of subfloor imperfections or the appropriate remediation methods.
Moisture testing is the final crucial step in subfloor preparation. Excess moisture can compromise the adhesive bond of glue-down planks and cause warping or buckling in both glue-down and click-lock installations. A moisture meter can be used to measure the moisture content of the subfloor. The acceptable moisture level varies depending on the flooring manufacturer's recommendations, but generally, a moisture content below a certain percentage is required before proceeding with the installation. If the moisture level is too high, appropriate measures like installing a moisture barrier or allowing the subfloor to dry further are necessary.
Click-Lock Vinyl Plank Flooring Installation
Click-lock vinyl plank flooring offers a user-friendly installation process, making it a popular choice for DIYers. These planks feature interlocking edges that snap together, creating a floating floor system. No adhesive is needed, which simplifies the installation and allows for easier replacement if any planks are damaged in the future.
Before beginning, it is important to acclimate the vinyl planks to the room's environment. This involves storing the unopened boxes of flooring in the room where they will be installed for approximately 48 to 72 hours. Acclimation allows the planks to adjust to the room's temperature and humidity, which can minimize expansion and contraction after installation. This is a critical step to prevent gaps or buckling in the finished floor.
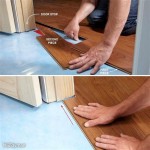
The first row of planks is typically installed along a straight wall, leaving a small expansion gap of about 1/4 inch to 3/8 inch between the planks and the wall. This gap allows for natural expansion and contraction of the flooring with changes in temperature and humidity. Spacers can be used to maintain this consistent gap. The tongue side of the plank should generally face the wall. Subsequent rows are installed by angling the planks and inserting the tongue into the groove of the previously installed row. Once aligned, the plank is gently pressed down to lock it into place. A tapping block and rubber mallet can be used to ensure a tight and secure connection between the planks.
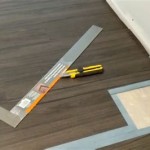
When cutting planks to fit around obstacles or at the end of a row, a utility knife with a sharp blade and a measuring tape are essential. Measure the required length and mark the plank. Score the surface of the plank with the utility knife several times and then snap it along the scored line. More complex cuts can be made using a jigsaw. It is crucial to ensure the cut edges are clean and straight to maintain a seamless appearance. Continue the process, staggering the seams between rows for a more visually appealing and structurally sound floor. Remove spacers after completion, and install baseboards to cover the expansion gap along the walls.
Glue-Down Vinyl Plank Flooring Installation
Glue-down vinyl plank flooring requires a more meticulous installation process compared to click-lock, demanding careful attention to detail and the proper application of adhesive. This method results in a floor that is directly adhered to the subfloor, providing a stable and durable surface. However, removal of glue-down vinyl plank flooring is often more challenging than removing click-lock.
As with click-lock, acclimation is crucial. Store the vinyl planks in the room where they will be installed for 48 to 72 hours prior to installation. This ensures the planks adapt to the room's temperature and humidity, minimizing potential issues later on.
Selecting the correct adhesive is a critical factor for a successful glue-down installation. Use an adhesive specifically designed for vinyl plank flooring and approved by the flooring manufacturer. The adhesive should be compatible with both the vinyl planks and the subfloor material. Follow the adhesive manufacturer's instructions regarding application methods, open time (the time between applying the adhesive and laying the planks), and curing time.
Adhesive is typically applied to the subfloor using a notched trowel. The size and shape of the notches on the trowel determine the amount of adhesive applied, so it's crucial to use the trowel size recommended by the adhesive manufacturer. Apply the adhesive in manageable sections, ensuring even coverage and avoiding puddles. Over-application of adhesive can lead to issues such as planks not adhering properly or adhesive squeezing up between the seams. Lay the vinyl planks into the adhesive within the specified open time. Press each plank firmly into the adhesive, using a hand roller or flooring roller to ensure full contact between the plank and the adhesive. This helps to eliminate air pockets and create a strong bond.
Maintaining proper alignment is essential for a professional-looking glue-down installation. Use chalk lines or a reference line to ensure the planks are laid straight and square. Stagger the seams between rows for a more visually appealing appearance. Use a utility knife to cut planks to fit around obstacles or at the end of a row. Wipe away any excess adhesive immediately with a damp cloth, as dried adhesive can be difficult to remove. Allow the adhesive to cure completely according to the manufacturer's instructions before allowing heavy traffic on the floor. This curing period is crucial for the adhesive to reach its full strength and ensure a long-lasting bond.
Considerations for Specific Environments
The choice between click-lock and glue-down vinyl plank flooring can depend on the specific environment where the flooring will be installed. In areas with high moisture levels, such as bathrooms or basements, glue-down vinyl planks may be a better option due to their superior water resistance. The continuous adhesive bond prevents water from seeping beneath the planks, which can cause mold growth or damage to the subfloor. However, high-quality click-lock flooring specifically designed for wet areas can also be effectively used, provided that seams are adequately sealed during installation.
For areas with heavy foot traffic, such as hallways or commercial spaces, glue-down vinyl planks offer greater stability and durability. The direct bond to the subfloor prevents movement and reduces the risk of the planks shifting or separating over time. However, thicker click-lock planks with a durable wear layer can also withstand heavy traffic. The wear layer is the protective top coat that resists scratches, scuffs, and stains. A thicker wear layer will provide greater protection and extend the lifespan of the flooring.
When installing vinyl plank flooring over radiant heat, it is essential to choose a product that is specifically approved for such applications. Not all vinyl plank flooring is compatible with radiant heat systems, and using an incompatible product can lead to warping, buckling, or adhesive failure. The flooring manufacturer's specifications should be carefully reviewed before installation. In general, thinner glue-down vinyl planks are often preferred for radiant heat applications due to their greater thermal conductivity. The temperature of the radiant heat system should also be carefully controlled to prevent overheating the flooring.

How To Install Vinyl Plank Flooring As A Beginner Home Renovation

Installing Vinyl Floors A Do It Yourself Guide The Honeycomb Home

Installing Vinyl Plank Flooring How To Fixthisbuildthat

How To Install Vinyl Flooring Planks

Installing Vinyl Plank Flooring For Beginners Anika S Diy Life

Laying Vinyl Planks The Right Way Expert Guide By Fantastic Handyman

Easy Ways To Install Vinyl Plank Flooring On Concrete

How To Install Vinyl Plank Flooring In A Bathroom Fixthisbuildthat

How To Install Luxury Vinyl Plank Flooring Wood

How To Install Luxury Vinyl Plank
Related Posts