Essential Aspects of Vinyl Wood Flooring Planks Installation
Vinyl wood flooring planks have gained immense popularity due to their durability, easy maintenance, and aesthetic appeal. Installing vinyl wood flooring planks requires proper planning and execution to ensure a successful outcome. This article presents the essential aspects of vinyl wood flooring planks installation for a flawless and long-lasting result.
1. Preparation
The foundation for a successful installation is proper preparation. Ensure the subfloor is level, clean, and free of debris. Remove any existing flooring and repair any imperfections. If installing over a concrete subfloor, check for moisture levels and install a moisture barrier if necessary.
2. Acclimation
Before installation, allow the vinyl wood flooring planks to acclimate to the temperature and humidity of the room. This prevents expansion or contraction after installation. Follow the manufacturer's instructions for acclimation time, which typically ranges from 24 to 48 hours.
3. Layout Planning
Plan the layout before starting the installation. Determine the direction of the planks and stagger them to create a natural and aesthetically pleasing look. Measure and mark the starting point and snap chalk lines to guide the installation.
4. Adhesive Selection
Vinyl wood flooring planks can be installed using either glue-down or floating methods. Glue-down installation requires a specific adhesive designed for vinyl flooring. Floating installations use a locking system to join the planks without the need for adhesive.
5. Installation Technique
Glue-Down Method: Apply the adhesive evenly to the subfloor using a trowel. Lay the first plank and press it firmly into the adhesive. Continue laying planks, staggering the joints and aligning the edges. Use a tapping block and mallet to ensure proper adhesion.
Floating Method: Angle the first plank and lock it into the side of the adjacent plank. Continue locking the planks together, maintaining a straight line. Use spacers to ensure even gaps along the walls and edges.
6. Trimming and Finishing
Trim the planks along the edges to fit the walls and obstacles. Use a sharp utility knife, miter saw, or power cutter for precise cuts. Install baseboards or transition strips to cover the expansion gap and provide a finished look.
7. Maintenance and Care
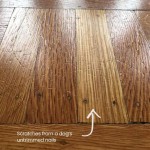
Regular cleaning and maintenance will extend the lifespan of your vinyl wood flooring. Sweep or vacuum regularly to remove loose dirt and dust. Use a damp mop with a mild cleaning solution specifically designed for vinyl flooring. Avoid using harsh chemicals or abrasive cleaners.
Conclusion
Installing vinyl wood flooring planks requires attention to detail and proper execution. By following these essential aspects, you can achieve a professional-looking, durable, and visually appealing floor that will enhance the beauty of your home for years to come.

Laying Vinyl Planks The Right Way Expert Guide By Fantastic Handyman

A Beginner S Guide To Installing Vinyl Plank Flooring Dumpsters Com

Installing Vinyl Plank Flooring How To Fixthisbuildthat

How To Install Vinyl Flooring Planks

How To Install Luxury Vinyl Plank Flooring Wood

How To Install Vinyl Plank Flooring As A Beginner Home Renovation

How To Install Floating Vinyl Plank Flooring In 5 Easy Steps Riverbend Interiors

Installing Vinyl Floors A Do It Yourself Guide The Honeycomb Home

Installing Vinyl Plank Flooring For Beginners Anika S Diy Life

How To Install Vinyl Plank Flooring In A Bathroom Fixthisbuildthat
Related Posts