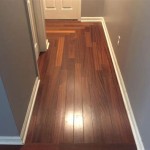
Vinyl Plank Wood Flooring Installation: Essential Aspects to Consider
Vinyl plank wood flooring has become increasingly popular due to its durability, affordability, and aesthetic appeal. However, proper installation is crucial to ensure a long-lasting and visually pleasing floor.
This guide will delve into the essential aspects of installing vinyl plank wood flooring, providing you with the knowledge and tips necessary for a successful project.
1. Preparation
Before starting the installation, ensure the subfloor is clean, flat, and free of any imperfections. Remove any existing flooring, baseboards, and obstacles. Level the subfloor using a self-leveling compound if necessary.
2. Moisture Control
Vinyl plank flooring is moisture-resistant, but excessive moisture can damage it. Install a vapor barrier over the subfloor to prevent moisture penetration. Use a moisture meter to check the subfloor's moisture level, which should be below 12%.
3. Flooring Acclimation
Allow the vinyl planks to acclimate to the installation environment for at least 48 hours before installation. This helps prevent buckling or shrinkage due to temperature or humidity changes.
4. Dry-Lay Planning
Dry-lay the planks to plan the layout and determine the required cuts. Measure and mark the starting point, ensuring straight lines and avoiding excessive cuts. Stagger the planks for a more natural and aesthetically pleasing look.
5. Adhesive Application
Follow the manufacturer's instructions for adhesive application. Use a notched trowel to apply adhesive evenly to the subfloor. Spread the adhesive in small sections as you lay the planks.
6. Plank Placement
Starting at the marked starting point, lay the first plank and tap it into place using a tapping block or hammer. Continue laying the planks, interlocking them securely. Lock each plank into the previous one to create a tight bond.
7. Cutting and Trimming
Use a utility knife or flooring cutter to make precise cuts around obstacles or walls. Measure and mark the cuts carefully to ensure a snug fit. Trim the excess plank with a jigsaw or miter saw.
8. Expansion Gaps
Leave a small expansion gap around the perimeter of the flooring to allow for natural expansion and contraction. Use spacers to maintain the gap and remove them after installation.
9. Wall Base Installation
Install wall base molding to cover the expansion gap and conceal the edges of the flooring. Use a nail gun or adhesive to secure the wall base in place.
10. Cleaning and Maintenance
Once the installation is complete, vacuum or sweep the flooring to remove any debris. Avoid using harsh chemicals or abrasive cleaning solutions. Regularly sweep or mop the floor with a damp cloth to maintain its beauty.
By following these essential aspects, you can confidently install vinyl plank wood flooring in your home, creating a durable and attractive floor that will provide years of enjoyment.

A Beginner S Guide To Installing Vinyl Plank Flooring Dumpsters Com

How To Install Vinyl Plank Flooring As A Beginner Home Renovation

10 Beginner Mistakes Installing Vinyl Plank Flooring

How To Install Vinyl Plank Flooring The Home Depot

How To Install Floating Vinyl Plank Flooring In 5 Easy Steps Riverbend Interiors

A Complete Guide How To Stagger Vinyl Plank Flooring Whole Cabinet Supply

Installing Vinyl Plank Flooring How To Fixthisbuildthat

Installing Vinyl Plank Flooring Step By Guide Homeserve Usa

How To Install Luxury Vinyl Plank Flooring Quick And Simple Casa Watkins Living

Installing Vinyl Floors A Do It Yourself Guide The Honeycomb Home
Related Posts


