Vinyl Plank Flooring Kitchen Installation: Essential Aspects to Get Right
Vinyl plank flooring is a popular choice for kitchens due to its durability, water resistance, and ease of maintenance. However, ensuring a flawless installation is crucial to maximize its benefits and longevity.
Subfloor Preparation: The subfloor must be level, flat, and dry. Any unevenness or imperfections can result in planks buckling or cracking over time. Smoothing the surface with a sander or leveling compound is recommended.
Expansion Gap: Vinyl planks expand and contract with temperature changes. Leaving an expansion gap around the perimeter of the room allows for this movement without buckling or warping. Use spacers to maintain a consistent gap.
Moisture Barrier: Vinyl plank flooring is water-resistant, but it's not waterproof. A moisture barrier under the planks prevents moisture penetration from the subfloor, which can damage the installation.
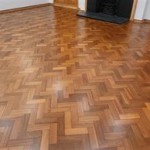
Staggering Seams: When installing the planks, stagger the end seams of adjacent rows to minimize the appearance of visible seams. This technique strengthens the installation and reduces the risk of gaps between the planks.
Adhesive or Floating: Vinyl plank flooring can be installed with adhesive or as a floating floor. Adhesive ensures a permanent bond to the subfloor, while floating floors rely on the planks' interlocking system for stability. Choose the method appropriate for your kitchen's conditions and preferences.
Transition Strips: When transitioning from vinyl plank flooring to other flooring types, such as tile or hardwood, use transition strips to cover the seam and create a smooth transition.
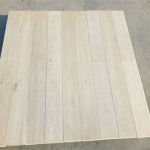
Proper Acclimation: Before installation, allow the vinyl planks to acclimate to the kitchen's temperature and humidity for several days. This step helps minimize potential expansion or contraction after installation.
Cutting and Fitting: Use a sharp utility knife or a flooring cutter to cut the planks to size. Carefully measure and mark the cuts to ensure a precise fit. Tap the planks together gently using a tapping block or a rubber mallet.
Sealing Edges: Once the installation is complete, seal the edges of the flooring with a vinyl-specific sealant. This step prevents moisture from seeping into the edges and compromising the installation.
By adhering to these essential aspects, you can ensure a successful vinyl plank flooring installation in your kitchen, creating a durable, water-resistant, and stylish flooring solution that will enhance the functionality and aesthetics of your space.

A Beginner S Guide To Installing Vinyl Plank Flooring Dumpsters Com

Can You Put A Refrigerator Or Heavy Furniture On Vinyl Plank Flooring

Installing Vinyl Plank Flooring For Beginners Anika S Diy Life

New Vinyl Plank Flooring Over Tile Table And Hearth

How To Install Vinyl Plank Flooring In A Kitchen And Living Room As Beginner Home Renovation

8 Reasons You Should Consider Luxury Vinyl Plank Flooring

Diy Luxury Vinyl Plank Installation

Updating A Kitchen With Vinyl Engineered Plank Flooring Cutertudor House

Diy Luxury Vinyl Plank Installation

How To Choose Best Vinyl Flooring For Kitchen Scv Floorsmith