Essential Aspects of Vinyl Plank Flooring Installation on Stairs
Vinyl plank flooring has gained immense popularity in recent years due to its durability, affordability, and versatile aesthetics. Installing vinyl planks on stairs may seem daunting, but with careful planning and proper technique, you can achieve a professional-looking finish that enhances the beauty of your home.
Step 1: Assess the Stairs
Before starting the installation, it's crucial to assess the existing stairs to determine the scope of the project. Examine the condition of the steps, risers, and nosings. If any damage or unevenness is found, it should be addressed prior to installing the vinyl planks.
Step 2: Gather Materials and Tools
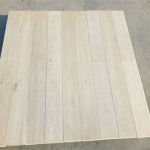
To ensure a successful installation, gather the necessary materials and tools. These include: vinyl planks, underlayment, adhesive, transition strips, a circular saw, a miter saw, a table saw, and a rubber mallet.
Step 3: Prepare the Stairs
Proper preparation is key to a flawless installation. Begin by cleaning the stairs thoroughly to remove any dirt or debris. Install underlayment over the steps and risers to provide additional cushioning and moisture resistance.
Step 4: Cut the Vinyl Planks
Measure the length and width of each step and riser. Transfer these measurements to the vinyl planks and cut them accordingly using a circular saw or a miter saw. For the nosings, use a table saw to achieve a 45-degree angle cut.
Step 5: Apply Adhesive
Apply adhesive to the underside of the vinyl planks and the prepared stairs. Follow the manufacturer's instructions for the recommended amount and type of adhesive. Use a notched trowel to ensure even distribution.
Step 6: Install the Vinyl Planks
Starting from the bottom step, press the vinyl planks firmly into place, aligning them with the edge of the riser. Use a rubber mallet to tap the planks into position. Continue this process for each subsequent step, ensuring that the joints are tight and flush.
Step 7: Install the Nosings
The nosings provide a finishing touch to the stairs and protect the edges of the vinyl planks. Apply adhesive to the underside of the nosings and align them along the edge of the steps. Use a miter saw to cut the nosings at a 45-degree angle to create a seamless transition between the steps and the riser.
Step 8: Install Transition Strips
If the vinyl plank flooring on the stairs meets another type of flooring on the landing, install transition strips to create a smooth and cohesive transition. Measure the width of the gap between the two flooring types and cut the transition strips accordingly. Secure the transition strips using adhesive or nails.
Conclusion
With proper planning and attention to detail, installing vinyl plank flooring on stairs can be a rewarding project. By following these essential aspects, you can ensure a durable and visually appealing result that enhances the overall aesthetics of your home.

How To Install Vinyl Plank Flooring On Stairs In 6 Steps Inc

How To Install Vinyl Plank Flooring On Stairs

Pros And Cons Of Installing Vinyl Flooring On Stairs Lx Hausys

How To Install Vinyl Plank Flooring On Stairs In 6 Steps Inc

Vinyl Flooring On Stairs Complete Guide

Pros And Cons Of Installing Vinyl Flooring On Stairs

Pros And Cons Of Installing Vinyl Flooring On Stairs Lx Hausys

Luxury Vinyl Tile Seamless Upstairs And Downstairs Solution

How To Install Spc Flooring On Stairs Protex Co Ltd

How To Install Luxury Vinyl Plank Laminate Flooring On Stairs