Vinyl Plank Flooring Installation On Stairs: A Comprehensive Guide
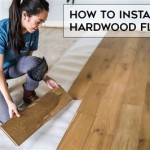
Installing vinyl plank flooring on stairs presents a durable and aesthetically pleasing alternative to traditional carpeting or hardwood. The process, while straightforward, requires careful planning, precise cutting, and meticulous adherence to specific techniques to ensure a safe and visually appealing result. This article provides a detailed guide to the installation of vinyl plank flooring on stairs, covering essential preparation steps, cutting and fitting techniques, and secure fastening methods.
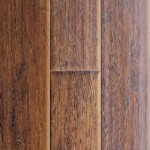
Vinyl plank flooring is a popular choice for stairs due to its water resistance, durability, and ease of maintenance. Compared to carpet, it doesn’t harbor allergens and is easier to clean. Unlike hardwood, it is less susceptible to scratches and dents, making it an ideal solution for high-traffic areas like staircases. The variety of styles and colors available in vinyl plank flooring allows for seamless integration with existing home decor.
Before commencing the installation, it is crucial to gather the necessary tools and materials. This includes, but is not limited to, the selected vinyl plank flooring, a measuring tape, a utility knife with sharp blades, a straight edge or T-square, a circular saw or miter saw, safety glasses, a dust mask, construction adhesive, a rubber mallet, a tapping block, a stair tread gauge (optional but recommended), and shims.
Accurate measurements are paramount to a successful installation. Each stair tread and riser must be measured individually, as slight variations are common. Record each measurement precisely, noting the length, width, and any irregularities. These measurements will serve as the basis for cutting the vinyl planks to the appropriate sizes.
Safety is a primary concern throughout the installation process. Wearing safety glasses protects the eyes from debris, while a dust mask prevents inhalation of harmful particles generated during cutting and sanding. Ensure adequate ventilation in the work area to minimize exposure to fumes from adhesives and other materials.
Preparation of the Staircase
The preparation of the staircase is a critical step that directly impacts the quality and longevity of the installed vinyl plank flooring. A clean, smooth, and stable surface is essential for proper adhesion and a professional-looking finish. Neglecting this stage can lead to unevenness, squeaking, and premature failure of the flooring.
Begin by thoroughly cleaning the existing staircase. Remove any dirt, dust, debris, and old adhesive residue. A vacuum cleaner with a brush attachment is effective for removing loose particles. For stubborn residue, use a scraper and appropriate cleaning solvents, adhering to manufacturer’s safety guidelines. Allow the surface to dry completely before proceeding.
Inspect the staircase for any imperfections, such as loose treads, damaged risers, or protruding nails. Repair any structural issues before installing the vinyl plank flooring. Loose treads should be secured with screws or nails, and damaged risers should be replaced or patched with wood filler. Countersink any protruding nails to create a flush surface.
Leveling the staircase is crucial for ensuring a smooth and even installation. Use a self-leveling compound to fill any low spots or irregularities on the treads and risers. Apply the compound according to the manufacturer's instructions, allowing it to dry and cure completely before proceeding to the next step. Sanding the surface after the leveling compound has dried can help achieve an even smoother finish.
If the existing staircase has a glossy or uneven surface, consider applying a layer of primer to promote adhesion. A quality primer will create a better bond between the staircase and the vinyl plank flooring, preventing peeling or lifting over time. Allow the primer to dry completely before proceeding with the installation.
In some cases, it may be necessary to remove existing carpeting or other floor coverings. This process can be time-consuming, but it is essential for creating a clean and stable surface for the vinyl plank flooring. Use a utility knife to cut the carpet into manageable sections, and then pull it up from the staircase. Remove any staples or tacks that remain, and thoroughly clean the surface before proceeding.
Cutting and Fitting the Vinyl Planks
Accurate cutting and fitting of the vinyl planks are essential for a seamless and professional-looking installation. This step requires precision and attention to detail, as even slight inaccuracies can result in gaps, uneven seams, and a compromised appearance. A stair tread gauge can simplify this process, allowing accurate replication of complex tread shapes.
Begin by measuring the first stair tread and riser. Transfer these measurements to the vinyl plank flooring, adding a small margin of error (approximately 1/8 inch) for adjustments. Use a straight edge or T-square to ensure accurate cuts. A utility knife with a sharp blade is suitable for making straight cuts on thinner vinyl planks. For thicker planks, a circular saw or miter saw may be necessary.
When cutting the vinyl planks, always err on the side of caution and cut slightly larger than the required size. It is easier to trim a piece down than to add material back on. After cutting, dry-fit the planks on the stair tread and riser to check for accuracy. Make any necessary adjustments with a utility knife or sanding block.
For treads with rounded edges or irregular shapes, create a template using cardboard or heavy paper. Trace the outline of the tread onto the template, and then transfer the template to the vinyl plank flooring. Cut the vinyl plank flooring along the traced line, using a utility knife or jigsaw. Test the fit of the cut piece, making any necessary adjustments until it fits snugly against the tread.
When cutting vinyl planks for the risers, ensure that they extend slightly beyond the edge of the tread above and below. This will create a clean and finished look, hiding any gaps or imperfections. Use a level to ensure that the risers are installed vertically, and adjust as needed to compensate for any imperfections in the staircase.
Pay close attention to the direction of the vinyl plank flooring when cutting and fitting the pieces. Ensure that the planks are installed in a consistent direction, creating a uniform and visually appealing pattern. Consider the location of seams and joints, and try to minimize their visibility by staggering them or aligning them with existing features of the staircase.
Adhering and Fastening the Vinyl Planks
Securing the vinyl planks to the staircase is a critical step in the installation process. Proper adhesion and fastening will ensure that the planks remain in place, preventing movement, squeaking, and premature wear. The type of adhesive and fastening method used will depend on the specific type of vinyl plank flooring and the condition of the staircase.
Apply a high-quality construction adhesive to the back of the vinyl planks, following the manufacturer's instructions. Use a notched trowel to spread the adhesive evenly, ensuring that all areas of the plank are covered. Avoid applying too much adhesive, as this can create a messy and uneven installation. A thin, even layer of adhesive is sufficient for most applications.
Position the vinyl plank flooring on the stair tread or riser, aligning it with the edges and corners. Press firmly to ensure that the adhesive makes good contact with the surface. Use a rubber mallet and tapping block to gently tap the planks into place, ensuring that they are securely seated. Work from the center of the plank outwards, removing any air pockets or bubbles.
For added security, consider using finishing nails or staples to fasten the vinyl planks to the staircase. Use a nail gun or staple gun to drive the fasteners through the planks and into the underlying wood. Countersink the nails or staples slightly to prevent them from protruding above the surface. Cover the nail holes with wood filler that matches the color of the vinyl plank flooring.
When installing vinyl plank flooring on stairs with bullnose treads, it is important to use a flexible transition strip to bridge the gap between the tread and the riser. The transition strip should be securely fastened to both the tread and the riser, providing a smooth and safe transition between the two surfaces. Choose a transition strip that matches the color and style of the vinyl plank flooring for a seamless and professional look.
Allow the adhesive to dry and cure completely before allowing traffic on the staircase. Follow the manufacturer's instructions for drying time, which may vary depending on the type of adhesive used. Avoid walking on the stairs during the drying period, as this can disrupt the adhesion and cause the planks to shift.
Once the adhesive has dried, inspect the installation for any gaps, uneven seams, or loose planks. Address any issues promptly, using additional adhesive or fasteners as needed. A final inspection will ensure a durable and aesthetically pleasing result.
Regular cleaning and maintenance will help prolong the life of the vinyl plank flooring on the stairs. Use a damp mop and mild detergent to clean the surface, avoiding harsh chemicals or abrasive cleaners. Promptly clean up any spills or stains to prevent them from setting. With proper care, vinyl plank flooring on stairs can provide years of reliable performance and enhance the beauty of the home.

How To Install Vinyl Plank Flooring On Stairs In 6 Steps Inc

How To Install Vinyl Plank Flooring On Stairs

Pros And Cons Of Installing Vinyl Flooring On Stairs Lx Hausys

Luxury Vinyl Tile Seamless Upstairs And Downstairs Solution

Pros And Cons Of Installing Vinyl Flooring On Stairs

How To Install Luxury Vinyl Plank Laminate Flooring On Stairs

How To Install Vinyl Plank Flooring On Stairs In 6 Steps Inc

Hardwood Stairs And Luxury Vinyl Plank Floors In High Point Floor Coverings International Triad

How To Install Laminate Flooring On Staircase Step By Guide

These Stairs Will Have Them Staring Winnipeg Free Press
Related Posts