Vinyl Plank Flooring Installation on Concrete: A Comprehensive Guide
Vinyl plank flooring is a popular choice for its durability, ease of maintenance, and versatility in design. Installing vinyl plank flooring on concrete requires careful preparation and precision to ensure a long-lasting and aesthetically pleasing floor. Here's a comprehensive guide to help you through the process:
Materials and Tools Required:
- Vinyl plank flooring
- Underlayment (optional)
- Moisture barrier
- Adhesive (for glue-down installation)
- Flooring cutter or utility knife
- Tapping block or mallet
- Tape measure
- Carpenter's pencil
Step 1: Preparation
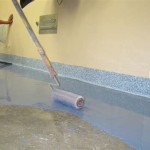
Start by ensuring the concrete subfloor is level, clean, and dry. Remove any existing floor coverings, adhesives, or debris. Inspect the concrete for cracks or imperfections and repair them if necessary. If the concrete is uneven or has high moisture content, consider installing an underlayment to provide a smooth surface and moisture barrier.
Step 2: Moisture Barrier Installation
A moisture barrier is crucial to prevent moisture from seeping into the vinyl flooring and causing damage. Roll out the moisture barrier over the prepared concrete subfloor and overlap the edges by 6 inches. Tape the seams securely with waterproof tape.
Step 3: Glue-Down Installation
Apply adhesive to the back of the vinyl planks according to the manufacturer's instructions. Position the first plank in the corner of the room and press it firmly into the adhesive. Continue laying planks row by row, tapping the edges together with a tapping block or mallet to ensure a tight fit. Wipe away any excess adhesive that may squeeze out.
Step 4: Floating Installation (Optional)
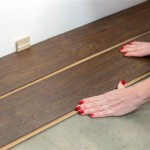
Floating installations use vinyl planks that lock together without the need for adhesive. Align the first two planks and lock them together along the long edge. Continue the process, angling the subsequent planks slightly and pressing them down to lock them into place. Ensure there are no gaps between planks and maintain a consistent spacing from the walls.
Step 5: Trim and Finish
Once the flooring is installed, trim around the edges using a flooring cutter or utility knife. Measure and cut the planks to fit snugly against walls, baseboards, and other obstacles. Install baseboards or quarter rounds to conceal any gaps and provide a finished look.
Tips for a Successful Vinyl Plank Flooring Installation:
- Plan the layout carefully to minimize waste and ensure a visually appealing result.
- Follow the manufacturer's instructions for adhesive application, curing time, and any specific requirements.
- Use a straightedge to ensure straight lines and square corners.
- Allow ample time for adhesive to dry before walking on the new floor.
- Maintain the floor regularly by sweeping or vacuuming and damp mopping as needed.
Installing vinyl plank flooring on concrete is a manageable project that can enhance the aesthetics and durability of your home. By following these steps and using quality materials, you can create a long-lasting and beautiful flooring solution.

Tips For Installing Vinyl Plank Over Concrete Floors Lemon Thistle

How To Prepare A Concrete Floor For Vinyl Flooring Parrys

Tips And Tricks For Installing Vinyl Plank Over Concrete Floors Riverbend Interiors

10 Beginner Mistakes Installing Vinyl Plank Flooring

How To Install Vinyl Or Laminate Floors In A Basement Over Concrete Slab

Tips For Installing Vinyl Plank Over Concrete Floors Lemon Thistle

Concrete Subfloor Preparation For The Vinyl Floor Installation How To Diy Mryoucandoityourself

Tips For Installing Vinyl Plank Over Concrete Floors Lemon Thistle

Installing Luxury Vinyl Plank Over Concrete Your Next Summer Diy Project

Installing Vinyl Plank Flooring How To Fixthisbuildthat


