Vinyl Flooring Cut Repair: A Comprehensive Guide
Vinyl flooring, renowned for its durability, affordability, and aesthetic versatility, remains a popular choice for residential and commercial spaces. Despite its resilient nature, vinyl flooring is susceptible to cuts and tears from sharp objects, heavy furniture, or accidental impacts. Addressing these damages promptly is crucial to maintain the floor's integrity, prevent further deterioration, and preserve its visual appeal. This article provides a detailed guide on assessing and repairing cuts in vinyl flooring, offering practical techniques and considerations for a successful restoration.
Before embarking on any repair, a thorough assessment of the cut is necessary. This evaluation determines the extent of the damage, the type of vinyl flooring involved, and the appropriate repair method. Small, superficial cuts may require a simple patching solution, while larger, more significant tears might necessitate a more extensive repair or even replacement of the affected section.
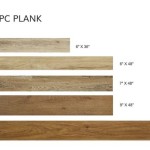
The type of vinyl flooring also influences the repair approach. Sheet vinyl, tile vinyl, and plank vinyl each present unique challenges and require specific techniques. Sheet vinyl, typically installed in large, continuous pieces, can be more challenging to repair seamlessly than tile or plank vinyl, which allows for individual piece replacement.
Key Point 1: Assessing the Damage and Choosing the Right Repair Method
The initial step involves a careful examination of the cut. Factors to consider include the size, depth, and location of the damage. A small, shallow cut might be addressed with a vinyl repair filler, while a deeper, wider cut may necessitate a patch. The location of the cut also plays a role; repairs in high-traffic areas will require a more robust solution to withstand wear and tear.
For very minor surface cuts, a vinyl repair kit containing a color-matching filler might suffice. These kits typically include a range of color pigments that can be blended to match the existing flooring. The filler is applied to the cut, leveled, and allowed to cure, effectively concealing the damage. However, the longevity of this solution depends on the quality of the filler and the level of foot traffic in the area.
For larger cuts, a more durable solution involves patching. This requires cutting out the damaged section and replacing it with a matching piece of vinyl. Sourcing a replacement piece can be achieved by using leftover vinyl from the original installation or by obtaining a close match from a flooring retailer. The key to a successful patch is precise cutting and careful adhesion to ensure a seamless blend with the surrounding flooring.
Another consideration is the presence of underlayment damage. If the cut has penetrated the vinyl and affected the underlayment beneath, the underlayment must also be repaired or replaced to provide a stable and even surface for the repair. Neglecting underlayment damage can lead to future problems and a less durable repair.
Finally, consider the feasibility of a professional repair. For complex cuts, intricate patterns, or concerns about achieving a seamless finish, consulting a professional flooring installer is advisable. While this option involves a higher cost, it ensures a high-quality repair and avoids potential mistakes that could further damage the flooring.
The chosen repair method should align with the severity of the damage, the type of vinyl flooring, and the homeowner's skill level and budget. A careful assessment is the foundation for a successful and long-lasting repair.
Key Point 2: Step-by-Step Guide to Patching Vinyl Flooring
Patching vinyl flooring involves several steps, each requiring precision and attention to detail. The following guide outlines the process for creating a seamless and durable patch.
Step 1: Preparing the Area. Thoroughly clean the area around the cut, removing any dirt, debris, or adhesive residue. Use a mild detergent and water, followed by a clean cloth to dry the surface. This ensures proper adhesion of the patch.
Step 2: Cutting Out the Damaged Section. Using a sharp utility knife and a straight edge, carefully cut out the damaged section of vinyl flooring. Create a square or rectangular shape around the cut for a cleaner, more consistent patch. It is crucial to cut completely through the vinyl, making sure to remove the damaged section entirely. Employ caution to avoid cutting into the subfloor.
Step 3: Creating a Template. Use the cut-out section as a template to trace the shape onto the replacement vinyl piece. Ensure the replacement piece is slightly larger than the cut-out to allow for precise trimming.
Step 4: Cutting the Replacement Patch. Carefully cut the replacement vinyl piece along the traced lines, using a sharp utility knife. Ensure the edges are clean and straight for a seamless fit. If necessary, slightly oversized cut on the patch could be done; this allows for fine trimming of the vinyl piece prior to gluing.
Step 5: Applying Adhesive. Apply vinyl flooring adhesive to the subfloor within the cut-out area, following the manufacturer's instructions. Use a notched trowel to ensure an even distribution of the adhesive. Be mindful of the adhesive's open time and working time to ensure proper bonding.
Step 6: Installing the Patch. Carefully position the replacement patch into the cut-out area, aligning the edges with the surrounding flooring. Press the patch firmly onto the adhesive, ensuring full contact with the subfloor. Use a roller or a flat, smooth object to apply even pressure across the entire patch.
Step 7: Securing the Edges. Use seam sealant along the edges of the patch to create a waterproof and secure bond. This prevents moisture from seeping under the patch and causing further damage. Wipe away any excess sealant with a damp cloth.
Step 8: Weighing the Patch. Place a heavy, flat object on top of the patch for at least 24 hours to allow the adhesive to fully cure. This ensures a strong and durable bond between the patch and the subfloor.
Step 9: Final Trim and Cleaning. After the adhesive has cured, carefully trim any excess vinyl around the edges of the patch, using a sharp utility knife. Clean the area with a damp cloth to remove any remaining residue.
Following these steps carefully will result in a durable and aesthetically pleasing patch that seamlessly blends with the surrounding vinyl flooring to keep it looking neat and uniform.
Key Point 3: Addressing Specific Challenges and Considerations
While the patching process outlined above provides a general guideline, several specific challenges and considerations may arise during the repair. Addressing these issues effectively is crucial for a successful outcome.
Matching the Pattern. One of the most significant challenges is matching the pattern of the replacement patch to the existing flooring. This requires careful attention to detail and may involve sourcing a replacement piece from the same batch of vinyl. If an exact match is unavailable, choosing a pattern that complements the existing flooring is the next best option. In some cases, creativity and artistic skill can be employed to subtly blend the patterns using color-matching techniques and specialized tools.
Working with Sheet Vinyl. Repairing cuts in sheet vinyl can be more challenging than repairing tile or plank vinyl due to the larger size and continuous nature of the material. A seamless repair requires precise cutting and careful adhesion to avoid visible seams. Consider using a heat gun to soften the vinyl and facilitate a smoother transition between the patch and the existing flooring. Professional installation is often recommended for repairs involving sheet vinyl.
Dealing with Loose-Lay or Click-Lock Vinyl. Some vinyl flooring products feature a loose-lay or click-lock installation method. Repairing cuts in these types of flooring may involve disassembling the surrounding sections to access the damaged area. This requires careful handling of the interlocking mechanisms to avoid damage during disassembly and reassembly. Follow the manufacturer's instructions for proper disassembly and reassembly techniques.
Adhesive Selection. Choosing the right adhesive is critical for a durable and long-lasting repair. Use a vinyl flooring adhesive specifically designed for the type of vinyl flooring being repaired. Consider factors such as the adhesive's open time, working time, and curing time. Follow the manufacturer's instructions carefully to ensure proper bonding.
Subfloor Integrity. The condition of the subfloor plays a crucial role in the success of the repair. Ensure the subfloor is clean, level, and free of any moisture or damage. Repair any imperfections in the subfloor before applying the adhesive. A compromised subfloor can lead to uneven adhesion and premature failure of the repair.
Seam Sealing. Seam sealing is essential for preventing moisture penetration and maintaining the integrity of the repair. Use a high-quality seam sealant that is compatible with vinyl flooring. Apply the sealant carefully and evenly along the edges of the patch, ensuring a waterproof barrier. Wipe away any excess sealant with a damp cloth.
Preventative Measures. After completing the repair, take preventative measures to minimize the risk of future damage. Use floor protectors under furniture legs, avoid dragging heavy objects across the floor, and promptly clean up any spills or stains. Regular maintenance and care will help to prolong the life of the vinyl flooring and minimize the need for future repairs.
By addressing these specific challenges and considerations, homeowners can achieve a successful and long-lasting repair that preserves the beauty and functionality while extending the lifespan of their vinyl flooring.

How To Repair Vinyl Flooring Fixing Sc Bubbles More

How To Repair Vinyl Flooring Fixing Sc Bubbles More

How To Repair Vinyl Flooring Fixing Sc Bubbles More

Repairing Vinyl Flooring Diy Family Handyman

How To Repair Luxury Vinyl Plank Flooring The Palette Muse

How To Patch Torn Vinyl

Avoid Costly Mistakes Repairing Vinyl Plank Flooring Made Easy

How To Repair Vinyl Flooring Fixing Sc Bubbles More

Repairing Vinyl Flooring Diy Family Handyman

How To Patch A Sheet Vinyl Floor This Old House
Related Posts