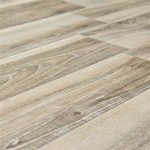
Unveiling the Art of Trafficmaster Allure Vinyl Plank Flooring Installation
Transform your abode with the enchanting allure of Trafficmaster Allure Vinyl Plank Flooring. Meticulously crafted to mimic the natural beauty of hardwood, this innovative flooring solution effortlessly blends timeless elegance with unparalleled durability. To ensure a flawless installation that will stand the test of time, follow these comprehensive guidelines and discover the art of effortless flooring mastery.
Pre-Installation Preparation
Before embarking on the installation process, meticulous preparation is paramount. Acclimate the vinyl planks to the intended installation environment for at least 48 hours, ensuring they reach room temperature. This prudent step minimizes the risk of expansion or contraction post-installation, ensuring a stable and secure surface.
Subfloor Inspection and Preparation
A solid and level subfloor is the cornerstone of a successful installation. Inspect the subfloor thoroughly, repairing any imperfections or irregularities. Ensure the surface is free of moisture, dust, or debris, as these elements can compromise the adhesion of the vinyl planks. If necessary, install a moisture-resistant underlayment to shield against potential moisture migration.
Plank Layout and Dry Fitting
Plan the layout meticulously before initiating the installation process. Determine the optimal orientation of the planks to complement the room's dimensions and natural light flow. Dry fit the planks to visualize the final design and identify any necessary adjustments or cuts.
Adhesive Application
Apply the adhesive generously and evenly to the subfloor, following the manufacturer's instructions. Use a notched trowel to create a consistent spread, ensuring optimal bonding between the vinyl planks and the subfloor. Position the planks firmly into place, pressing down with moderate force to secure them.
Plank Installation and Staggering
Begin installing the planks from a corner of the room, staggering the joints to enhance the visual appeal and structural stability of the flooring. Ensure that the planks are snugly fitted together, but avoid excessive force that could cause buckling or damage. Use a tapping block to gently tap the planks into place, ensuring a seamless and flush surface.
Expansion Gap Maintenance
Maintain a consistent expansion gap around the perimeter of the room, allowing the flooring to expand and contract naturally with temperature fluctuations. Install quarter-round molding along the baseboards to conceal the expansion gap and complete the elegant look of your flooring.
Finishing Touches
Once the installation is complete, allow the adhesive to cure fully, typically within 24-48 hours. Clean the floor gently with a damp mop to remove any residual adhesive or dust. Avoid using abrasive cleaners or excessive water, as they could damage the flooring's protective finish.
Congratulations! You have successfully mastered the art of Trafficmaster Allure Vinyl Plank Flooring Installation. Relish the beauty and functionality of your transformed space, knowing that your flooring will provide years of enduring charm and easy maintenance.

Trafficmaster White Maple 4 Mil X 6 In W 36 L Grip Strip Water Resistant Luxury Vinyl Plank Flooring 24 Sqft Case 97011 The Home Depot

How To Install Luxury Vinyl Plank Trafficmaster Allure

Trafficmaster Cherry 4 Mil X 6 In W 36 L Grip Strip Water Resistant Luxury Vinyl Plank Flooring 24 Sqft Case 12024 The Home Depot

How To Install Vinyl Flooring Traffic Master Moonstone Rigid Core Plank Diy

How To Install Allure Flooring

Trafficmaster Allure Vinyl Plank Flooring Installation

Allure By Traffic Master Flooring Install

Installing Allure Trafficmaster Resilient Vinyl Flooring Basement Floor Installation Plank

Trafficmaster Allure Ultra Resilient Flooring Installation Review

Trafficmaster High Point Chestnut 4 Mil X 6 In W 36 L Grip Strip Water Resistant Luxury Vinyl Plank Flooring 24 Sqft Case 83313 The Home Depot


