Essential Aspects of Trafficmaster Allure Resilient Vinyl Plank Flooring Installation
Transforming your living space with Trafficmaster Allure Resilient Vinyl Plank Flooring is a rewarding endeavor that requires careful planning and execution. Here's a comprehensive guide to ensure a seamless and successful installation:
1. Pre-Installation Preparation
Acclimate the flooring planks to the room temperature for at least 48 hours prior to installation. Measure the room and determine the direction of the planks. Ensure the subfloor is level, flat, and free of debris. If necessary, use a self-leveling compound to smooth any uneven areas.
2. Installing the First Row
Start by laying the first plank along one wall, ensuring a straight edge. Use spacers to maintain uniform gaps between the planks. Dry-fit the remaining planks in the first row, ensuring a snug fit. Trace the perimeter of the last plank and cut it to fit precisely.
3. Floating Lock Installation
Trafficmaster Allure Resilient Vinyl Planks feature a floating lock installation system. Align the tongue of the next plank with the groove of the previous plank and gently press down until the lock engages. Continue this process for the entire room, ensuring the planks are securely joined.
4. Staggered Installation
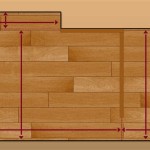
To create a more natural and visually appealing look, stagger the joints of the planks by at least six inches. Cut the first plank in the second row by half and start the row with the cut end. This will help distribute the seams evenly throughout the floor.
5. Cutting and Fitting
Use a utility knife or circular saw to cut planks to fit around obstacles such as door frames or pipes. For precise cuts, use a miter saw or a flooring T-bar. Measure and transfer the cutline onto the plank before making the cut.
6. Transition Moldings
To transition to other flooring types or areas, use transition moldings such as T-moldings or reducers. Secure the moldings to the subfloor and align them with the edge of the vinyl planks. Use a nail gun or adhesive for secure attachment.
7. Finishing Touches
Once the installation is complete, remove the spacers and thoroughly clean the floor to remove any dust or debris. Install baseboards or quarter rounds to conceal the perimeter and give a finished look. Allow the flooring to cure for 24 to 48 hours before heavy traffic.
By following these steps carefully, you can ensure a professional-looking, durable, and beautiful Trafficmaster Allure Resilient Vinyl Plank Flooring installation. Enjoy your transformed space for years to come!

Trafficmaster Allure Ultra Resilient Flooring Installation Review

Allure By Traffic Master Flooring Install

Installing Allure Trafficmaster Resilient Vinyl Flooring Basement Floor Installation Plank

Trafficmaster White Maple 4 Mil X 6 In W 36 L Grip Strip Water Resistant Luxury Vinyl Plank Flooring 24 Sqft Case 97011 The Home Depot

Trafficmaster Country Pine 4 Mil X 6 In W 36 L Grip Strip Water Resistant Luxury Vinyl Plank Flooring 24 Sqft Case 33114 The Home Depot

Trafficmaster Khaki Oak 4 Mil X 6 In W 36 L Grip Strip Water Resistant Luxury Vinyl Plank Flooring 24 Sqft Case 185312 The Home Depot

Trafficmaster Ceramica 12 X 24 Vinyl Tile Floor Installation

Trafficmaster Khaki Oak 4 Mil X 6 In W 36 L Grip Strip Water Resistant Luxury Vinyl Plank Flooring 24 Sqft Case 185312 The Home Depot

Trafficmaster Brushed Oak Taupe 4 Mil X 6 In W 36 L Grip Strip Water Resistant Luxury Vinyl Plank Flooring 480 Sqft Pallet 30095311 The Home Depot

Pin On S
Related Posts