Tools You Need To Install Laminate Flooring
Installing laminate flooring can significantly enhance the aesthetics and value of a home. While professional installation is an option, many homeowners choose to undertake this project themselves. Successful laminate flooring installation requires meticulous preparation and the appropriate tools. Having the right tools not only expedites the process but also ensures a high-quality, durable, and aesthetically pleasing finished product. This article details the essential tools required for a successful laminate flooring installation.
Measuring and Planning Tools
Before commencing any physical work, accurate measurement and planning are crucial. This stage determines the quantity of materials required and ensures that the layout is both functional and visually appealing, minimizing wastage and potential errors.
Measuring Tape: A reliable measuring tape is essential for accurately determining the dimensions of the room. It needs to be long enough to cover the longest span of the room without multiple measurements being needed. A 25-foot tape measure is generally sufficient for most residential rooms. Accuracy is critical for calculating the square footage of the room and for making precise cuts.
Pencil and Paper: These are fundamental for recording measurements, sketching the room layout, and noting the placement of obstacles such as doorways, pipes, and corners. A durable pencil such as a carpenter’s pencil is preferable for marking surfaces clearly.
Calculator: A calculator is indispensable for calculating the square footage of the room and determining the number of laminate flooring planks required. It is also helpful for calculating waste allowance, typically around 5-10% depending on the room's complexity and cutting patterns.
Level: A level, preferably a spirit level or laser level, is necessary to ensure that the subfloor is even. Uneven subfloors can cause laminate flooring to buckle or become unstable. A long level (4-6 feet) is recommended for checking larger areas, while a smaller level (2 feet) is useful for tighter spaces.
Straight Edge or Chalk Line: A straight edge, such as a long metal ruler or a chalk line, is used to create straight lines for cutting the laminate planks. A chalk line is particularly useful for marking long, straight lines on the subfloor or laminate planks. A straight edge provides a dependable guide for scoring and cutting laminate.
T-Square or Speed Square: These tools are used to ensure that cuts are square, particularly when cutting planks to fit around corners or obstacles. They are also helpful for marking consistent lines for repetitive cuts.
Cutting and Shaping Tools
Laminate flooring installation invariably involves cutting planks to fit the room's dimensions and around obstacles. The tools used for cutting and shaping laminate flooring should be chosen based on the type of cuts required and the user's comfort level.
Laminate Flooring Cutter: A laminate flooring cutter is a specialized tool designed specifically for cutting laminate planks. It provides clean, straight cuts without chipping or splintering. This tool is efficient, dust-free, and relatively quiet compared to power saws. It's particularly useful for making straight cuts in a production-like environment.
Circular Saw: A circular saw is a versatile power tool that can be used to make a variety of cuts in laminate planks, including straight cuts, angled cuts, and rip cuts. It is essential to use a fine-tooth blade designed for cutting laminate to minimize chipping. Eye and ear protection are crucial when using a circular saw.
Jigsaw: A jigsaw is ideal for making curved or intricate cuts in laminate planks, such as those needed to fit around pipes or irregular shapes. It's important to use a fine-tooth blade designed for cutting laminate to avoid chipping. The speed of the jigsaw should be adjusted to prevent overheating and splintering.
Hand Saw: A hand saw, such as a backsaw or a coping saw, can be used for making small, precise cuts or for trimming laminate planks in tight spaces where power tools are impractical. It requires more physical effort but offers greater control.
Utility Knife: A utility knife with a sharp blade is useful for scoring laminate planks before snapping them along a straight line. This technique is suitable for thinner laminate planks and can provide a clean break.
Drill with Hole Saw Attachment: A drill with a hole saw attachment is required for creating holes in laminate planks to accommodate pipes or other circular obstructions. The size of the hole saw should match the diameter of the pipe or obstruction.
Installation Tools
The actual installation phase requires specific tools to ensure that the laminate planks are properly aligned, secured, and finished. These tools facilitate a tight, seamless fit and protect the flooring during the installation process.
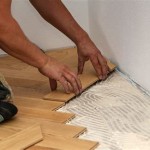
Tapping Block: A tapping block is a small, rectangular block made of wood or plastic that is used to gently tap the laminate planks into place without damaging the edges. It distributes the force of the hammer evenly and prevents chipping or splintering.
Pull Bar: A pull bar is a metal tool with a hooked end that is used to pull the last row of laminate planks into place against the wall. It provides leverage and allows you to securely lock the planks together, especially in tight spaces where a tapping block cannot be used.
Spacers: Spacers are small, wedge-shaped pieces of plastic or wood that are placed between the laminate planks and the walls to maintain a consistent expansion gap. This gap allows the laminate flooring to expand and contract with changes in temperature and humidity, preventing buckling or warping. The size of the expansion gap depends on the manufacturer's recommendations, typically ranging from ¼ inch to ½ inch.
Hammer: A hammer is used in conjunction with the tapping block and pull bar to gently tap the laminate planks into place. A rubber mallet is preferred to minimize the risk of damaging the planks.
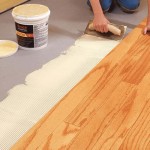
Underlayment Applicator: Depending on the type of underlayment used, a specialized applicator may be required. For example, if using a self-adhesive underlayment, a roller can help to ensure that it is properly adhered to the subfloor.
Seam Sealer Applicator: Some laminate flooring installations require the application of a seam sealer to protect the joints from moisture. A small applicator brush or nozzle is used to apply the sealer evenly along the seams.
Safety Equipment
Safety should always be prioritized during any construction or home improvement project. Laminate flooring installation involves the use of power tools and sharp objects, making safety equipment essential to prevent injuries.
Safety Glasses: Safety glasses protect the eyes from dust, debris, and flying objects that can be generated when cutting or hammering laminate planks. They should be worn at all times during the installation process.
Dust Mask or Respirator: A dust mask or respirator protects the lungs from inhaling dust particles that can be created when cutting or sanding laminate planks. A respirator is recommended for individuals with respiratory sensitivities.
Ear Protection: Ear protection, such as earplugs or earmuffs, reduces the risk of hearing damage from the noise generated by power tools. They should be worn whenever using a circular saw, jigsaw, or other loud equipment.
Gloves: Gloves protect the hands from cuts, scratches, and blisters that can occur when handling laminate planks and tools. They also provide a better grip, reducing the risk of accidents.
Knee Pads: Knee pads provide cushioning and support for the knees when working on the floor for extended periods. They reduce strain and discomfort, allowing you to work more efficiently.
Additional Tools and Materials
While the tools listed above are essential for most laminate flooring installations, certain situations may require additional tools or materials.
Moisture Meter: A moisture meter is used to check the moisture content of the subfloor before installing the laminate flooring. Excessive moisture can cause the laminate to warp or buckle. If the moisture content is too high, the subfloor needs to be properly dried before proceeding.
Vacuum Cleaner: A vacuum cleaner is essential for thoroughly cleaning the subfloor before installing the underlayment and laminate flooring. It removes dust, debris, and other particles that can interfere with the adhesion and stability of the flooring.
Floor Scraper: A floor scraper is used to remove any existing adhesive, paint, or other residues from the subfloor. A clean, smooth subfloor is essential for proper adhesion of the underlayment and laminate flooring.
Self-Leveling Compound: If the subfloor is uneven, a self-leveling compound can be used to create a smooth, flat surface. This is particularly important for laminate flooring, which requires a level subfloor to prevent buckling or instability.
Trim and Molding Tools: After installing the laminate flooring, trim and molding are used to cover the expansion gap and create a finished look. Tools required for installing trim and molding include a miter saw, coping saw, nail gun, and wood filler.
Summary of Essential Tools
To summarize, successful laminate flooring installation hinges on having the appropriate tools. These tools span various categories, ensuring precision in measurement and planning, efficient cutting and shaping, proper installation techniques, and adherence to safety protocols. Accurate measurements using a reliable tape measure, pencil, and calculator are vital for material estimation and layout planning. Cutting tools such as a laminate flooring cutter, circular saw, and jigsaw are essential for adapting planks to fit room dimensions and accommodate obstacles. Installation-specific tools like a tapping block, pull bar, and spacers guarantee a tight and seamless fit while allowing for expansion. Safety gear, including safety glasses, a dust mask, ear protection, and gloves, is paramount to preventing injuries. Having these tools readily available contributes significantly to a smooth, efficient, and professional-looking laminate flooring installation.

How To Install Laminate Flooring On Your Own Diy Hq Longwood Fl

8 Essential Tools For Laminate Flooring Installations The Family Handyman

How To Install Laminate Flooring The Home Depot

Guide To Fitting Laminate Up 50 Off Free Samples

Tools Needed To Install Laminate Flooring Find The Home Pros

How To Install A Laminate Floor

The Laminate Flooring Tools Needed For Installing This

Tools You Need To Install Laminate Flooring And Some Ll Want

Wood Laminate Flooring Installation Floor Fitting Kit Home Tool Set 20 Spacer Diy At B Q

4 Makita Tools That Will Come In Handy When Installing Flooring
Related Posts