Tools Needed To Put In Laminate Flooring
Installing laminate flooring is a DIY project within reach of many homeowners, offering a beautiful and durable floor covering for their homes. The success of a laminate flooring installation hinges on having the right tools and knowing their correct application. This article will delve into the essential tools needed for a successful laminate flooring installation, discussing the various stages of the process and the tools required for each.
Essential Tools for Preparation
Before laying down the first plank, careful preparation is key to a smooth and successful installation. This phase involves removing the existing flooring, checking for levelness, and preparing the subfloor. The following tools are crucial for this preparation stage:
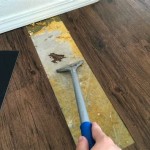
- Crowbar or pry bar: This tool is essential for removing the existing flooring, whether it's carpet, tile, or another type of flooring.
- Hammer: A hammer is used to remove nails and staples from the existing flooring, as well as to drive in any necessary fasteners during the subfloor preparation.
- Level: A level is crucial for ensuring that the subfloor is level and flat before installing the laminate flooring. Uneven subfloors can lead to squeaking and uneven planks.
- Tape measure: A tape measure is essential for measuring the room and calculating the amount of laminate flooring needed.
- Pencil: A pencil is used to mark the layout of the flooring and to make any necessary adjustments.
- Utility knife: A utility knife is used to trim the laminate flooring to fit the space and to score the underlayment.
- Circular saw or jigsaw: A circular saw or jigsaw is used to cut the laminate planks to size, especially for irregular shapes or around obstacles.
- Safety glasses and gloves: Safety glasses and gloves protect you from flying debris and sharp edges while working with the tools.
Laying the Laminate Flooring
Once the subfloor is prepared, the task shifts to laying down the laminate planks. This involves precise cutting, joining, and securing the planks to form a seamless floor. Here are the tools needed for this phase:
- Tapping block: A tapping block is used to gently tap the laminate planks together, ensuring a tight and secure fit.
- Pull bar: A pull bar is used to pull the laminate planks together, providing extra leverage for a tight fit.
- Spacer wedges: Spacer wedges are used to maintain a consistent expansion gap between the laminate planks and the walls, allowing for movement due to temperature and humidity changes.
- Underlayment: Underlayment is a moisture barrier and soundproofing layer that goes beneath the laminate flooring. It can be made of various materials, such as foam, cork, or polyethylene.
- Measuring tape: A measuring tape is crucial for verifying the spacing between planks and for making accurate cuts.
Finishing Touches and Accessories
The final step involves finishing the installation and adding any necessary trims or accessories. This ensures a clean and professional look for the new laminate flooring:
- Baseboards: Baseboards are used to cover the gap between the laminate flooring and the walls, offering a finished and aesthetically pleasing look.
- Transition strips: Transition strips are used to connect the laminate flooring to other floor coverings, such as carpet or tile, creating a smooth transition between different floor types.
- Molding: Molding is used to cover any edges or corners where the laminate flooring meets a wall or other surface, providing a decorative and protective finish.
- Glue (optional): While not always necessary, glue can be used to secure the planks in areas with high traffic or where movement might be a concern.
- Nail gun (optional): For added security, a nail gun can be used to further secure the planks to the subfloor, especially in areas where the flooring is likely to be exposed to heavy wear and tear.
Choosing the Right Tools
Choosing the right tools for your specific project is crucial for its success. While the list above provides a comprehensive overview of the tools needed for a typical laminate flooring installation, some projects might require specialized tools or different types of tools. It is essential to carefully consider the specific requirements of your project and select the tools that are best suited for the task.
For example, if you are installing laminate flooring in a large area, you might want to consider using a laser level for more precise measurements. If you are installing laminate flooring around obstacles, you might need a circular saw with a guide rail to make accurate cuts. And if you are using a moisture barrier, you might need a specific type of underlayment that is compatible with the barrier.
Before embarking on your laminate flooring project, consult with a professional or visit a home improvement store to receive expert advice on choosing the appropriate tools and techniques. Proper planning and preparation will significantly contribute to a successful and enjoyable flooring installation experience.

How To Install Laminate Flooring On Your Own Diy Hq Longwood Fl

6 Steps To Installing Laminate Flooring Do It Best

The Laminate Flooring Tools Needed For Installing This

See Which Laminate Flooring Tools And Cutters I Have In My Kit

Roberts Laminate Flooring Installation Kit 7 Piece 10 780 The Home Depot

Tools You Need To Install Laminate Flooring And Some Ll Want

Installing Laminate Flooring Amazing Pergo Wheaton Oak

9 Essential Tips For Laminate Flooring Installation

Guide To Installing Laminate Flooring Diy Family Handyman

8 Essential Tools For Laminate Flooring Installations The Family Handyman
Related Posts


