Essential Aspects of Tongue and Groove Flooring DIY
Tongue and groove flooring is a popular choice for DIY enthusiasts due to its ease of installation and classic appearance. However, like any project, proper planning and execution are crucial for a successful outcome. Here are the essential aspects you need to consider:
Planning and Preparation
Before starting any installation, it's important to assess the subfloor's condition. Ensure it's level, dry, and structurally sound. Any unevenness or defects must be addressed before laying the flooring. Additionally, determine the room's dimensions and calculate the necessary materials, including flooring, underlayment, and trim.
Tools and Materials
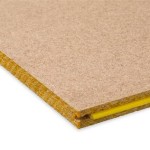
For tongue and groove flooring installation, you'll need essential tools such as a hammer, nail gun, circular saw, pry bar, and measuring tape. Choose high-quality flooring material that suits your style and budget. Underlayment, such as acoustic foam or cork, provides additional support and noise reduction.
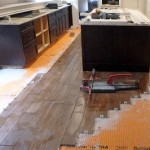
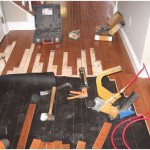
Installation Process
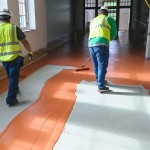
Begin installation by laying the underlayment over the subfloor. Start from a corner and work your way across the room, ensuring the edges are flush. Next, position the first row of tongue and groove planks, inserting the tongue into the groove of the previous plank. Use a nail gun to secure the planks to the subfloor, following the recommended spacing. Continue this process row by row, alternating the starting edge for stability.
Trimming and Finishing
Once the flooring is installed, trim the edges using a circular saw. Install baseboards or quarter rounds to cover the gaps between the flooring and the walls. These finishing touches enhance the appearance and durability of the floor.
Maintenance and Care
Proper maintenance is crucial for preserving the beauty and longevity of your tongue and groove floor. Sweep or vacuum regularly to remove dirt and debris. Use damp mops with a pH-neutral cleaner to clean the floor. Avoid abrasive cleaners or excessive water, as these can damage the finish. Periodically, apply a floor wax or sealant to protect the surface and maintain its shine.
Conclusion
Installing tongue and groove flooring DIY can be a rewarding experience, saving you time and money. By following these essential aspects, you can create a beautiful and durable floor that will enhance your living space. Remember to adhere to the manufacturer's instructions and seek professional advice if needed. With proper planning, preparation, and attention to detail, you can achieve a professional-looking floor that will last for years to come.

Wide Plank Floor Diy Rough Cut To Tongue And Groove 10 Steps With S Instructables

How To Install Beautiful Wood Floors Using Basic Unfinished Lumber The Creek Line House

Install Tongue And Groove Wood Veneer Flooring

How To Install Tongue And Groove Flooring Blog

Diy Tounge And Groove Floor Board Replacement Creative Cain Cabin

Floor Spruce Up Ana White

5 Essential Tips For Tongue And Groove Flooring District Floor Depot

Diy Installing Tongue And Groove Wood Flooring

Tongue Groove Flooring Installation On Underlay Start To Finish

How To Install Lock Engineered Hardwood Flooring
Related Posts