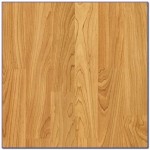
Essential Aspects of Solid Wood Flooring Glue Down
Solid wood flooring offers a timeless appeal and unmatched durability to any interior space. Installing solid wood flooring using a glue-down method requires meticulous attention to detail and an understanding of the essential steps involved. This comprehensive guide will navigate you through the crucial aspects of solid wood flooring glue down, ensuring a successful and long-lasting installation.
Preparing the Subfloor
A well-prepared subfloor is the foundation for a stable and durable solid wood floor. Begin by ensuring the subfloor is level, dry, and free of debris. Use a moisture meter to verify that the moisture content is within the manufacturer's recommended range. Smooth any uneven surfaces using a floor sander or self-leveling compound. If the subfloor is concrete, apply a vapor barrier to prevent moisture from penetrating the flooring.
Choosing the Right Adhesive
Selecting the appropriate adhesive for your solid wood flooring is essential for ensuring proper adhesion. Choose an adhesive specifically designed for solid wood flooring that provides a strong and lasting bond. The adhesive should be compatible with the type of subfloor, the wood species, and the anticipated traffic. Consider factors such as moisture resistance, shear strength, and drying time when selecting the adhesive.
Applying the Adhesive
Once the subfloor is prepared and the adhesive selected, it's time to apply the adhesive. Use a notched trowel to spread the adhesive evenly over the subfloor, ensuring that all grooves are filled. Apply the adhesive to manageable sections, large enough to lay a few planks at a time. Avoid applying excessive adhesive, as it can ooze out and cause problems later.
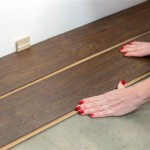
Laying the Planks
Carefully lift each solid wood plank and apply a thin layer of adhesive to the back. Align the plank with the previous one and press it firmly into the adhesive. Use a tapping block and mallet to ensure the planks are fully seated. Check the level of the planks periodically and adjust as needed. Leave a small gap between the planks and the walls to allow for expansion and contraction during seasonal changes.
Curing and Finishing
Once all the planks are laid, allow the adhesive to cure according to the manufacturer's instructions. This can take several hours to days, depending on the adhesive used. Once the adhesive has cured, the floor is ready for finishing. Sand the floor to smooth out any imperfections and apply the desired finish, such as stain, polyurethane, or oil. Ensure adequate ventilation during the finishing process.
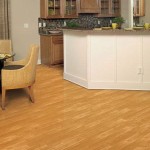
Installing solid wood flooring using a glue-down method is a rewarding project that adds value and beauty to any home. By following these essential steps, you can achieve a professional-quality installation that will last for years to come.

Can You Glue Down Solid Wood Flooring Hardwood Guide Reallyfloors America S Est

Floating Floor Vs Nail Down Slaughterbeck Floors Inc

Best Adhesive For Hardwood Parquet Flooring Over Plywood Sfk

Pros Cons Of Glue Down Flooring Installation Floorset

Glue Down Vs Floating Wood Floor Installation Finfloor

Installation Methods For Wooden Floor Craftedforlife

How To Install Prefinished Hardwood Floor Glue Down Technique Diy Mryoucandoityourself

How To Install Diy Glue Down Engineered Hardwood Flooring

Should I Nail Or Glue My Hardwood Flooring Down Ambience

Hardwood Floor Installations