Essential Aspects of Shaw Floating Vinyl Plank Flooring Installation
Shaw Floating Vinyl Plank Flooring is an excellent choice for homeowners seeking a durable, stylish, and low-maintenance flooring solution. Installing this flooring requires meticulous attention to detail and proper techniques to ensure optimal performance and longevity. Here are some essential aspects to consider for a successful Shaw Floating Vinyl Plank Flooring installation:
1. Subfloor Preparation
The subfloor serves as the foundation for the flooring, so it must be properly prepared before installation. Ensure the subfloor is level, flat, and free of moisture, unevenness, or debris. Leveling compounds or underlayment may be necessary to rectify any inconsistencies.
2. Acclimation
Shaw Floating Vinyl Planks need to acclimate to the installation environment before installation. Allow the planks sufficient time (typically 24-48 hours) to adjust to the temperature and humidity levels of the room where they will be installed.
3. Starting Point & Layout
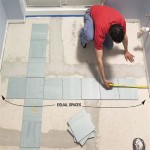
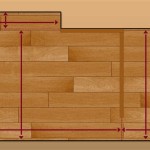
Determine the starting point by finding the center of the room and laying out a chalk line perpendicular to the longest wall. Start installing the planks from this center point, alternating the end joints for stability. Use spacers to maintain uniform gaps between the planks and the walls.
4. Floating Installation
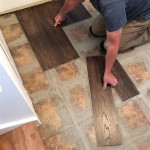
Shaw Floating Vinyl Planks are designed for a floating installation method, where the planks interlock without the use of glue or nails. Align the tongue and groove edges of the planks, ensuring they click firmly into place. Use a tapping block and mallet to gently tap the planks together.
5. Tapping & Compressing
After aligning the planks, use a tapping block and mallet to gently tap on the long edges of the planks. This helps compress the joints and ensure a tight fit. Avoid excessive force that could damage the planks.
6. Undercut Door Casings
Door casings may need to be undercut to allow the flooring to slide underneath. Use an oscillating tool or coping saw to carefully trim the bottom edge of the casing to the thickness of the flooring plus the underlayment.
7. Transitions & Expansion Gaps
In areas where the flooring transitions to other floor coverings or doorways, use appropriate transition strips or moldings. Additionally, leave an expansion gap around the perimeter of the room to allow for natural expansion and contraction of the flooring.
8. Final Inspection & Cleanup
Once the installation is complete, thoroughly inspect the floor for any gaps, unevenness, or loose planks. Remove any spacers, clean the floor with a damp cloth, and enjoy your new Shaw Floating Vinyl Plank Flooring.
Remember that proper planning, meticulous preparation, and attention to detail are crucial for a successful Shaw Floating Vinyl Plank Flooring installation. By following these essential aspects, you can ensure a durable, visually appealing, and long-lasting flooring solution for your home.

Shaw Floorte Vinyl Flooring Installation Getting Started Job Preview Floor Prep Plank

Install Luxury Vinyl Tile

Installing Shaw Luxury Vinyl Flooring Is Easier Than You Think
Floorté Luxury Vinyl Shaw Floors

Shaw Floating Vinyl Plank At Com

Shaw Floorte World Fair 2044v 00343 Paris Glue Down Luxury Vinyl Plan

Shaw Floors Laurel Ridge 7 In X 48 Cider Oak Luxury Vinyl Plank Flooring 18 68 Sq Ft Carton 8 Planks Com

Shaw World S Fair 6 Whole Residential Vinyl Plank Flooring

Shaw Floors Take Home Sample 5 In X 7 Biscayne Envoy Waterproof Lock Luxury Vinyl Plank Flooring Sh 157820 The Depot

Shaw Farrier Plus 20 M Natural Maple Mil X 7 In W 48 L Waterproof Interlocking Luxury Vinyl Plank Flooring 27 73 Sq Ft Carton The Department At Com
Related Posts

