Essential Aspects of Rustic Wood Flooring DIY
Rustic wood flooring exudes a timeless charm, bringing the aesthetics of nature indoors. Whether you're an experienced DIYer or just starting out, installing rustic wood flooring can be a rewarding project. Here's a comprehensive guide to guide you through the essential aspects of this captivating endeavor.
1. Choosing the Right Wood
The type of wood you choose will significantly impact the look and feel of your floor. Consider factors such as durability, appearance, and texture. For rustic flooring, species like oak, pine, and hickory are popular choices due to their distinct grain patterns and aged patina.
The thickness of the wood also matters. Planks with a thickness between 3/4 and 1 inch are suitable for most residential applications. Thicker planks are more durable but may require a more robust subfloor.
2. Preparing the Subfloor
Before installing the wood, prepare a flat and stable subfloor. This may involve leveling the existing subfloor, removing old flooring, or installing a new underlayment. Ensure the subfloor is dry and free from any moisture or debris.
3. Acclimating the Wood
Wood is a natural material that expands and contracts with changes in temperature and humidity. Before installing the wood planks, they must be acclimated to the climate where they will be used. Stack the planks in the room where they will be installed for at least 3 days, allowing them to adjust to the local conditions.
4. Installing the Wood
There are two main methods for installing rustic wood flooring: nailing or stapling. Nailing provides a stronger hold, while stapling is faster and easier. Choose the method that best suits your skills and preferences.
Start by installing the first row of planks perpendicular to the direction of the joists. Use spacers to ensure a consistent gap between the planks. For nailing, use a flooring nailer or a hammer and finish nails. For stapling, use a pneumatic staple gun.
5. Finishing the Floor
Once the wood is installed, you can finish it to protect it and enhance its appearance. Sand the floor lightly to remove any splinters or rough patches. Then, apply a sealant or finish of your choice, such as polyurethane or oil-based finishes.
Allow the finish to dry completely before using the floor. You may need to apply multiple coats to achieve the desired look and protection.
Tips for a Successful DIY Rustic Wood Flooring Installation
* Wear appropriate safety gear, including gloves and safety glasses. * Rent or borrow professional tools if you don't have them already. * Measure and plan the layout of the floor carefully before cutting any planks. * Use a moisture meter to ensure the subfloor and wood are dry. * Allow adequate time for the wood to acclimate and the finish to dry. * Protect the floor from spills and heavy foot traffic during the drying process. * Enjoy the beauty of your newly installed rustic wood flooring for years to come!
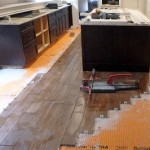
Diy Rustic Wide Plank Plywood Flooring Our Project Ideas

Diy Rustic Wide Plank Plywood Flooring Our Project Ideas

Make Your Own Plank Flooring Using 1 X 12 Lumber Hallstrom Home

Diy Rustic Wood Floors Finish Your Project Off Using Flooraid No Harsh Chemicals And Environmenta Floor Design Reclaimed

Make Your Own Plank Flooring Using 1 X 12 Lumber Hallstrom Home

Diy Bar With Reclaimed Wood And An Old Door Scavenger Chic

Diy Floor Log Unique Flooring Wood Handmade Rustic Natural

Diy Rustic Wide Plank Plywood Flooring Our Project Ideas

Diy Rustic Wide Plank Plywood Flooring Our Project Ideas

How To Lay Your Own Wooden Plank Flooring At Home Without Hiring An Expert Diy Dilemmas Express Co
Related Posts


