```html
Replacing Laminate Flooring: A Comprehensive Guide
Laminate flooring, known for its affordability and ease of installation, is a popular choice for residential and commercial spaces. However, like all flooring materials, laminate is subject to wear and tear, damage, and evolving aesthetic preferences. When laminate flooring reaches the end of its lifespan or no longer meets the needs of the space, replacement becomes necessary. This article provides a detailed examination of the process involved in replacing laminate flooring, covering essential considerations, preparation steps, installation techniques, and post-installation care.
Key Considerations Before Replacement
Before commencing the replacement of laminate flooring, several critical factors must be evaluated. These considerations directly impact the scope of the project, the selection of replacement materials, and the overall success of the installation.
Determining the Need for Replacement: The initial step involves a thorough assessment of the existing laminate floor. This assessment should focus on identifying signs of irreversible damage, such as significant water damage causing warping or swelling, extensive surface scratches or gouges that detract from the appearance, and separation of seams beyond repair. Furthermore, if the existing laminate flooring has become outdated in terms of style and color, replacement may be considered for aesthetic reasons. Minor scratches or dents can often be addressed with repair kits or individual plank replacement, but widespread damage typically necessitates a full replacement.
Budget Allocation: Establishing a realistic budget is crucial. The budget should encompass the cost of the new flooring material, underlayment (if required), tools, and any professional installation fees. Laminate flooring varies significantly in price based on quality, thickness, and features such as water resistance. It is advisable to obtain multiple quotes from different suppliers and installation professionals to ensure a competitive price. Contingency funds should also be factored in to address unforeseen issues that may arise during the replacement process, such as subfloor repairs.
Selection of Replacement Flooring: The selection of the replacement flooring material is a critical decision. While replacing laminate with laminate is a common choice, other options such as luxury vinyl plank (LVP), engineered hardwood, or tile should be considered based on factors like budget, aesthetic preferences, durability requirements, and moisture resistance. LVP offers excellent water resistance and durability, making it suitable for bathrooms and kitchens. Engineered hardwood provides the aesthetic appeal of solid hardwood with enhanced stability. Tile offers exceptional durability and water resistance but can be more expensive and require specialized installation skills. When selecting laminate flooring as a replacement, consider factors such as the wear layer (AC rating), thickness, and water resistance rating. Higher AC ratings indicate greater resistance to abrasion and wear, while thicker planks tend to be more durable and comfortable underfoot.
Room Usage and Environmental Factors: The intended use of the room and the environmental conditions to which the flooring will be exposed should be carefully considered. For high-traffic areas such as hallways and living rooms, durable flooring with a high AC rating is recommended. In areas prone to moisture, such as bathrooms and kitchens, water-resistant or waterproof flooring options are essential. For rooms with significant temperature fluctuations, flooring with good dimensional stability is preferred to prevent warping or cracking. Consider the presence of pets and their potential impact on the flooring. Scratch-resistant options are ideal for households with pets.
Preparation for Laminate Flooring Replacement
Proper preparation is essential for a successful laminate flooring replacement. This includes removing the existing flooring, inspecting and preparing the subfloor, and acclimating the new flooring.
Removing the Existing Laminate Flooring: The initial step involves removing all furniture and objects from the room. Next, carefully remove the baseboards and trim using a pry bar and hammer. Score along the top edge of the baseboards with a utility knife to prevent damage to the wall. Begin removing the laminate planks, typically starting along one wall. Most laminate flooring is installed as a floating floor, meaning it is not glued or nailed to the subfloor. Use a pry bar or a specialized laminate removal tool to carefully detach the planks, working along the seams. Take care not to damage the subfloor during the removal process. As the planks are removed, stack them neatly for disposal. Properly dispose of the old laminate flooring according to local regulations.
Subfloor Inspection and Preparation: Once the old flooring is removed, thoroughly inspect the subfloor for any signs of damage, such as cracks, unevenness, or moisture. Repair any cracks with patching compound and level any uneven surfaces using self-leveling compound. Uneven subfloors can cause the new laminate flooring to buckle or separate at the seams. Ensure the subfloor is clean, dry, and free from debris before proceeding. Sweep or vacuum the subfloor to remove any dust or particles. Check the moisture content of the subfloor using a moisture meter. The moisture content should be within the range recommended by the flooring manufacturer. If the moisture content is too high, allow the subfloor to dry thoroughly before installing the new flooring. Install a moisture barrier if required based on the subfloor material and the flooring manufacturer's recommendations.
Acclimation of New Flooring: Acclimation is the process of allowing the new flooring material to adjust to the temperature and humidity of the room. This is essential to prevent expansion or contraction issues after installation. Store the unopened boxes of flooring in the room where they will be installed for at least 48 to 72 hours prior to installation. Ensure the room is at a normal living temperature (typically between 65°F and 75°F) and relative humidity (between 30% and 50%). This allows the flooring to expand or contract to its equilibrium moisture content, minimizing the risk of gapping or buckling after installation.
Laminate Flooring Installation Techniques
The installation process for laminate flooring typically involves laying an underlayment, installing the planks according to the manufacturer's instructions, and finishing with trim and baseboards.
Underlayment Installation: Underlayment provides cushioning, sound insulation, and moisture protection for the laminate flooring. Roll out the underlayment over the prepared subfloor, aligning the edges. Overlap the seams slightly and tape them together using moisture-resistant tape. Ensure the underlayment is smooth and flat before proceeding with the flooring installation. Choose an underlayment that is compatible with the type of subfloor and the laminate flooring. Some laminate flooring products come with an attached underlayment, in which case a separate underlayment is not required.
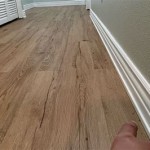
Plank Installation: Follow the manufacturer's instructions for installing the laminate planks. Typically, installation begins along one wall, leaving a small expansion gap (approximately ¼ inch) between the flooring and the wall. This expansion gap allows the flooring to expand and contract without buckling. Use spacers to maintain a consistent expansion gap. Most laminate flooring products utilize a click-lock system, where the planks snap together. Align the tongue of one plank with the groove of the adjacent plank and press down firmly to lock them together. Use a tapping block and hammer to gently tap the planks together, ensuring a tight fit. Stagger the seams of the planks to create a more visually appealing and structurally sound floor. Cut the planks to fit around obstacles such as pipes and door frames using a saw. Use a jigsaw for curved cuts. When installing the final row of planks, you may need to rip (cut lengthwise) the planks to fit the remaining space. Ensure the final row also maintains the expansion gap.
Finishing Touches: Once the flooring is installed, remove the spacers and install the baseboards and trim. Reattach the baseboards and trim using nails or screws. Cover the expansion gap between the flooring and the wall with the baseboards and trim. Install transition strips between different types of flooring or in doorways to create a smooth and seamless transition. Clean the installed flooring with a damp cloth to remove any dust or debris.
```
Laminate Floor Repair Diy Family Handyman

How To Easily Replace A Damaged Laminate Floor Plank Interior Design Wonderhowto

3 Ways To Repair Laminate Flooring Wikihow

How To Install Laminate Flooring Forbes Home

How To Install Laminate Flooring For Beginners

How To Repair Laminate Flooring The Home Depot

How To Repair Laminate Flooring The Home Depot

How To Repair Laminate Flooring Forbes Home

How To Easily Replace A Damaged Laminate Floor Plank Interior Design Wonderhowto

How To Repair Laminate Flooring With Water Damage Dry Force
Related Posts