Essential Aspects of Press Lock Vinyl Flooring Installation
Press lock vinyl flooring, also known as click-lock vinyl flooring, has gained popularity due to its ease of installation and durability. Unlike traditional vinyl flooring that requires adhesive, press lock vinyl planks or tiles simply lock together, eliminating the need for glue or nails. Here are some essential aspects to consider for a successful press lock vinyl flooring installation:
1. Subfloor Preparation
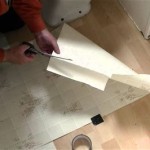
A smooth, level subfloor is crucial for a successful installation. Remove any existing flooring, baseboards, and trim. Repair any unevenness or cracks in the subfloor using self-leveling compound or underlayment. Ensure the subfloor is clean, dry, and free of debris.
2. Underlayment
An underlayment provides a moisture barrier, reduces sound transmission, and can help level the subfloor. Choose an underlayment specifically designed for press lock vinyl flooring, as it will ensure a secure and stable installation.
3. Expansion Gap
Press lock vinyl flooring expands and contracts with temperature changes. To prevent buckling or gaps, leave an expansion gap around the perimeter of the room. Use spacers or a tapping block to maintain a consistent gap of about 1/4 inch.
4. Starting Point
Determine the center point of the room and start installing the planks or tiles from there. Work your way outward, ensuring that each plank or tile is securely locked into place. Use a tapping block or rubber mallet to gently tap the planks together.
5. Staggering the Joints
To avoid weak seams, stagger the joints of the planks or tiles. Start the second row by cutting the first plank in half and installing it offset from the first row. Continue staggering the joints throughout the installation.
6. Cutting and Fitting
Use a sharp utility knife and a straightedge to cut the planks or tiles to fit around obstacles such as doorways, closets, and appliances. Measure carefully and cut precisely to ensure a snug fit.
7. Trimming and Installing Baseboards
Once the flooring is installed, trim the baseboards or molding to accommodate the expansion gap. Reinstall the baseboards or molding, ensuring they cover the expansion gap and provide a finished look.
Conclusion
Press lock vinyl flooring installation can be a rewarding DIY project with proper preparation and attention to detail. By following these essential steps, you can achieve a professional-looking, durable, and beautiful vinyl floor that will enhance the aesthetics of your space for years to come.

How To Install A Lock Vinyl Floor

How To Install Vinyl Plank Flooring As A Beginner Home Renovation

Post Nbl Express Eco Flooring

How To Install Lock Vinyl Flooring Step By 99cent Floor

Luxury Vinyl Locking Systems 101 Nufloors

Luxury Vinyl Tile Lvt Installation Step By Tutorial Envirobuild

How To Lay Lvt Flooring A Step By Guide Factory Direct

Ideal Floors Step By Lock Vinyl Plank Installation Guide Flooring Blog In Dallas Fort Worth

How To Install A Lock Vinyl Floor

Stainmaster 12x24 Lock Vinyl Tile Installation Tip
Related Posts