Essential Aspects of Pre Engineered Flooring Installation
Pre engineered flooring has become increasingly popular due to its durability, ease of installation, and aesthetic appeal. Unlike traditional hardwood flooring, pre engineered flooring consists of multiple layers, with a durable wear layer on top and a moisture-resistant backing. Installing pre engineered flooring involves several crucial steps that must be followed meticulously to ensure a professional and long-lasting result.
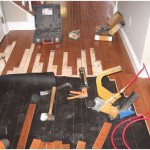
1. Preparation and Acclimation
Prior to installation, it is essential to thoroughly prepare the subfloor. This involves removing any existing flooring, leveling and smoothing the surface, and ensuring that it is free from moisture. The pre engineered flooring planks should also be acclimated to the room temperature and humidity for 48-72 hours before installation. This helps prevent warping or buckling due to changes in environmental conditions.
2. Underlayment and Moisture Barrier
An underlayment is typically installed beneath pre engineered flooring to provide cushioning, reduce noise, and create a more stable base. It is important to select an underlayment that is compatible with the type of flooring being used and the subfloor conditions. A moisture barrier may also be necessary to protect the flooring from moisture penetration from below.
3. Floating or Glue-Down Installation
Pre engineered flooring can be installed using either a floating or glue-down method. Floating installation involves assembling the planks using a tongue-and-groove system and allowing them to slightly float over the prepared subfloor. Glue-down installation, on the other hand, requires adhesive to be applied to the subfloor before placing the planks in position. The choice of installation method depends on the specific flooring product and the subfloor conditions.
4. Expansion Gaps and Moldings
Expansion gaps are necessary around the perimeter of the flooring to allow for movement caused by changes in temperature and humidity. These gaps should be filled with appropriate moldings, such as baseboards, quarter rounds, or transition strips, to create a finished and aesthetically pleasing look.
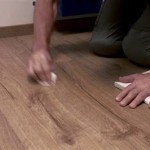
5. Proper Care and Maintenance
Once the pre engineered flooring is installed, it is important to follow proper care and maintenance guidelines to extend its lifespan. Regular sweeping and vacuuming are recommended to remove dirt and debris. Avoid using harsh cleaning agents or excessive water when cleaning the floor. By following these simple maintenance tips, you can keep your pre engineered flooring looking its best for many years to come.

How To Install Lock Engineered Hardwood Flooring

A Comprehensive Guide On Engineered Wood Flooring Installation Mersey

How To Install Lock Engineered Hardwood Flooring

How To Install Engineered Hardwood Floors 4 Easy Installation Options

Installing Engineered Hardwood On Concrete Twenty Oak

How To Install Hardwood Flooring Step By Forbes Home

How To Install An Engineered Hardwood Floor

How To Install An Engineered Hardwood Floor

How To Install Pre Finished Engineered Flooring This Old House

How To Install Hardwood Flooring The Home Depot
Related Posts